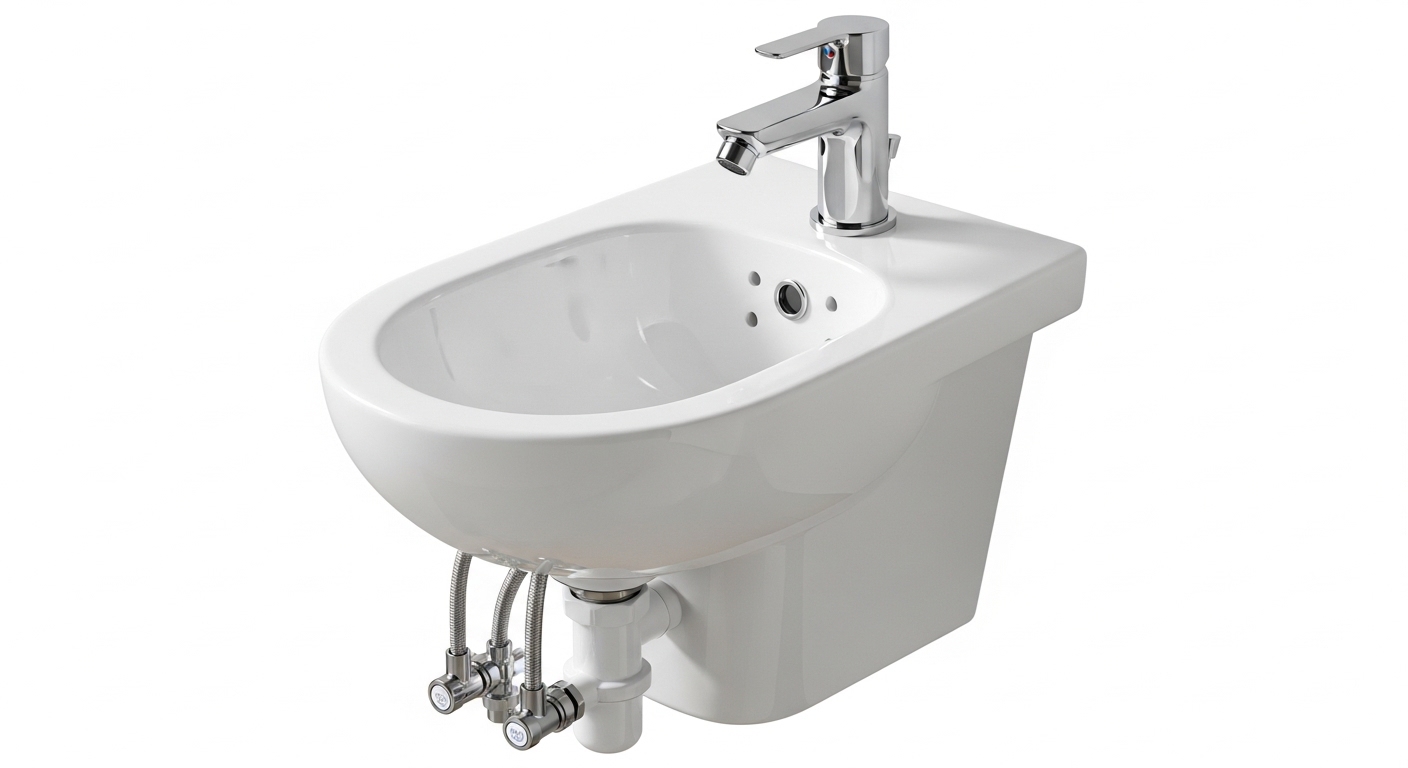
If you’ve been putting off a bidet faucet replacement because you assume it means tearing out fixtures or paying a plumber $150 just to show up, here’s the good news: swapping the faucet on a standalone bidet (or a bidet-style vanity setup) is one of the easier bathroom fixture jobs you can do. It uses the same basic skills as changing any deck-mounted lavatory faucet — loosen, lift, reseal, reconnect. The two things that trip people up aren’t skill; they’re buying the wrong faucet and not knowing which shut-off to turn. This guide walks through both, plus how to pick the right replacement, what it costs, and when you genuinely should call in a pro.
At Adeaga, we spend our days testing and shipping faucets and bathroom fixtures, so the advice below is the same thing we’d tell a friend standing over their bidet with a wrench in hand — concrete numbers, real terminology, no fluff.
How do I know if I actually need to replace my bidet faucet — or just repair it?
Replace the whole faucet only if the body is cracked, the finish is corroding through, or the faucet is a discontinued model you can’t get parts for. If it’s just dripping, sticking, or running slow, you almost certainly need a repair, not a replacement — and repairs are cheaper and faster.
Here’s the quick triage most bidet faucet problems fall into:
- Drip from the spout, hard-to-turn handle, or temperature that won’t hold: that’s a worn cartridge. Swapping it is a 20-minute job — see our walkthrough on choosing and replacing a faucet cartridge, which uses the exact same principle on a bidet mixer.
- Weak or spitting stream: usually a clogged aerator, not a dead faucet. Unscrew it, soak it, done.
- Leak at the base, cracked ceramic-disc body, pitted or flaking finish, or a brand that no longer sells parts: now you’re into a genuine replacement.
- You’re upgrading the look (chrome to matte black, single-handle to widespread): also a replacement, obviously — nothing wrong with wanting a nicer faucet.
If you’ve got a bidet-seat sprayer system rather than a traditional faucet — the kind that runs off your toilet supply — the parts and logic are different. For those, start with our guide to the Bio Bidet flow faucet parts you actually need before you buy anything.
What kind of bidet faucet do I need to buy as a replacement?
Buy the faucet that matches your bidet’s mounting type and hole configuration first — everything else (finish, brand, handle style) is preference. Get those two wrong and no amount of Teflon tape will save you.
There are three mounting setups you’ll run into on a standard bidet, plus vertical/horizontal spray variants:
| Faucet Type | How It Mounts | Best For | Typical Price (2026) |
|---|---|---|---|
| Single-hole deck mixer | One hole in the bidet rim, single lever for hot/cold | Most modern standalone bidets; easiest swap | $45–$120 |
| Widespread / 3-hole | Two handles + spout across 4″ or 8″ centers | Traditional or vintage bidets, matching a lav faucet | $90–$250 |
| Vertical-spray (pop-up) mixer | Single hole, water sprays up from the bidet floor | Bidets designed for upward rinse; needs matching drain | $70–$180 |
| Wall-mounted mixer | Threaded stubs coming out of the wall behind the bidet | Bidets with no deck holes; European-style installs | $110–$300 |
Measure before you buy. Flip the bidet or look underneath and note: how many holes, the center-to-center distance between them (4″ and 8″ are the common widespread specs), and whether the supply lines come from the wall or the floor. Then match the faucet’s reach and height so the stream lands in the bowl, not on the rim. If you’re moving from a two-handle to a single lever and want to understand deck-hole logic more deeply, our piece on the two-hole wall-mount setup explains hole spacing in a way that carries straight over to bidets.
One more decision: solid brass vs. zinc-alloy body. A brass-bodied bidet faucet resists corrosion far better and will outlast a cheap zinc unit by years, especially if your water is hard. It costs a little more up front and it’s worth it — the same reasoning we lay out in our take on whether a brass-built tap is actually worth it.
What tools and parts do I need before I start?
You need a basin wrench, an adjustable wrench, plumber’s tape, a bucket, and the new faucet — that’s the core kit. Total spend on tools if you own none is about $30–$40, and you’ll reuse them for every faucet job after this.
Here’s the full checklist so you’re not stopping mid-job:
- Basin wrench — the long-handled one that reaches the mounting nuts up behind the bidet where a normal wrench can’t fit. This is the tool that makes or breaks the job.
- Adjustable wrench + slip-joint pliers for the supply-line and compression nuts.
- PTFE plumber’s tape (Teflon tape) — wrap threaded connections 3–4 turns clockwise.
- New flexible supply hoses — replace them while you’re in there; braided stainless hoses cost a few dollars and old ones are a top leak source.
- Plumber’s putty or a silicone gasket to seal the faucet base to the bidet deck.
- A bucket and old towel for the water left in the lines.
- A flashlight or headlamp — underside of a bidet is dark and cramped.
If your existing shut-off valves are seized or weeping — common on older installs — grab replacement 1/4-turn angle stops too. The cartridge-and-valve logic there is the same one we cover in our outdoor faucet cartridge replacement guide, and it’s worth reading if your valves feel gritty.
How do I actually replace a bidet faucet, step by step?
Shut off the water, disconnect the supply lines, unthread the old faucet from below, set the new one with fresh sealant, then reconnect and test. Done carefully, a standard deck-mounted swap runs 45–90 minutes.
- Shut off both supply valves. They’re under the bidet — turn the hot and cold angle stops clockwise until they stop. Open the faucet handle to release pressure and confirm the water’s truly off. No valves down there? Shut off the bathroom or house main.
- Drain and disconnect the supply lines. Put your bucket underneath. Loosen the compression nuts connecting the flexible hoses to the faucet tailpieces with your adjustable wrench. Some water will drain — that’s normal.
- Remove the old faucet’s mounting nuts. Reach up with the basin wrench and loosen the nuts holding the faucet to the deck. On a vertical-spray unit you’ll also disconnect the pop-up/spray linkage. Lift the old faucet out from the top.
- Clean the deck. Scrape off old putty, mineral crust, and gunk around the hole until the ceramic is clean and dry. A good seal needs a clean surface.
- Set the new faucet. Apply plumber’s putty under the base (or fit the supplied gasket), drop the faucet through the hole, align it, and hand-tighten the mounting nuts from below. Snug them with the basin wrench — firm, not gorilla-tight; overtightening cracks ceramic.
- Connect fresh supply hoses. Wrap the threads with 3–4 turns of Teflon tape, attach hot to hot and cold to cold, and tighten. Hand-tight plus a quarter turn with the wrench — braided hoses don’t need to be cranked.
- Turn the water back on slowly and test. Open the valves gradually, run the faucet hot and cold, and watch every joint for drips for a full two minutes. Feel the connections with a dry finger — a slow weep won’t always show as a puddle right away.
The single most common mistake is skipping the two-minute leak check and walking away. The second is cross-threading a connection because you started it with a wrench instead of by hand. Start every threaded joint by hand.
Can I put a regular bathroom faucet on a bidet instead of a dedicated bidet faucet?
Often yes — a standard single-hole or widespread lavatory faucet will physically fit many modern bidets, as long as the hole count, spacing, spout reach, and height match the bowl. The catch is that dedicated bidet faucets are shaped to aim water where it needs to go, and some bidets require a vertical-spray or pop-up mechanism a lav faucet can’t provide.
Rules of thumb:
- Horizontal-rinse bidets (water arcs from a spout at the back) accept most standard deck faucets with enough reach and height.
- Vertical-rinse bidets (water sprays up from the bowl floor) need a purpose-built vertical-spray mixer — a lav faucet won’t work.
- Matching your vanity: if you want the bidet faucet to match your sink faucet’s finish, buying the same line’s bidet-specific model is the cleanest route.
And if your real goal is bidet function without swapping fixtures at all, you may not need this job. A clamp-on or hose attachment can add a rinse to your existing setup — we cover exactly that in connecting a bidet to your existing tap water. For shoppers weighing a full branded fixture, our review of the American Standard bidet faucet lineup compares models by bowl fit and finish.
What does a bidet faucet replacement cost — DIY vs. plumber?
Doing it yourself costs the price of the faucet ($45–$300) plus about $30–$40 in tools you keep forever. Hiring a plumber adds roughly $120–$250 in labor on top of the faucet, since most charge a one- to two-hour minimum for a fixture swap.
| Scenario | DIY Cost | With a Plumber | Time |
|---|---|---|---|
| Simple single-hole swap, working valves | Faucet + ~$35 tools | Faucet + $120–$180 | 45–90 min |
| Widespread 3-hole with new hoses | Faucet + hoses (~$15) | Faucet + $150–$220 | 60–120 min |
| Also replacing seized shut-off valves | Faucet + valves (~$20) | Faucet + $200–$300 | 2–3 hrs |
| Wall-mounted, in-wall rough-in issues | Not recommended DIY | Faucet + $250–$450 | Half day+ |
Call a pro when the shut-offs won’t close, the connections are soldered rather than threaded, you hit corroded galvanized pipe, or it’s a wall-mounted unit with the valves buried in the wall. Those are the situations where a $10 part turns into a flooded floor. For everything else, this is a confidence-building weekend job.
FAQ
How long does a bidet faucet replacement take for a beginner?
Plan on 45–90 minutes for a first-timer doing a standard single-hole deck swap with working shut-off valves. Add 30–60 minutes if you’re also replacing the supply valves or dealing with corroded, seized nuts. The actual faucet swap is quick; it’s the surprises underneath that eat time.
Do I need to turn off the whole house water to replace a bidet faucet?
No, not if your bidet has its own shut-off valves (angle stops) underneath — turn just those two clockwise. Only shut off the bathroom branch or house main if the local valves are missing, seized, or won’t fully close. Always open the faucet afterward to confirm the water is truly off before you disconnect anything.
Will any bidet faucet fit my bidet?
No — you must match the mounting type (deck vs. wall), the number of holes, and the center-to-center spacing (commonly 4″ or 8″ on widespread units), plus the rinse direction (horizontal vs. vertical spray). Measure your existing setup before buying. A faucet that’s the wrong hole count or spray type simply won’t install correctly.
Can I reuse my old supply hoses to save money?
You can, but we don’t recommend it. Braided stainless supply hoses cost only a few dollars and old ones are one of the most common causes of slow leaks and sudden bursts. Since you’re already disconnected and have easy access, replacing them is cheap insurance against a much bigger problem later.
Why is my new bidet faucet still leaking at the base after installation?
A base leak almost always means the seal wasn’t seated properly — either the plumber’s putty/gasket has a gap, or the mounting nuts aren’t evenly snug. Turn off the water, lift the faucet, clean the deck fully, apply fresh sealant, and retighten the mounting nuts evenly and firmly (but not so hard you risk cracking the ceramic). If the leak is at a threaded connection instead, redo it with fresh Teflon tape.
Is it worth replacing a bidet faucet myself if I’ve never done plumbing?
Yes, for a standard deck-mounted swap with accessible shut-off valves — it’s genuinely beginner-friendly and one of the best first plumbing jobs to build confidence. The skills (shut off, disconnect, reseal, reconnect, leak-test) transfer to nearly every faucet in your home. Step up to a pro only for wall-mounted units, soldered connections, or seized valves.
A quick note on standards, testing, and warranty
When you shop for a replacement bidet faucet, look for units that meet recognized plumbing standards — in North America that means NSF/ANSI 61 and NSF/ANSI 372 for lead-free wetted parts, and cartridges rated for a high open-close cycle count (500,000 cycles is a strong benchmark). Every Adeaga faucet ships with braided stainless supply-line compatibility, ceramic-disc cartridges we cycle-test in-house before a model goes live, and a limited lifetime warranty on the finish and function. If a fixture fails our leak and pressure testing, it doesn’t ship — that’s the whole point of testing before we sell it.
Author note: This guide was written by the Adeaga fixtures team — the same people who source, bench-test, and support the faucets we sell at adeaga.net. We’ve installed, swapped, and troubleshot bidet faucets across single-hole, widespread, vertical-spray, and wall-mount configurations, and the steps above reflect what actually works on real bathroom installs, not just spec sheets. When we say “check for leaks for two full minutes,” it’s because we’ve learned the hard way what the one-minute check misses.