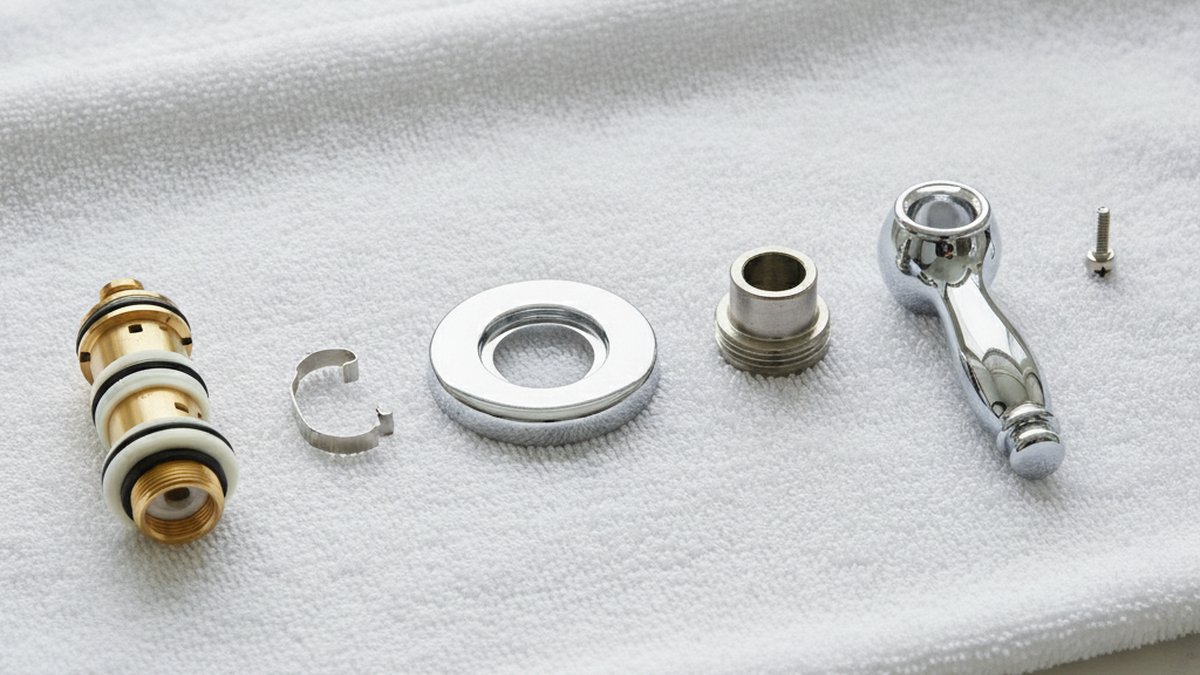
If you’ve just cleaned a cartridge or swapped a washer and now you’re staring at a pile of parts wondering how to put a shower faucet back on, relax — reassembly is genuinely the easy half of the job. The parts only fit one way, and as long as you seat the cartridge correctly and don’t overtighten anything, you’ll be back to hot showers in under half an hour. This guide walks you through the exact order, the mistakes that cause leaks, and how to handle the two most common valve types (Moen and Delta/Kohler) without calling a plumber.
At Adeaga we sell and test shower fixtures every week, and the number one support question we get isn’t “how do I take it apart” — it’s “I took it apart, now what?” So here’s the clear answer, step by step.
What Order Do the Shower Faucet Parts Go Back On?
The parts go back on in the reverse order you removed them: cartridge first (deepest in the wall), then the retaining clip or bonnet nut that locks it, then the escutcheon (the round wall plate), then the handle adapter or stem extension, the decorative handle, and finally the set screw that holds the handle on. Get this sequence right and everything else falls into place.
Here’s the reliable reassembly sequence for almost every single-handle shower valve:
- Confirm the water is off. The shower valve stop screws or your home’s main should already be closed. Open the handle position to release residual pressure before you start.
- Seat the cartridge. Push it fully into the valve body. Most cartridges have a flat, notch, or key that must line up with a matching slot — it should slide in without forcing.
- Lock it in. Reinsert the brass or plastic retaining clip (Moen, Delta) or thread on the bonnet nut/retainer (Kohler, Grohe). This is the part people forget — without it, water pressure will shoot the cartridge out.
- Mount the escutcheon plate. Slide the wall plate and any foam/rubber gasket back over the valve.
- Add the handle adapter/stem. Many valves have an intermediate adapter that translates the cartridge stem to the handle.
- Attach the handle and set screw. Fit the handle, then tighten the small Allen set screw underneath or behind it.
If your cartridge has an “hot/cold” orientation notch, install it in the neutral or “off” position marked by the manufacturer. Installing it 180° out is the classic reason people finish the job and discover hot is now cold — an easy fix (pull it and rotate), but annoying.
Why Does My Shower Faucet Leak After I Put It Back On?
A shower faucet that leaks right after reassembly almost always means one of three things: the O-rings dried out and need grease, the cartridge isn’t fully seated, or the retaining clip isn’t seated in its groove. Fix those in order and 95% of post-reassembly drips disappear.
Let’s go through them, because this is where most DIYers get stuck:
- Dry or nicked O-rings. The rubber O-rings on the cartridge need a thin coat of silicone-based plumber’s grease (never petroleum-based — it degrades rubber). Dry O-rings drag, tear, and weep. If an O-ring looks flattened or cracked, replace it — a full O-ring kit costs a few dollars. Our guide to water faucet O-ring replacement shows exactly how to size and seat them.
- Cartridge not bottomed out. If the cartridge sits even 2–3 mm proud, the seals won’t compress and water sneaks past. Push firmly and evenly until it stops.
- Retaining clip in the wrong slot. The clip has to drop fully into its groove on both sides. A half-seated clip lets the cartridge float, causing both leaks and a loose handle.
If you replaced the cartridge itself and it still drips, double-check you bought the exact model — a Moen 1222 and a Moen 1225 look similar but aren’t interchangeable. When in doubt, take the old cartridge to the store or match the number stamped on it.
How Do I Put a Moen Shower Faucet Back On?
To put a Moen shower faucet back on, slide the cartridge in with its flat side (the notch or “ear”) facing up, reinsert the brass retaining clip through the slot on top of the valve until it seats, then reattach the handle adapter, escutcheon, handle, and set screw. Moen’s 1222/1225 cartridges are keyed, so orientation matters.
The Moen-specific detail that trips people up is the retaining clip. It’s a thin horseshoe-shaped brass clip that slides down through two slots at the top of the valve body, straddling the notch on the cartridge stem. If you don’t reinstall it — or you seat it crooked — the cartridge won’t stay put under pressure. Push it all the way down until the top of the clip is flush with the valve body.
Moen also sells a small plastic cap/tool that helps pull and reset the cartridge; if yours came with one, use it to make sure the cartridge is fully bottomed out before you clip it. Turn the water on slowly afterward — a sudden full-pressure blast can unseat a not-quite-locked cartridge.
How Do I Reassemble a Delta or Kohler Shower Faucet?
For a Delta shower faucet, reinstall the cartridge/stem, then push the plastic retaining clip (Delta calls it a bonnet clip) into place, followed by the bonnet nut, escutcheon, and handle. For Kohler, you typically thread a bonnet nut over the valve to lock the cartridge rather than using a clip — hand-tighten, then snug it a quarter turn with a wrench.
The key difference between the major brands is how the cartridge is held captive. Here’s a quick comparison so you know what to expect for your valve:
| Brand | How cartridge locks in | Tool needed | Watch out for |
|---|---|---|---|
| Moen | Brass horseshoe retaining clip | Allen key + needle-nose pliers | Clip must seat flush; cartridge is keyed |
| Delta | Plastic bonnet clip + bonnet nut | Allen key + adjustable wrench | Don’t overtighten bonnet nut |
| Kohler | Threaded bonnet nut (ceramic disc cartridge) | Adjustable wrench | Align “UP” mark on cartridge |
| Grohe | Threaded bushing/retainer nut | Allen key + wrench | Reuse the correct spacer ring |
Whatever the brand, the rule is the same: snug, not gorilla-tight. Plastic clips crack and brass threads strip if you crank on them. Hand-tight plus a light turn with a tool is all a shower valve ever needs — the water seal comes from the O-rings, not from brute torque.
What Tools and Supplies Do I Need to Put It Back Together?
You need surprisingly little: an Allen (hex) key set, a Phillips and flathead screwdriver, an adjustable wrench, silicone plumber’s grease, and a rag. A total spend of under $20 if you don’t already own them. That’s it — no torch, no solder, no glue.
Here’s the short kit that covers virtually every single-handle shower faucet reassembly:
- Allen key set — for the handle set screw (usually 3/32″ or 1/8″).
- Screwdrivers — Phillips for handle screws, flathead for prying trim.
- Adjustable wrench or channel-lock pliers — for bonnet nuts.
- Silicone plumber’s grease — for O-rings and moving seals.
- Plumber’s tape (PTFE) — only if you removed threaded pipe fittings, not for the cartridge itself.
- A towel and a flashlight — to catch drips and see into the valve.
If you find your handle screws are seized or stripped from the teardown, a small screw extractor bit saves the day. And if you removed the whole trim to deep-clean, a soft cloth with white vinegar handles limescale on the escutcheon without scratching the finish. For finish-specific cleaning cautions, our notes on cleaning nickel faucets without ruining the finish apply equally to shower trim.
How Do I Test the Shower Faucet After Reassembly?
After reassembly, turn the water back on slowly — reopen the valve stops or main gradually — then run the shower through hot, cold, and mixed positions for 30–60 seconds while watching the handle base and escutcheon for drips. No leaks and smooth handle movement means you’re done.
Do this properly and you’ll catch a problem before it becomes a wall stain:
- Open the water slowly. A gradual reopen lets seals settle and avoids a pressure spike that could pop a loose cartridge.
- Cycle the temperatures. Move the handle fully hot, fully cold, and midway. Confirm hot is actually hot (if it’s reversed, your cartridge is 180° out).
- Check flow and pressure. Weak flow after reassembly usually means debris in the cartridge or a clogged aerator/showerhead screen, not a reassembly error.
- Feel around the handle and wall plate. Run a dry finger along the base; any moisture points to an O-ring or seating issue.
- Watch for 24 hours. Slow weeps sometimes only show after the seals have been under pressure for a while.
If the water pressure came back weaker than before, the debris you dislodged during disassembly may have collected downstream. Cleaning the shower head screen or aerator is often the fix — the same principle as our walkthrough on cleaning a faucet aerator when water pressure drops. And if you’re actually planning to swap the shower head while you’re in there, our guide on how to change a shower head covers the thread tape and hand-tightening steps.
When Should I Stop and Call a Plumber Instead?
Stop and call a professional if the valve body itself is cracked, if you smell or see a hot-water supply leak inside the wall, or if the cartridge simply won’t seat after two careful attempts. Reassembling trim is DIY-friendly; a damaged valve body buried in tile is not.
Signs it’s beyond a simple reassembly:
- Water leaking behind the wall plate into the wall cavity rather than out the front.
- A valve body that’s corroded, cracked, or has stripped threads.
- Persistent temperature problems even with a brand-new correctly-oriented cartridge (possible bad pressure-balancing spool).
- You had to cut into a tiled wall to reach the valve — re-tiling and soldering are jobs for a pro.
For a bigger-picture view of what’s happening behind your shower wall, our overview of what shower system plumbing actually involves helps you decide whether the repair is trim-level (do it yourself) or rough-in-level (call someone).
FAQ
How long does it take to put a shower faucet back on?
For a standard single-handle valve, reassembly takes 15–20 minutes if you have your parts and tools ready. Add 10 minutes if you’re greasing or replacing O-rings, and another few minutes to slowly re-pressurize and leak-test.
Do I need plumber’s tape when reassembling a shower cartridge?
No — PTFE (plumber’s) tape goes on threaded pipe connections, not on the cartridge or its O-rings. The cartridge seals with rubber O-rings and silicone grease. Only use tape if you disconnected a threaded supply fitting during the job.
Why is my hot and cold reversed after I put the faucet back together?
The cartridge is installed 180° out of position. Shut the water off, pull the cartridge, rotate it half a turn so its orientation notch matches the manufacturer’s mark, and reinstall. It’s a two-minute fix and doesn’t damage anything.
Can I reuse the old cartridge or should I replace it?
You can reuse a cartridge that’s clean, smooth-turning, and has intact O-rings — just re-grease it. Replace it if it’s scored, sticky, cracked, or was the source of your original leak. A new cartridge is inexpensive insurance if you already have the valve open.
How tight should the retaining nut or clip be?
Hand-tight plus a light snug with a wrench — roughly a quarter turn past hand-tight for a bonnet nut. Clips just need to seat fully in their groove. Overtightening cracks plastic clips and strips brass threads without improving the seal, since the O-rings do the sealing.
The shower drips only when I turn it on — is that normal right after reassembly?
A brief drip as trapped air clears is normal, but a steady drip is not. If it persists past a minute of running, the cartridge likely isn’t fully seated or an O-ring is dry or pinched. Shut off, reseat, re-grease, and retest.
A Note From the Adeaga Team
This guide was written and reviewed by the Adeaga fixtures team. We manufacture and stock shower valves, cartridges, and trim kits, and we bench-test replacement cartridges against the original manufacturer specs (Moen 1222/1225, Delta RP, Kohler ceramic-disc, and Grohe equivalents) so our compatibility charts are accurate. Every faucet we sell meets standard NSF/ANSI 61 and cUPC requirements for potable-water contact, and our valve trim carries a limited lifetime finish-and-function warranty. If you get stuck mid-reassembly, our support line can match your valve to the right cartridge and clip before you order. Always confirm your specific model’s instructions, and when a repair reaches into the wall cavity, bring in a licensed plumber.