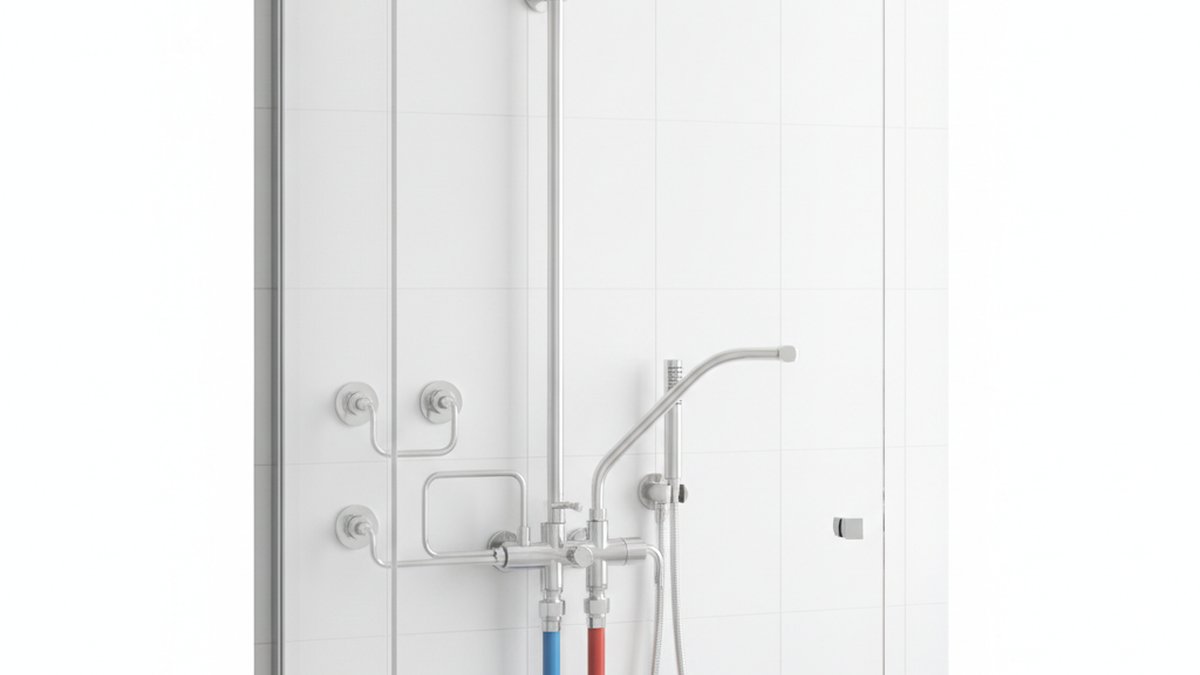
When people ask about shower system plumbing, they’re usually staring at a wall trying to figure out one thing: is this a Saturday project, or a “call someone” project? The honest answer depends less on the shower system you buy and more on what’s already inside your wall. A shower system is really two halves — the rough-in (the valve body and pipes hidden in the wall) and the trim (the showerhead, handles, and plates you actually see and touch). Understanding which half you’re touching is the whole game.
At adeaga, we spend our days matching homeowners to the right fixtures — showerheads, valves, tub spouts, and full shower systems — so this guide walks you through exactly what the plumbing behind a shower system involves, what you can realistically DIY, and where the real money and risk hide. Let’s make you dangerous in the good way.
What are the actual parts of shower system plumbing?
A shower system’s plumbing breaks down into six core parts: the hot and cold supply lines, the mixing valve, the shower riser (the vertical pipe), the drop-ear elbow that anchors the showerhead, a diverter if you have more than one outlet, and the trim you see on the wall. Everything else is a variation on those pieces.
Here’s how they work together. Cold water and hot water arrive through two supply lines — usually ½-inch copper, PEX, or CPVC. They meet at the mixing valve, which is the brain of the system: it blends the two to your chosen temperature and sends the mixed water up the riser to the showerhead. If your system has a handheld, a tub spout, or body sprays, a diverter (built into the valve or separate) decides which outlet gets the water. That’s the entire logic of the thing.
The part that trips people up is the valve. There are four common types, and knowing which one you have (or want) determines both your comfort and your plumbing work:
- Pressure-balancing valve — the most common in North America. It keeps water temperature roughly steady when someone flushes a toilet or runs the dishwasher, protecting you from a scald. Single handle for temperature and flow.
- Thermostatic valve — holds an exact temperature you set (say, 104°F) regardless of pressure swings, and usually has separate controls for temperature and volume. The upgrade most people love and the one that costs more to install.
- Diverter valve — routes water between multiple outlets (head, handheld, tub spout).
- Mixing (manual) valve — the old-school type with two handles and no anti-scald protection. If yours is this, an upgrade is worth it for safety alone.
If you want a deeper look at the small connective pieces — elbows, escutcheons, thread types, and washers — our guide to shower faucet fittings and which ones you actually need covers the parts list in detail so you’re not making three trips to the hardware store.
Can I install a shower system myself, or do I need a plumber?
You can DIY it if you’re doing a like-for-like trim or showerhead swap; you’ll likely want a plumber if you’re changing the valve type, adding outlets, or moving pipes. That single distinction — trim versus rough-in — is the fork in the road.
Genuinely DIY-friendly: Replacing a showerhead is the easiest plumbing job in the house — unthread the old one, wrap the shower arm threads with plumber’s tape, thread on the new one hand-tight plus a quarter turn with a wrench. Swapping trim (the handle and escutcheon plate) on the same valve brand and model is also usually beginner-friendly because you’re not touching pressurized pipe. If that’s your situation, our walkthrough on how to change a shower head shows exactly how far a screwdriver and some tape will get you.
Intermediate — doable with care: Replacing a valve trim with a compatible new one, installing a flow-restricting showerhead, or adding a handheld to an existing diverter. Adding or adjusting a flow restrictor is a common tweak; if your pressure feels weak after a swap, our guide on installing a shower head flow restrictor without killing your pressure explains how to balance water savings against a satisfying spray.
Call a plumber: Anytime you open the wall to change the valve body, move supply lines, sweat new copper, add body sprays, or convert from a pressure-balancing to a thermostatic system. These involve soldering or crimping under pressure, testing for leaks inside a finished wall, and often a permit. A leak behind tile is the single most expensive mistake in this entire category — a $250 plumber call is cheaper than a $6,000 mold remediation.
How much does shower system plumbing cost in 2026?
Expect roughly $150–$400 for a DIY trim-and-head refresh, $400–$900 for a valve replacement with a plumber, and $1,500–$4,500+ for a full multi-outlet shower system with new rough-in. The spread is huge because “shower system” means anything from a fancy showerhead to a spa wall with rain head, six body jets, and a handheld.
Here’s a realistic breakdown of the common scenarios:
| Project | Typical parts cost | Labor | Wall opened? | DIY-friendly? |
|---|---|---|---|---|
| Showerhead swap | $25–$150 | $0 (DIY) | No | Yes — beginner |
| Trim kit replacement (same valve) | $80–$300 | $0–$150 | No | Yes — intermediate |
| Pressure-balance valve replacement | $120–$350 | $250–$600 | Yes | Advanced only |
| Thermostatic system w/ diverter | $350–$900 | $400–$1,000 | Yes | No — hire a pro |
| Full multi-outlet spa system | $700–$2,500 | $800–$2,000 | Yes (major) | No — hire a pro |
A quiet cost driver most people forget: water pressure and flow rate. If you add a rain head plus body sprays, you may be asking for 15+ gallons per minute out of plumbing that was sized for one 2.5 GPM head. If your supply lines are ½-inch and your home pressure is on the low side (under 45 psi), that spa system will trickle. Before you buy a big multi-function system, check your household pressure with a $12 gauge on an outdoor faucet — 45–60 psi is the sweet spot. Below that, upsizing supply lines to ¾-inch or adding a pressure booster becomes part of the plumbing job.
What’s the difference between a shower system and a plain showerhead — plumbing-wise?
A plain showerhead threads onto an existing shower arm and needs zero wall work; a shower system replaces the valve and often adds outlets, which means opening the wall. That’s the practical difference that matters for your weekend and your wallet.
A “shower system” (sometimes sold as a shower “combo” or “panel”) typically bundles a valve, a rain or fixed head, a handheld on a slide bar or elbow, and sometimes body sprays and a tub spout — all designed to work together. Because it usually includes a new valve, you’re into rough-in territory. A showerhead upgrade, by contrast, is pure trim: it lives entirely outside the wall.
There’s also a middle path a lot of people miss: exposed shower systems. These mount the riser, valve, and heads on the wall surface rather than buried inside it, connecting to a single existing water outlet. They’re popular in the UK and increasingly in the US precisely because they dramatically cut the plumbing work — no tile demolition. If you’re renovating a shower with a tricky wall, our guide to the best shower system for tile walls walks through when an exposed system saves you from cracking expensive tile.
What size pipe and connections does shower system plumbing use?
Standard residential shower plumbing uses ½-inch supply lines (copper, PEX, or CPVC) feeding the valve, with a ½-inch NPT threaded shower arm carrying a standard ½-inch connection to the showerhead. Almost every showerhead and shower arm on the market uses that same ½-inch thread, which is why head swaps are so painless.
Key connection facts worth knowing before you shop:
- Showerhead thread: ½-inch NPT is the universal standard in the US. Any standard head fits any standard arm — no adapter needed.
- Valve inlets/outlets: Usually ½-inch, but connection style varies — sweat (soldered copper), threaded, PEX crimp, or push-fit. Match your valve to your existing pipe material.
- Drop-ear elbow: The fitting anchored in the wall that the shower arm screws into. If you’re moving the head height, this is the piece that moves — and it lives inside the wall.
- Rain head arms: Ceiling-mount and long wall-mount arms may need extra bracing so a heavy metal rain head doesn’t sag or leak over time.
One rule that saves headaches: buy the valve and trim as a matched set from the same brand and series. Mixing a valve body from one maker with trim from another is a leading cause of drips and no-fit frustration, because internal cartridge dimensions and splines aren’t standardized across brands the way showerhead threads are. When in doubt, buy the system, not the pieces.
How do I rough-in shower system plumbing step by step?
Roughing-in a shower valve means mounting the valve body at the right height and depth, connecting hot and cold supplies and the outlet riser, then pressure-testing before you close the wall. Here’s the sequence a pro follows — useful whether you’re DIYing an advanced job or just want to know what you’re paying for.
- Shut off water to the bathroom (or the whole house) and open a lower faucet to drain the lines.
- Set valve height: mount the valve body roughly 42–48 inches off the finished floor for a standing shower; tub-shower combos sit lower. Check your specific valve’s instructions.
- Mind the depth: the valve has a plaster guard marking the finished-wall surface. Set it so the trim will sit flush with your tile — too deep or too proud and the trim won’t seal.
- Connect supplies: hot to the hot inlet (left), cold to the cold (right). Run the outlet up to the shower arm’s drop-ear elbow; add a tub-spout drop if it’s a combo.
- Secure everything to blocking or brackets so nothing shifts when the handle is turned.
- Pressure-test: restore water with the trim off and check every joint for weeping. This is the step you never skip — finding a leak now costs nothing; finding it after tile costs thousands.
- Close the wall, then install the trim, handle, and head.
That pressure-test-before-you-close step is the professional’s discipline, and it’s exactly why the manufacturer’s warranty and building code both care about how the rough-in is done. Which brings us to the boring-but-important part.
Do warranties and codes actually matter for shower plumbing?
Yes — more than most people realize. Anti-scald protection is required by plumbing code in most of the US, valves should meet the ASSE 1016 standard for temperature safety, and low-flow heads are governed by the federal 2.5 GPM maximum (with tighter limits in states like California and Colorado). Ignoring these isn’t just risky; it can void your fixture warranty and fail a home inspection at resale.
Reputable shower valves are tested and certified — look for ASME A112.18.1 / CSA B125.1 compliance and a WaterSense label if water efficiency matters to you. And read the fine print on the warranty: most quality shower systems carry a limited lifetime warranty on the valve and finish for the original homeowner, but that coverage usually assumes the unit was installed to spec. A DIY valve swap that develops a leak because the cartridge was seated wrong may not be covered — another reason the in-wall work is where hiring a pro pays off.
FAQ
Can I replace a shower valve without opening the wall behind it?
Usually no. The valve body sits inside the wall, so replacing the whole valve means access — either through the shower wall or from an access panel behind it (common on the opposite side, like a closet). You can replace just the trim and cartridge without opening the wall if the existing valve body is sound and you’re staying with a compatible brand, which covers a lot of “my shower drips or looks dated” situations.
Will a new shower system work with my existing water pressure?
A single-head system will work fine on typical 45–60 psi home pressure. Multi-outlet spa systems with a rain head plus body sprays demand much higher flow, and low pressure or ½-inch supply lines will leave them weak. Test your pressure with an inexpensive gauge before buying a big system, and size up supply lines or add a booster pump if you’re under about 45 psi.
Is a thermostatic valve worth the extra plumbing cost?
For most families, yes. A thermostatic valve holds your set temperature even when water is used elsewhere, which is both a comfort and a genuine scald-safety upgrade for kids and older adults. It costs more in parts and labor than a pressure-balancing valve, but since you’re already opening the wall for a valve job, the incremental cost is often modest relative to the daily benefit.
How long does it take to install a full shower system?
A DIY showerhead or trim swap takes 20–60 minutes. A pro replacing a valve typically needs half a day. A full multi-outlet system with new rough-in, especially if tile or drywall must be opened and re-closed, is usually a one-to-two-day job plus any waterproofing and tile cure time. Build in extra days if the wall needs to be re-tiled.
What tools do I need for basic shower plumbing?
For trim and head work: an adjustable wrench, PTFE plumber’s tape, a Phillips and flathead screwdriver, a cartridge puller for some valves, and silicone caulk for sealing plates. For rough-in work you’ll add a pipe cutter, a torch or PEX crimp tool depending on your pipe, a level, and a pressure gauge for testing. If you’re only ever swapping heads, an adjustable wrench and tape are literally all you need.
Can I convert a two-handle shower to a single-handle system?
Yes, but it’s a wall-open job. Two-handle setups have separate hot and cold valves, while single-handle systems use one mixing valve, so the conversion means removing the old valves and installing a new single valve body — plumbing you’ll want a pro for unless you’re comfortable soldering or crimping under pressure and pressure-testing the result.
Author note: This guide was written by the adeaga fixtures team, who fit, test, and troubleshoot shower valves, showerheads, and full shower systems every week. adeaga (adeaga.net) is a specialist faucet and bathroom-fixtures retailer; our recommendations are based on hands-on installation experience and manufacturer testing standards, not spec sheets alone. Always follow your fixture’s installation manual and local plumbing code — when the wall opens, a licensed plumber is money well spent.