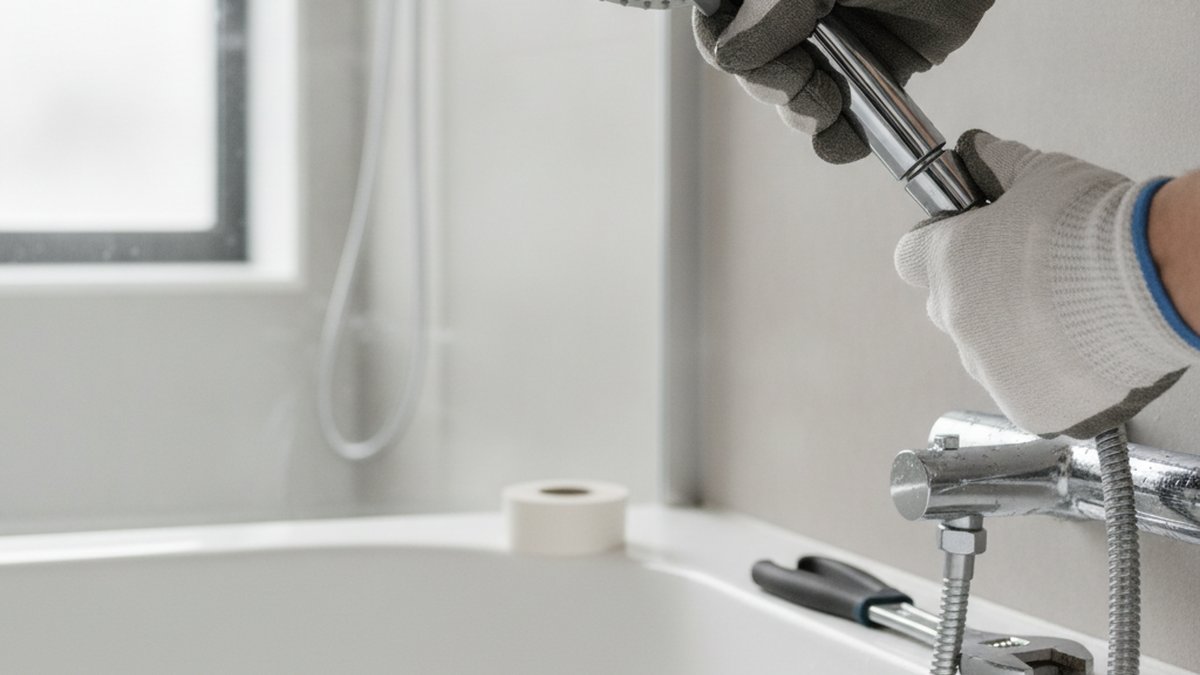
If you’ve been typing “how to change shower head youtube” into the search bar hoping a 12-minute video will make this feel less intimidating, here’s the good news: swapping a shower head is one of the easiest plumbing jobs in the whole house, and you can learn everything a video would show you in the next few minutes of reading. There’s no soldering, no shutting off the water main, and no cutting into the wall. You’re unscrewing one thing and screwing on another. At adeaga, we’ve installed and tested hundreds of shower heads across every finish and spray type, and we wrote this guide to be the thing you actually need instead of pausing and rewinding a clip.
Below we’ll walk through the exact steps, the two or three places where people genuinely get stuck (stuck old heads, leaks at the joint, wrong thread size), and how to know your new head will fit before you buy it. By the end you’ll understand not just what to do but why each step matters — which is the part most YouTube tutorials skip.
Do I actually need to watch a video, or can I just do it?
You can just do it. Changing a shower head is a hand-tool, no-experience job that the vast majority of people finish in under ten minutes on their first try. The reason people search for “how to change shower head youtube” is fear of doing something wrong and flooding the bathroom — but the connection you’re working with (the shower arm) sits after the shower valve, so nothing is under live pressure once the shower is off. Worst case if you mess up, you get a small drip at the threaded joint, which you fix by adding more plumber’s tape.
The one advantage a video has is showing you the “feel” of loosening a stuck head. We’ll describe that in words below so you get the same benefit without the ads and the two-minute intro.
What tools and materials do I need to change a shower head?
You need almost nothing. Here’s the complete list:
- PTFE plumber’s tape (thread seal tape) — the single most important item; costs about $2 and prevents leaks.
- An adjustable wrench or channel-lock pliers — only if the old head is stuck; hand-tight is often enough to remove.
- An old rag or microfiber cloth — to protect the finish from wrench teeth and to grip a slippery head.
- A toothbrush and white vinegar — optional, for cleaning mineral crust off the shower arm threads.
- Your new shower head — that’s the whole point.
You do not need to turn off your home’s water supply, and you do not need pipe wrenches, a torch, or any adhesive. If a tutorial tells you to glue the threads, close the tab — glue is exactly wrong here.
How do I remove the old shower head step by step?
Grip the base of the old head where it meets the shower arm and turn it counterclockwise (lefty-loosey). Most heads that were installed correctly come off with hand pressure alone. If it won’t budge, wrap a rag around the connecting nut, grip that nut with an adjustable wrench, and turn — steady pressure, not a sudden jerk.
Here’s the sequence in order:
- Turn the shower off and give it a second to stop dripping. No need to touch the main valve.
- Hold the shower arm steady with one hand (the pipe curving out of the wall) so you don’t twist it inside the wall — twisting the arm can crack the connection behind the tile.
- Turn the head counterclockwise with your other hand. If it’s stuck, use the rag-and-wrench method on the swivel nut, not the head body.
- Unwind it fully and set it aside. You’ll usually see old, crusty plumber’s tape stuck to the threads.
The most common panic point is a head that feels welded on. That’s almost always mineral buildup or old tape hardened into the threads, not a mechanical lock. Soak a rag in white vinegar, wrap it around the joint for 15–20 minutes, then try again — the vinegar softens the calcium. If you live somewhere with hard water, this is the same crusty scale we cover in our guide on cleaning a faucet head with CLR to get rid of hard water buildup, and the exact same trick works on shower arm threads.
What do I do about the old plumber’s tape and gunk on the threads?
Clean it all off before installing the new head — leftover tape and scale are the number-one cause of leaks. Peel away the old tape with your fingernail or the toothbrush, then scrub the threads with the toothbrush and a little vinegar until the metal is clean and the grooves are clear. Wipe dry. The threads need to be bare and clean so your fresh tape seats properly and the new head screws on straight. Skipping this step is why people end up with a joint that drips no matter how hard they crank it.
How do I install the new shower head so it doesn’t leak?
Wrap the clean shower arm threads clockwise with 3–4 layers of plumber’s tape, then hand-screw the new head on clockwise until snug plus a quarter turn. That’s it — the tape is what seals the joint, not brute force. Over-tightening a metal head can crack it or strip the threads; over-tightening a plastic head definitely will.
Do it in this order:
- Wrap the tape in the direction the head tightens — clockwise as you look at the end of the arm. Wrapping the wrong way makes the tape unravel as you screw the head on. Wrap firmly so the tape sinks into the thread grooves.
- Screw the new head on by hand, keeping it straight so you don’t cross-thread it. It should turn easily for several rotations.
- Snug it up with your hand, then add roughly a quarter-turn with the rag-wrapped wrench if needed. Stop when it feels firm.
- Turn the water on and check the joint. A few drips? Turn it off, add one more wrap of tape, and redo. Nine times out of ten one more layer fixes it.
If your new head came with a rubber washer or O-ring inside the swivel nut, make sure it’s seated flat before you tighten — a pinched or missing washer causes leaks that no amount of tape will cure. Many handheld and rain-style heads rely on that washer as the primary seal.
Why is my new shower head leaking from the connection?
Almost always it’s one of three things: not enough plumber’s tape, tape wrapped the wrong direction, or a cross-threaded (crooked) head. Take the head back off, inspect the threads for a stripped or angled start, re-wrap with 4–5 clean clockwise layers, and reseat it straight. If it leaks from the swivel ball on a handheld or adjustable head rather than the arm joint, the internal washer is the culprit — replace that small rubber ring. This is closely related to why an aerator or washer seal matters on faucets; the same physics of a compressed rubber seal apply, as we explain in our piece on the faucet aerator washer and how to replace one without leaks.
Will any shower head fit my shower arm?
Yes — almost universally. In the US, Canada, the UK and most of the world, shower arms use a standardized ½-inch NPT (National Pipe Thread) connection, so virtually any off-the-shelf shower head will screw onto virtually any standard shower arm. That’s the whole reason this is a beginner job: you don’t need to match brands or measure much.
The rare exceptions are older or imported fixtures. Here’s a quick comparison of what you might run into:
| Connection type | Where you’ll see it | Will a standard head fit? | What you need |
|---|---|---|---|
| ½” NPT (standard US) | Nearly all US/Canada homes | Yes, directly | Just plumber’s tape |
| ½” BSP (British Standard) | Some UK/EU/imported fixtures | Usually, but the seal can be imperfect | Extra tape or a cheap adapter |
| Handheld with hose | Handheld and combo units | Yes — connects to arm via a bracket/diverter | Included washers, sometimes a bracket |
| Concealed/rain arm from ceiling | Rainfall installs | Yes, if arm is ½” threaded | May need a longer arm, not a new valve |
If you’re moving from a simple fixed head to something more elaborate — a rainfall head, a handheld combo, or a multi-function unit — the arm connection is the same, but you may want to think about spray coverage and pressure. If you don’t want to touch the fixed head at all, a clip-on handheld can be a smarter route; we break that down in our guide to the best handheld shower head add-on when you don’t want to replace your fixed shower.
What if I want a rainfall or handheld head instead of a basic one?
You install it exactly the same way — the connection is identical — but there are two extra considerations. First, weight and reach: large rainfall heads sit at the end of the arm and can droop over time if the arm is thin, so a heavier-duty or ceiling-mounted arm helps. Second, water pressure: rain heads spread water over a big area, so if your home already has low pressure, a giant rain head can feel weak. If saving water is your goal but you don’t want a limp spray, read our walkthrough on how to install a shower head flow restrictor without killing your pressure — it explains the trade-off between flow rate and feel.
How do I keep my new shower head working like new?
Clean the nozzles once a month and you’ll never fight low pressure or a sideways spray. Modern heads use soft silicone or rubber nozzle tips specifically so you can rub mineral deposits off with your thumb. For a deeper clean, unscrew the head (or just the faceplate), soak it in a 50/50 white vinegar and water solution for an hour, then scrub with the toothbrush and rinse. Hard water is the enemy of every shower head, and scale is what turns a strong, even spray into a few sad, crooked streams.
- Monthly: rub the nozzle tips with your thumb while the water runs.
- Every few months: vinegar soak to dissolve internal scale.
- If pressure drops suddenly: check the small filter screen or flow restrictor inside the inlet — it’s usually clogged, not broken.
- Keep a little PTFE tape on hand — if you ever notice a joint drip, a re-wrap is a five-minute fix.
When should I actually call a plumber?
Almost never — but there are two honest exceptions. Call a pro if the shower arm itself is corroded, cracked, or spins loosely inside the wall, because that means the fitting or drop-ear elbow behind the tile is compromised and forcing it can cause a leak inside the wall cavity. Also call one if you’re changing the shower valve or trim (the handle assembly), not just the head — that’s a different, more involved job that can involve the water supply. Swapping only the head, which is what “how to change shower head youtube” searches are really about, stays firmly in DIY territory.
FAQ
How long does it take to change a shower head?
About 5–10 minutes for most people, including cleaning the threads and taping. If the old head is badly stuck with mineral buildup, add 15–20 minutes for a vinegar soak. It’s genuinely one of the fastest home upgrades you can make.
Do I need to turn off my water to change a shower head?
No. The shower arm connection sits after the shower valve, so once you turn the shower off, there’s no live pressure at the joint you’re working on. You only need the main supply off if you’re replacing the valve or the arm itself, not the head.
Which way do I unscrew a shower head?
Counterclockwise (lefty-loosey) when you’re facing the end of the shower arm. Hold the arm steady with your other hand so you don’t twist the pipe inside the wall. Most correctly installed heads loosen by hand; use a rag-wrapped wrench on the swivel nut only if it’s stuck.
How much plumber’s tape should I use on a shower head?
Three to four snug wraps around clean threads, applied clockwise so the tape tightens rather than unravels as you screw the head on. If you get a small drip after installing, remove the head and add one or two more layers — that fixes the vast majority of joint leaks.
Why won’t my old shower head come off?
It’s stuck with hardened mineral scale or old plumber’s tape baked into the threads, not mechanically locked. Wrap a vinegar-soaked rag around the joint for 15–20 minutes to soften the deposits, then grip the swivel nut with a rag-padded wrench and turn counterclockwise with steady, even pressure — no sudden jerks that could crack the arm.
Are all shower heads the same size and thread?
In the US and Canada, essentially yes — nearly all use a standard ½-inch NPT connection, so almost any shower head fits almost any shower arm. Some UK, EU, or imported fixtures use ½-inch BSP threads, which usually still work with extra tape or an inexpensive adapter.
Author note: This guide was written and field-checked by the adeaga fixtures team, who install, pressure-test, and live with the shower heads, faucets, and valves we write about. Our recommendations reflect hands-on testing against real hard-water conditions and manufacturer specs, not spec sheets alone. When we mention thread standards or seal methods, they align with common plumbing standards (½” NPT connections and PTFE thread sealing), and we always suggest keeping your new head’s warranty paperwork — most quality shower heads carry a multi-year or limited lifetime warranty that covers finish and internal seals if a manufacturing defect shows up.