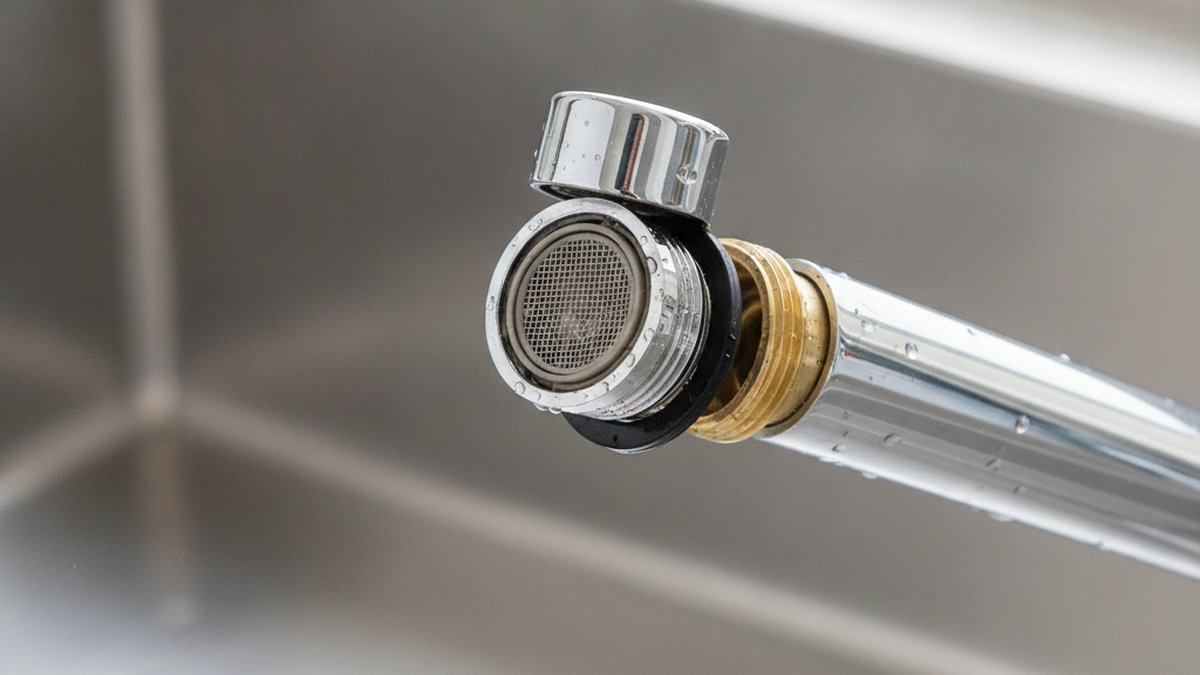
If you’ve been wondering exactly how to clean aerator in faucet hardware without buying a new faucet or calling a plumber, you’re in the right place — because a clogged aerator is the single most common reason a kitchen or bathroom faucet goes from a strong stream to a weak, sputtering, sideways-spraying trickle. The aerator is the small mesh screen and housing screwed into the very tip of your spout. Its job is to mix air into the water so you get a soft, splash-free stream while using less water. But that same fine mesh is a magnet for hard-water minerals, sand, rust flakes, and little bits of debris from your pipes. Over months and years it clogs, and your pressure drops. The good news: cleaning it is one of the easiest plumbing fixes that exists, and you almost certainly already own everything you need.
Below I’ll walk you through the exact steps, what to soak the parts in, how to handle the stubborn cases where the aerator won’t budge, and when a clogged aerator is not actually your problem. This is written for a real kitchen or bathroom sink — not a lab — so I’ll flag the small mistakes that cause leaks or lost parts.
What exactly is a faucet aerator, and why does it clog?
A faucet aerator is the little threaded fitting at the end of your spout that contains a fine metal or plastic screen, a flow restrictor, and one or more rubber washers. It clogs because that screen is the first thing your water hits after traveling through your pipes — so every mineral deposit, grain of sand, and rust flake gets caught there instead of in your glass.
If you live in a hard-water area (most of the U.S., honestly), the culprit is usually calcium and magnesium scale — a chalky white or greenish crust that builds up on the mesh and inside the housing. In older homes, you’ll also see orange-brown rust flakes shed from galvanized or steel pipes. After any plumbing work in your neighborhood, you might suddenly find sand and pipe grit jammed in there. All of it does the same thing: it shrinks the open area of the screen, so less water gets through and what does get through sprays unevenly.
Here’s the tell: if the weak pressure is only at one faucet — and every other tap in the house is fine — the aerator is your prime suspect. If pressure is weak everywhere, the problem is upstream (a pressure regulator, a main valve, or the municipal supply), and cleaning the aerator won’t fix it.
How do I clean a faucet aerator step by step?
Clean a faucet aerator by unscrewing it, disassembling it, soaking the parts in vinegar, scrubbing the screen, and reassembling it in the exact reverse order. Here’s the full sequence:
- Close the drain or lay down a towel. The aerator comes apart into three or four tiny pieces, and losing the rubber washer down the drain will turn a 15-minute job into a trip to the hardware store. Put a rag or a strainer basket over the drain first.
- Unscrew the aerator by hand. Turn it clockwise as you look up at it from below, which is counterclockwise from the water’s point of view — “lefty loosey” if you’re looking down at the spout. Most aerators are only hand-tight. If it won’t turn, wrap the housing in a rubber band, a cloth, or a strip of masking tape for grip before you reach for pliers.
- Note the order of the parts as they come out. Lay them on the towel left to right in the order they came off. A typical aerator stacks up as: outer housing, mesh screen, flow restrictor, and rubber washer/gasket. Reassembling them out of order causes leaks or spray.
- Soak everything in 50/50 white vinegar and water for 30–60 minutes. Vinegar dissolves calcium scale cheaply and safely. For a heavy crust, go with straight white vinegar and let it sit a couple of hours. A small cup or a sealed sandwich bag tied around the spout both work.
- Scrub with an old toothbrush. After soaking, work the bristles across the screen from both sides to push loosened scale out. A toothpick or a straightened paper clip clears any holes still blocked.
- Rinse under running water. Hold the screen up to a light — you should see clean, evenly-open mesh with light coming through all of it.
- Reassemble and hand-tighten. Put the parts back in the reverse order, screw the aerator back onto the spout by hand, then give it a gentle quarter-turn with a tape-wrapped tool if needed. Don’t crank it — over-tightening cracks the housing and crushes the washer.
- Test it. Turn the water on. You should have your full stream back, and no drips leaking from the threads where the aerator meets the spout.
What’s the best thing to soak a faucet aerator in — vinegar, CLR, or something else?
White vinegar is the best all-around choice for soaking a faucet aerator: it’s cheap, safe on chrome and most finishes, and dissolves the calcium scale that causes 90% of clogs. Reach for a stronger commercial descaler like CLR only when vinegar hasn’t fully cleared a very heavy, years-old buildup.
Here’s how the common options stack up:
| Soak solution | Best for | Soak time | Watch out for |
|---|---|---|---|
| White vinegar (50/50 with water) | Everyday calcium/lime scale | 30–60 min | Smell; safe on almost all finishes |
| Straight white vinegar | Heavy hard-water crust | 1–3 hours | Longer soak needed for thick scale |
| CLR or commercial descaler | Stubborn, old, mixed rust + lime | 2–8 min only | Never leave on long; rinse thoroughly; keep off brushed/coated finishes |
| Lemon juice | Light buildup, no vinegar on hand | 1–2 hours | Weaker acid; slower |
| Dish soap + hot water | Greasy kitchen grime, not scale | 15–30 min | Won’t touch mineral deposits |
One important caution: commercial descalers work fast because they’re strong. Follow the label — most say a maximum of a few minutes on plumbing parts — and rinse the aerator thoroughly before it goes anywhere near your drinking water. If you want the full walkthrough on the chemical route, we cover it in detail in how to clean a faucet head with CLR. For the daily-driver job on a normal kitchen tap, plain vinegar is all you need.
My faucet aerator won’t unscrew — how do I get it off without breaking it?
If your aerator won’t budge, the fix is grip plus a little penetrating help: wrap the housing in a cloth or wide rubber band, grip it with slip-joint pliers, and turn steadily rather than yanking. Nine times out of ten it’s just cemented in place by dried mineral scale, not truly stuck.
Work through these in order:
- Add grip, not force. A rubber band, a strip of masking tape, or a rubber jar-opener gives your pliers a bite without scratching the finish. Bare metal pliers on a chrome or brushed-nickel aerator will chew it up.
- Break the scale seal. Wrap a vinegar-soaked paper towel around the aerator for 20–30 minutes first. Dissolving the crust at the threads often frees it with no muscle at all.
- Turn the right way. Looking up at the spout from below, loosen by turning clockwise. It’s easy to fight yourself by turning the wrong direction.
- Look for a hidden “cache” aerator. Many modern faucets — Moen, Delta, Kohler, Grohe — use a recessed aerator that sits flush inside the spout and needs a small plastic key that came in the box. If you see notches instead of flats, that’s what you have. A cheap universal aerator key set costs a few dollars.
- Don’t crush it. If it truly won’t move, a replacement aerator is only a few dollars. It’s rarely worth destroying the spout threads over a $4 part.
While you’ve got it apart, inspect the little rubber washer inside. If it’s flattened, torn, or brittle, replace it — a bad washer is a leading cause of slow drips right at the spout tip. We break this down in why the faucet aerator washer matters and how to replace one without leaks.
How often should I clean my faucet aerator?
Clean your faucet aerator every 3 to 6 months if you have hard water, and once or twice a year if your water is soft. If you notice reduced flow, a crooked or sputtering stream, or water spraying off to one side sooner than that, clean it right away — those are the early warning signs of a clog.
A few situations call for an off-schedule cleaning no matter what:
- Right after any plumbing work — yours or the city’s. New pipe cuts and pressure changes shake loose sediment that heads straight for your aerators.
- After the water was shut off and turned back on. Sudden surges push rust and grit downstream.
- When one faucet is noticeably weaker than the rest. That’s a localized clog, and the aerator is the cheapest thing to rule out first.
If cleaning the aerator restores flow but your overall pressure still feels low across the house, the aerator isn’t your bottleneck — it’s worth understanding what a normal number even looks like. Our guide to the average kitchen sink faucet flow rate explains what to expect and how the built-in flow restrictor factors in, so you don’t chase a “problem” that’s actually your faucet working as designed.
Should I clean the aerator or just replace it?
Clean the aerator first — it’s free and works most of the time. Replace it only if the screen is torn, the housing threads are cracked or stripped, the plastic flow restrictor is warped, or scale has physically eaten into the parts so they won’t seal. A new aerator costs $3–$8 and takes two minutes to swap in.
Here’s the simple decision rule I give people:
- Clean it if the parts are intact and it’s just mineral buildup. This is the vast majority of cases.
- Replace it if you see cracks, a torn screen, corroded metal, or it still leaks/sprays after a thorough cleaning and a fresh washer.
- Upgrade it if you want a different feel — a spray aerator for rinsing dishes, a “laminar” aerator for a clear, splash-free stream, or a lower-flow model to save water. Just match the thread type (male vs. female) and size to your faucet.
When you buy a replacement, note whether your faucet uses a standard external aerator or a recessed cache aerator, and whether the threads are on the outside (male) or inside (female) of the housing. Bringing the old one to the store — or measuring it — saves you a second trip.
E-E-A-T: who’s telling you this, and why trust it
Author note: This guide was written by the adeaga fixtures team, drawing on hands-on servicing of kitchen and bathroom faucets across chrome, brushed nickel, matte black, and oil-rubbed bronze finishes. We’ve cleaned, rebuilt, and replaced more aerators than we can count, and the steps above reflect what actually works on real sinks — including the annoying recessed-aerator faucets that don’t come apart the “normal” way.
Brand credibility: adeaga (adeaga.net) is a specialist in faucets and bathroom fixtures. We don’t dabble in general home renovation — spouts, aerators, cartridges, shower heads, and tub fixtures are the whole business, which is why our repair guides go deeper than a generic DIY blog.
On standards and warranty: Aerators sold in North America are typically rated to a maximum flow standard (2.2 GPM for many kitchen faucets, with 1.8 GPM and lower water-saving models common; WaterSense-labeled bathroom aerators cap at 1.5 GPM). Cleaning your aerator with vinegar does not void a faucet’s warranty — it’s routine, manufacturer-recommended maintenance. Using harsh chemicals or metal tools that scratch a coated finish, on the other hand, can. When in doubt, check your faucet maker’s care instructions, and keep the aerator model number noted for warranty-covered replacements.
FAQ
Can I clean a faucet aerator without removing it?
Yes, in a pinch. Fill a small sandwich bag with white vinegar, slip it over the spout so the aerator is submerged, and secure it with a rubber band for 1–2 hours. It’s less effective than taking the aerator apart and scrubbing the screen directly, but it’s a solid option when the aerator is stuck or you want a quick descale between full cleanings.
Will vinegar damage my faucet finish?
Diluted white vinegar is safe for short soaks on chrome, stainless, and most standard finishes. Be more careful with brushed, matte black, or specialty-coated finishes — don’t leave vinegar sitting on the visible faucet body for long, and rinse and dry it afterward. For the aerator parts themselves, a 30–60 minute soak is completely fine.
Why is my faucet still weak after I cleaned the aerator?
If cleaning didn’t help, the clog is elsewhere. Check the shut-off valves under the sink (they may be partially closed), inspect the supply lines for kinks, or suspect a worn cartridge inside the faucet. Low pressure at every tap points to a whole-house issue like a failing pressure regulator, not the aerator.
How do I know which aerator to buy if I need a replacement?
Measure the diameter and check the thread location — external threads on the housing mean it’s “male,” internal threads mean “female.” Standard kitchen aerators are usually 15/16″ male or 55/64″ female; bathroom aerators are often smaller. If your faucet has a recessed aerator with notches instead of flats, buy a cache aerator plus the matching key. Taking the old one to the store is the foolproof method.
Is a clogged aerator dangerous or just annoying?
It’s not dangerous, just annoying — and slightly wasteful, because you may crank the faucet wider to compensate. The one thing worth noting: a heavily scaled, rarely-cleaned aerator can harbor bacteria in the trapped debris, so periodic cleaning is a small hygiene win as well as a pressure fix.
Can I just leave the aerator off entirely?
You can, and the water will still flow — but you’ll get a harsh, splashy stream, use more water, and lose the debris screen that protects your sink from grit. Removing the aerator is a useful diagnostic step (if pressure jumps with it off, the aerator was the clog), but it’s not a good permanent setup. Clean it or replace it instead.