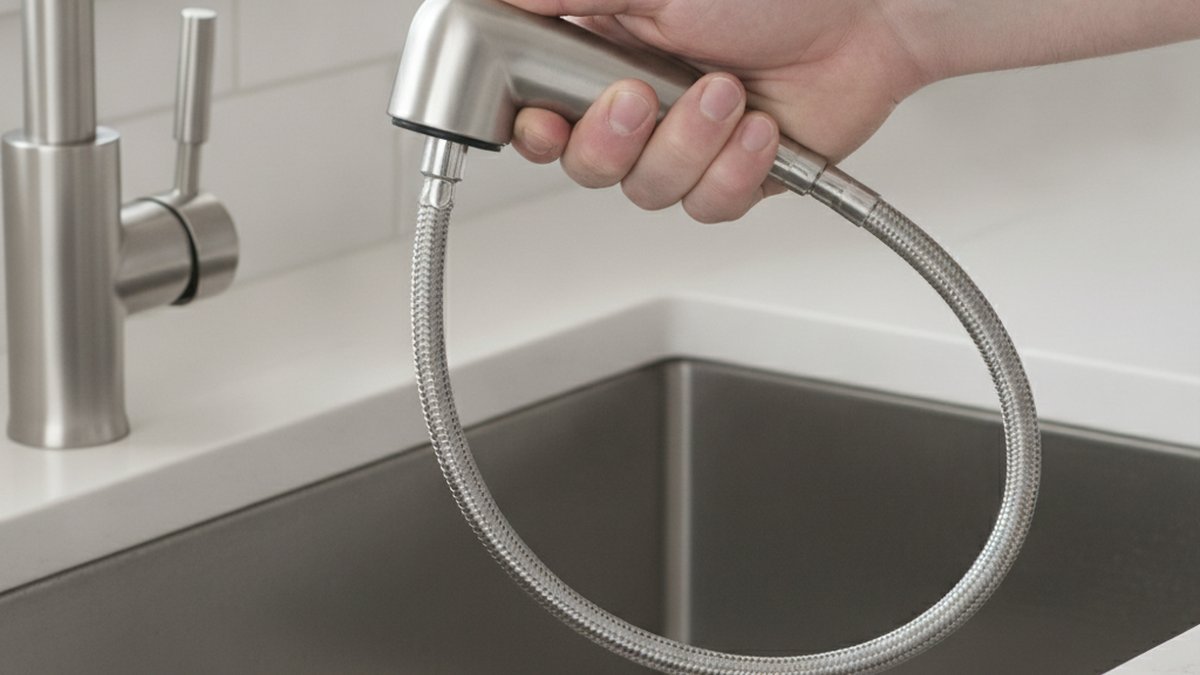
If your sprayer is dribbling, stuck in spray mode, or the finish is peeling, you can almost always replace the kitchen faucet head yourself in under ten minutes — no plumber, no shutting off the water, and no re-plumbing anything under the sink. The “head” on a modern kitchen faucet is the pull-down or pull-out spray wand that clicks between stream and spray. It threads onto the end of a flexible hose, which means swapping it is one of the easiest faucet fixes there is. The tricky part isn’t the labor; it’s buying the right replacement so the threads and the diverter actually match.
Below I’ll walk through exactly how to do it, how to tell if the head is even the problem, which replacement to buy, and the three mistakes that make people give up and call a plumber they didn’t need.
Is the spray head actually the problem — or is it the aerator, hose, or diverter?
Before you buy anything, confirm the head is what’s failing — because three different parts cause nearly identical symptoms. The spray head is the culprit if the water pattern is wrong (stuck on spray, weak spray, or leaking from the head’s seams), or if the button that toggles stream/spray feels mushy or won’t switch. If the problem is only low pressure in a clean, steady stream, it’s usually the aerator or a mineral-clogged screen, not the head.
Here’s a quick way to diagnose it in 30 seconds:
- Water sprays out the sides or the seams of the wand → the head’s internal seals are shot. Replace the head.
- Stuck in spray mode / won’t return to stream → the diverter or button inside the head failed. Replace the head.
- Weak, sputtering flow but the pattern still switches fine → clogged aerator or spray face. Try cleaning first.
- Leak appears up inside the faucet neck when you pull the head out → the hose or hose connection, not the head.
- The head physically won’t retract → the counterweight came loose on the hose, not a head fault.
If it’s really just mineral buildup, you may not need a new part at all. Descaling the spray face and screen restores flow for pennies — our guide on cleaning a faucet aerator that doesn’t come off and the walkthrough on cleaning the aerator when water pressure drops both cover the vinegar-soak method that fixes 70% of “weak spray” complaints. Try that first; a $0 fix beats a new head.
How do I actually remove and replace the kitchen faucet head, step by step?
Grip the head, pull the hose out about 12 inches, and unscrew the head counter-clockwise — it almost always comes off by hand. Then thread the new one on. That’s the whole job. Here’s the full sequence so nothing surprises you:
- Close the faucet handle (you generally don’t need to shut off the supply valves, since the head is downstream of the handle — but if you’re nervous, turn the two valves under the sink clockwise).
- Pull the spray head out and hold the hose so it can’t snap back into the spout.
- Unscrew the head counter-clockwise. Most thread directly onto the hose fitting. If it’s stiff from mineral crust, wrap a rubber band or cloth around it for grip, or use slip-joint pliers gently — don’t crush the plastic collar.
- Check for a rubber washer or O-ring inside the old head’s connector. If it’s flattened, cracked, or missing, that’s why it leaked. Replace it with the one included in your new head kit.
- Note the counterweight. On pull-down models, a metal weight clips to the hose to retract the head. Leave it in place — it stays with the hose, not the head.
- Screw the new head on clockwise, hand-tight. Snug plus a light nudge is enough. Over-tightening cracks the plastic threads and causes the very leak you’re trying to fix.
- Run the water 20 seconds and watch the connection for drips. Toggle stream/spray a few times to confirm the diverter works.
No plumber’s tape is needed on the head-to-hose joint — that connection seals with a rubber washer, not with threads, and PTFE tape there can actually prevent the washer from seating. Save the tape for tapered threaded joints elsewhere.
Which replacement kitchen faucet head should I buy — universal or brand-specific?
Buy the brand-specific head if your faucet is from a major maker (Moen, Delta, Kohler, Grohe, Pfister) and still under warranty — it’s often free. Buy a universal head only when your brand is discontinued or generic, and only after you confirm the thread type. The single most common mistake is ordering a head that looks identical but has the wrong thread size or a built-in diverter your faucet doesn’t expect.
Kitchen spray heads generally connect one of three ways, and matching this is what makes or breaks the swap:
| Connection type | What it looks like | Best replacement route | Typical cost |
|---|---|---|---|
| Proprietary quick-connect | Bayonet/clip fitting unique to the brand (common on Moen, Delta) | Order the exact OEM head by faucet model number | $18–$45 |
| Standard threaded (½”–¾”) | Male or female threads on the hose end | Universal threaded head — measure and match thread size | $12–$30 |
| Push-fit / integrated hose | Head and hose sold as one sealed unit | Replace the whole hose-and-head assembly | $25–$60 |
To identify yours, find the model number — it’s usually etched on the faucet base, printed under the sink on the body, or on your original receipt/box. Search “[brand] [model] replacement spray head” and you’ll land on the exact OEM part. If you genuinely can’t find a model number, unscrew the head, measure the thread diameter with calipers or against a hardware-store gauge, and buy a universal threaded head that matches. When in doubt, take the old head to the store and thread candidates onto it right there.
If your faucet is an off-brand or economy model and the head keeps failing, that’s a signal the whole faucet is low-quality — heads on good faucets last years. It may be worth stepping up to a proven pull-down; our rundown of pull-down kitchen faucet brands actually worth buying covers which makers ship durable spray heads and honest warranties.
Can I replace just the head on any pull-down faucet, or do I need the whole hose?
On most name-brand pull-down and pull-out faucets, yes — the head detaches from the hose and you replace it alone. The exception is budget faucets where the head is molded onto the hose as one sealed piece; on those, you replace the hose-and-head assembly together, which is still a 10-minute job but a slightly pricier part.
To tell which you have, pull the head out and look at the joint where it meets the hose. If you see a threaded collar or a clip, the head is separate and replaceable on its own. If the head and hose flow into one continuous molded unit with no visible seam, it’s an integrated assembly. Either way you’re not touching the faucet body, the deck plate, or the supply lines — so this stays firmly in DIY territory regardless.
One thing worth checking while you’re in there: the counterweight and the hose’s travel. If your head has been retracting weakly or the hose sticks, sometimes a stainless steel kitchen faucet extender or a re-clipped weight solves the reach problem you were blaming on the head. And if replacing the head doesn’t stop the leak, the trouble may be deeper — a worn cartridge in the faucet body. A cartridge swap is still DIY-friendly; the process mirrors what we cover in our faucet cartridge replacement guide.
How much does it cost to replace a kitchen faucet head — DIY vs. plumber?
DIY costs just the part: $12–$60 depending on connection type, plus zero labor. A plumber will typically charge $75–$150 for the same swap because of the minimum service-call fee, even though the actual work is a five-minute hand-twist. For a straightforward head replacement, this is one of the highest “why did I ever pay someone” jobs in the house.
| Scenario | Part cost | Labor | Total | Time |
|---|---|---|---|---|
| DIY, brand-specific head | $18–$45 | $0 | $18–$45 | ~5 min |
| DIY, universal threaded head | $12–$30 | $0 | $12–$30 | ~5 min |
| DIY, full hose-and-head assembly | $25–$60 | $0 | $25–$60 | ~10 min |
| Plumber, any of the above | $18–$60 | $75–$150 | $95–$210 | Half-day wait |
| OEM head under warranty | $0 | $0 | $0 | Shipping wait |
The best-value move: before buying anything, call the manufacturer or check your warranty. Most major faucet brands include lifetime coverage on functional parts and will mail you a replacement spray head free — you just install it. That single phone call can turn a $45 purchase into a $0 one.
What if the new head still leaks or won’t switch modes?
If a brand-new head leaks at the connection, the rubber washer is misseated or missing — unscrew it, confirm the washer is flat and centered in the connector, and re-tighten hand-tight only. If the head leaks from its own body or won’t toggle stream/spray, you got a defective unit or a mismatched diverter; exchange it for the correct model. A correctly matched, properly seated head should be leak-free the moment you turn the water on.
Run through this short checklist before assuming you did something wrong:
- Leak at the joint: washer missing, pinched, or double-stacked. Use exactly one washer, seated flat.
- Leak from the wand body: defective head or wrong internal diverter type — return it.
- Won’t switch modes: mismatched head for your faucet’s flow system; buy the OEM-matched part.
- Weak flow after install: flush the line — run water with the head off for 5 seconds to clear debris, then reattach.
- Head won’t stay retracted: re-clip the counterweight higher on the hose.
If none of that fixes it, the fault has moved past the head into the hose or cartridge, and that’s your next diagnostic step — but that’s still well within DIY reach.
FAQ
Do I need to turn off the water to replace a kitchen faucet head?
Usually no. The spray head sits downstream of the faucet handle, so as long as the handle is closed, no water flows to the head while you unscrew it. If it makes you more comfortable, turn the two supply valves under the sink clockwise first — it costs nothing and adds peace of mind.
Are kitchen faucet spray heads universal?
Partly. Many use standard ½” or ¾” threaded connections that accept universal heads, but major brands like Moen and Delta often use proprietary quick-connect fittings that only accept their own OEM parts. Always confirm your connection type and thread size before ordering, or match the new head against the old one in person.
Why is my kitchen faucet head leaking where it meets the hose?
Almost always a worn, cracked, or missing rubber washer inside the connector, or an over-tightened joint that cracked the plastic threads. Replace the washer, hand-tighten only, and never use PTFE tape on this rubber-sealed connection — the tape prevents the washer from seating properly.
How long does a kitchen faucet spray head last?
On a quality faucet, a spray head lasts 5–10 years before the diverter or finish wears out. If yours fails in under two years, or fails repeatedly, that points to a low-grade faucet rather than bad luck — and it’s worth upgrading the whole fixture rather than replacing heads on a loop.
Can I replace a kitchen faucet head with a different finish than my faucet?
You can, and it will function perfectly, but the finish likely won’t match exactly — a chrome head on a brushed-nickel faucet reads as slightly off in daylight. For the best look, order the head in your faucet’s exact finish family. If you’re already rethinking the finish, our guides on faucet finishes can help you decide before you buy.
What tools do I need to replace a kitchen faucet head?
In most cases, none — it unscrews and screws on by hand. For a stubborn, mineral-crusted head, keep slip-joint pliers and a cloth or rubber band handy for extra grip. That’s the entire toolkit for this repair.
A quick note on doing this right
This guide was written and reviewed by the adeaga fixtures team, who install, pressure-test, and stress-cycle kitchen faucet spray heads as part of our product QA. Every head we sell is tested to standard flow-rate and endurance benchmarks (aligned with the ASME A112.18.1 faucet standard) and backed by a manufacturer warranty, because a spray head is only as good as its diverter and seals over years of daily use. When in doubt, match the part to your faucet’s model number, hand-tighten, and test before you walk away — the vast majority of “I need a plumber” spray-head problems are a five-minute fix once you know what you’re looking at.