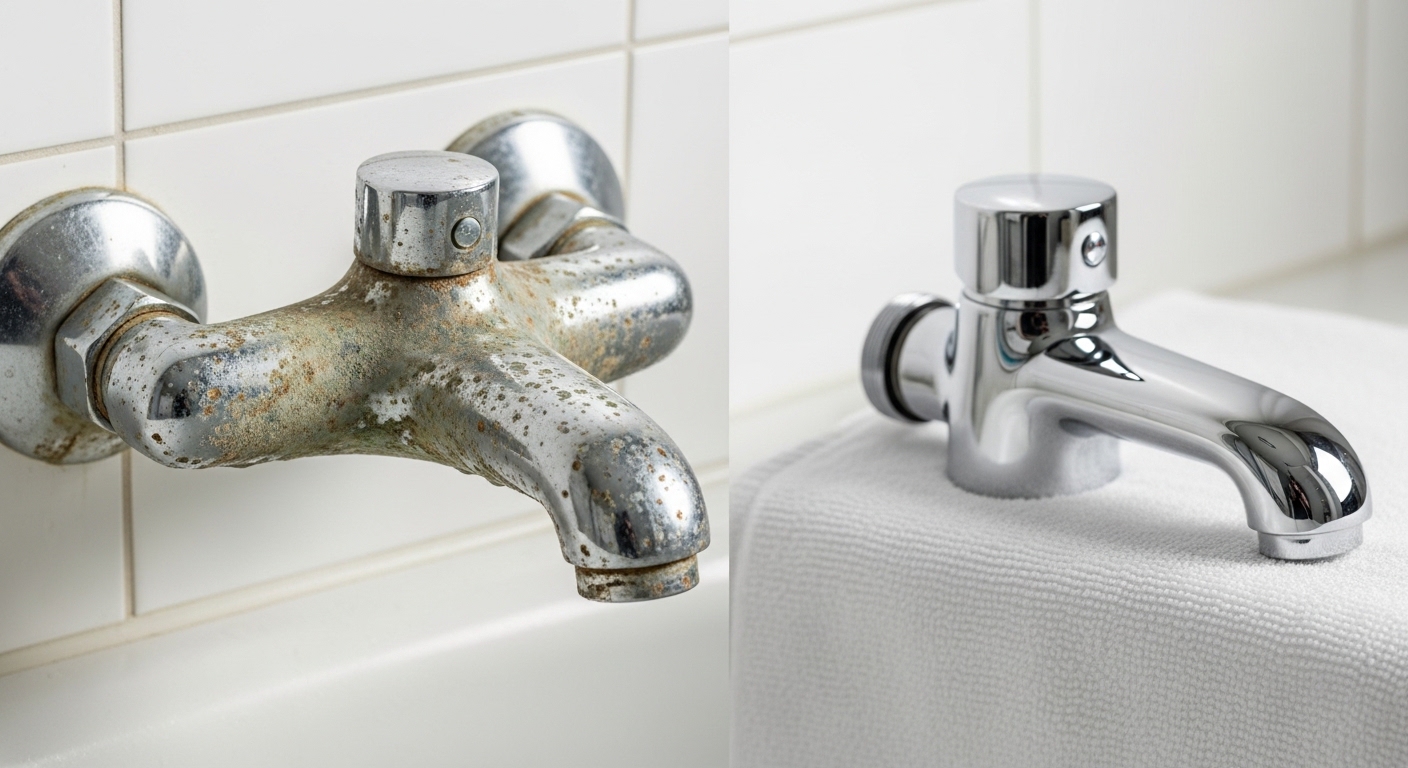
Learning how to replace old faucet on bathtub fixtures is one of the most satisfying DIY plumbing wins out there — because most of the time, the part you actually hate (the corroded, dripping, mineral-crusted tub spout) comes off and goes back on in under half an hour with tools you already own. The trick is knowing which kind of faucet you’re dealing with before you start yanking on it. Get that one thing right and the rest is easy. Get it wrong and you can crack a fitting inside the wall, which turns a $25 spout swap into a $500 drywall repair. This guide walks you through it like a friend who’s done it a dozen times.
We’ll cover how to tell your spout type, the exact step-by-step, what tools you need, when it’s a spout-only job versus a full valve replacement, and how to avoid the three mistakes that cause leaks. Let’s get into it.
How do I know if I can just swap the spout or need to replace the whole faucet?
If your tub still turns on and off fine and you only hate the spout itself — the look, a drip from the end, or a diverter that won’t send water up to the shower — you only need to replace the spout, which is a true DIY job. If water leaks behind the wall, the handles are seized, or temperature control is broken, you’re looking at the valve, which is a bigger job.
Here’s the plain-English version. A bathtub “faucet” is really two separate parts:
- The spout — the metal piece water pours out of. This is what most people mean when they say their tub faucet looks old or drips. It’s a wear part, it’s cheap ($15–$60), and it’s designed to be replaced.
- The valve (the rough-in) — the body buried inside the wall behind the handle(s) that mixes hot and cold and controls flow. Replacing this means opening the wall, soldering or push-fit connections, and often a permit. This is where most people call a plumber.
So the first question to ask yourself is: is my problem the spout, or the valve? If it’s the spout, keep reading — you’ve got this. If hot/cold mixing is broken, handles leak, or you see water damage on the ceiling below, that’s valve territory and you should weigh hiring out. The good news: 80% of “I need to replace my old tub faucet” situations are spout-only.
How do I tell if my tub spout is threaded or slip-on (and why does it matter)?
Look at the underside of the spout near the wall. If you see a small hole with a hex (Allen) set screw, you have a slip-on/set-screw spout that slides onto a copper pipe. If there’s no set screw, it’s a threaded spout that screws directly onto a nipple. This single detail decides how you remove it.
This matters more than anything else in the whole job, so don’t skip it. Removing a threaded spout by twisting is correct — but twisting a slip-on spout that’s locked by a set screw will either do nothing or snap the copper stub inside the wall. Spend 30 seconds identifying yours.
| Feature | Threaded Spout | Slip-On (Set-Screw) Spout |
|---|---|---|
| Set screw underneath? | No | Yes — small Allen screw |
| How it attaches | Screws onto a threaded pipe nipple (1/2″ NPT) | Slides over a smooth copper pipe, locked by set screw |
| How to remove | Turn counterclockwise (lefty-loosey) | Loosen set screw, then pull straight off |
| Tools needed | Cloth + hand, or pipe wrench / screwdriver for leverage | Hex/Allen key (usually 1/8″ or 5/32″) |
| Sealing on reinstall | Plumber’s tape on threads | O-ring + set screw; no tape needed |
| Common on | Older homes, traditional builds | Newer construction, modern valves |
What tools and parts do I actually need to replace a bathtub faucet spout?
For a spout swap you need almost nothing: the new spout, plumber’s tape (PTFE/Teflon tape), and either an Allen key (slip-on) or a cloth and maybe a pipe wrench (threaded). Total cost is usually $20–$70 and you likely already own the tools.
Here’s the full shopping/tool list so you can do it in one trip:
- New tub spout — measure first (see the next section). Buy a finish that matches your handles and shower head.
- Plumber’s tape (PTFE/Teflon) — for threaded spouts. A roll is about a dollar.
- Allen/hex key set — for slip-on spouts. The set screw is usually 1/8″ or 5/32″.
- Old rag or cloth — protects the finish when you grip the spout and catches drips.
- Pipe wrench or large adjustable wrench — only if a threaded spout is stuck. Wrap the spout in cloth first.
- Silicone caulk (optional) — a thin bead where the new spout meets the wall keeps water out of the wall cavity.
- Flashlight — to peek inside the wall opening and check the pipe condition.
That’s genuinely it. No soldering, no shutting off the whole house in most cases, no special skills. If you’ve ever changed a kitchen faucet aerator you’re overqualified. Speaking of pressure problems, if your real complaint is weak flow rather than the spout itself, our guide on how to actually fix weak water pressure walks through diagnosing flow issues that a new spout won’t solve.
What’s the step-by-step to replace an old bathtub faucet spout?
Shut the water, remove the old spout (unscrew it or loosen the set screw), clean and inspect the pipe, prep the new spout with tape or check its O-ring, then attach it and test. Start to finish it’s about 20–30 minutes.
Here’s exactly how to replace old faucet on bathtub spouts, step by step:
- Turn off the water. For a spout-only swap you often don’t strictly need to — no water flows through the spout when the tub is off. But shut off the tub’s supply valves or the main if you want zero surprises. Open the tub faucet briefly to relieve pressure.
- Cover the drain. Put the stopper down or lay a towel over the drain so you don’t lose a set screw down the pipe. This saves more trips to the hardware store than any other tip here.
- Remove the old spout.
- Threaded: Wrap a cloth around it for grip and turn counterclockwise. If it’s frozen, slide the handle of a pipe wrench or a sturdy screwdriver into the spout opening for leverage and twist gently.
- Slip-on: Loosen the set screw underneath with your Allen key (you don’t need to fully remove it), then pull the spout straight off the copper pipe. A little twisting wiggle helps break the O-ring’s grip.
- Inspect and clean the pipe. Wipe off old tape, gunk, and mineral scale. Check the copper or nipple for cracks or corrosion. If the threaded nipple is rusted through, replace it before continuing.
- Prep the new spout.
- Threaded: Wrap plumber’s tape clockwise around the pipe threads 4–6 times. This seals and prevents leaks.
- Slip-on: Confirm the O-ring inside the new spout is seated; a dab of silicone grease helps it slide on smoothly.
- Install the new spout. Threaded: turn clockwise by hand until snug and pointing straight down — don’t crank it past level with a wrench or you’ll crack it. Slip-on: push it fully onto the pipe until it meets the wall, then tighten the set screw.
- Seal and test. Run a thin bead of silicone caulk along the top and sides where the spout meets the wall (leave the bottom open so any hidden leak can escape and warn you). Turn the water back on and run the tub. Check the diverter pulls up and sends water to the shower. Look for drips at the wall joint.
How do I make sure the new spout actually fits before I buy it?
Match three things: the connection type (threaded vs. slip-on), the pipe-to-wall distance, and the spout length. The most common mistake is buying a spout whose connection doesn’t match what’s coming out of your wall.
Tub spouts are not perfectly universal, and “close enough” leaks. Before you buy:
- Confirm connection type using the set-screw check above. Some “universal” spouts ship with adapters for both — those are the safest bet if you’re unsure.
- Measure the spout length from the wall to the tip of the old one. A shorter spout can dump water behind the tub edge instead of into the basin.
- Measure pipe stick-out — how far the copper or nipple protrudes from the finished wall. Slip-on spouts especially need a minimum and maximum pipe length to seat and seal correctly.
- Decide on diverter or not. If you have a tub/shower combo, buy a diverter spout (the one with the little pull-up knob on top). If it’s a tub only, a plain spout is fine.
While you’ve got your tape measure out, this is also the perfect moment to upgrade the small cosmetic stuff. A worn spout often sits against a chipped or dated escutcheon, and a tub spout beauty ring can hide an oversized or ragged wall hole for a few dollars and make the whole install look factory-finished. It’s the cheapest finishing touch in the bathroom.
What about replacing the whole tub faucet, including the handles and valve?
Replacing the full faucet — handles, trim, and the valve behind the wall — is a serious upgrade that involves accessing the plumbing through the wall or an access panel, and often soldering or push-fit connections. If you’re confident with plumbing it’s doable in a few hours; if not, this is the one to hire out.
People reach for a full replacement when they want to switch from two handles to a single-lever, when the valve is leaking internally, or when they’re renovating. The job in broad strokes:
- Shut off water to the whole bathroom or house.
- Remove the handles, trim plate, and old spout.
- Access the valve body — through an access panel behind the wall, or by opening the tile/drywall.
- Disconnect and remove the old valve; install the new rough-in valve (sweat-soldered or push-fit fittings).
- Pressure-test for leaks before closing the wall.
- Reinstall trim, handles, and spout.
For freestanding and clawfoot tubs the mechanics are different again — those faucets mount to the tub or floor rather than inside a wall, and repairs there have their own quirks. If that’s your setup, our dedicated free standing tub faucet repair guide covers cartridges, supply lines, and common leaks for that style. And if a loose, wobbly handle is your only real complaint, you may not need a full replacement at all — sometimes a loose faucet handle is a five-minute tighten, not a teardown.
Why is my new tub spout leaking, and how do I fix it?
A new spout that leaks almost always comes down to one of three things: not enough plumber’s tape on threaded connections, a missing or pinched O-ring on slip-on spouts, or a spout that wasn’t pushed fully onto the pipe. Re-seat it and the leak usually stops.
Run through these in order:
- Leak at the wall joint, threaded spout: You likely undersealed. Remove it, add 5–6 wraps of plumber’s tape clockwise, reinstall snug.
- Leak at the wall joint, slip-on spout: The O-ring is missing, twisted, or dry. Pull the spout, check the O-ring, add a little silicone grease, push it fully home, retighten the set screw.
- Drip from the spout tip when the tub is off: That’s not the spout — that’s your valve cartridge worn out. The spout swap won’t fix it; you’ll need a new cartridge.
- Spout spins or wobbles: Threaded nipple may be too short or the spout over-rotated past the seal point. Don’t force it level with a wrench; add tape so it seats snug pointing straight down.
One more note: if your diverter spout sends water out both the spout and shower head at the same time, the internal diverter is failing. That’s normal wear and a brand-new spout fixes it instantly — it’s actually one of the most common reasons people replace an otherwise-fine spout.
FAQ
Do I need to turn off the water to replace just the tub spout?
Technically no, because no water flows through the spout while the tub is off — you can often swap a spout without touching the main shutoff. That said, shutting off the tub supply or main valve gives you peace of mind, especially if you bump the handle. Always open the faucet briefly first to release any trapped pressure.
How long does it take to replace an old bathtub faucet?
A spout-only replacement takes about 20–30 minutes for most people, including the trip to identify and buy the matching part. A full valve-and-trim replacement that involves opening the wall is a several-hour job and frequently a weekend project if tile work is involved.
Can I use a wrench to remove a stuck threaded tub spout?
Yes, but protect the finish first by wrapping the spout in a cloth, and apply steady pressure rather than sudden force. The cleanest method is to insert a sturdy screwdriver or the handle of a pipe wrench into the spout opening for leverage and turn counterclockwise. If it won’t budge, penetrating oil on the threads and 15 minutes of patience usually frees it without cracking the wall pipe.
What size set screw does a slip-on tub spout use?
Most slip-on tub spouts use a 1/8″ or 5/32″ hex (Allen) set screw located on the underside near the wall. You only need to loosen it — not fully remove it — to pull the spout off. Cover the drain before you start so the tiny screw can’t escape down the pipe.
Should I caulk around a new tub spout?
Yes — run a thin bead of silicone caulk along the top and sides where the spout meets the wall to keep splashing water out of the wall cavity. Leave the bottom edge uncaulked on purpose, so that if there’s ever a hidden leak it can drip out and warn you instead of rotting the wall from inside.
Is replacing a tub faucet a good DIY project for a beginner?
A spout swap is one of the best beginner plumbing projects — it’s low-risk, low-cost, needs minimal tools, and gives an instantly visible result. Replacing the valve behind the wall is not beginner-friendly because of the soldering and wall access involved. So if you’re new to this, start with the spout and call a pro for valve work.
A quick word on doing it right
Author note: This guide was written by the adeaga fixtures team — folks who install, test, and break down tub and shower hardware for a living. We’ve pulled hundreds of old spouts off real tub walls, which is why we hammer on the threaded-vs-slip-on check: it’s the single mistake we see send DIYers to the emergency hardware run. As a brand, adeaga designs faucets and tub fixtures to standard 1/2″ NPT and slip-on connections so replacements drop in cleanly, and our spouts are pressure-tested and backed by warranty against finish and seal defects. Whenever you buy a replacement, check that it meets ASME/cUPC plumbing standards — it’s a quick way to know the part will seal and last rather than leak in a year.