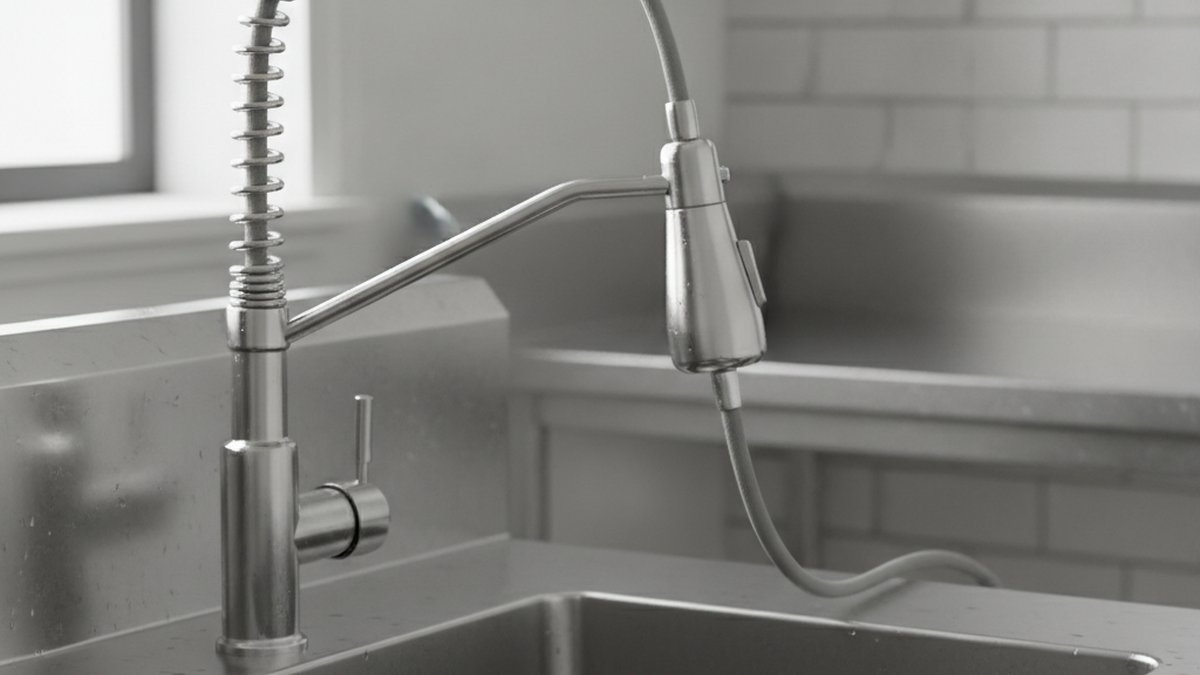
If you’ve been quoted $200–$400 in labor just to swap in a pre-rinse unit, here’s the good news: a commercial kitchen faucet install is well within reach for a confident DIYer, and the hardware itself hasn’t changed much in decades. These are deliberately simple, serviceable faucets — that’s the whole point of “commercial” grade. Below I’ll walk you through exactly what fits, what tools you need, the step-by-step process, and the mistakes that cause 90% of post-install leaks. This guide leans toward the tall spring-style pre-rinse units you see in restaurants and serious home kitchens, but the same principles apply to any heavy-duty gooseneck.
What exactly counts as a “commercial” kitchen faucet, and will it fit my sink?
A commercial kitchen faucet is a heavy-duty faucet built to NSF/ANSI 61 and 372 standards, usually featuring an exposed spring, a high-pressure spray valve, and a wall-mount or deck-mount base on 8-inch centers. Whether it fits your sink comes down to two numbers: your hole spacing and your deck clearance above.
Before you buy anything, measure. Most commercial deck-mount units use two holes spaced 8 inches apart (center to center) — the classic “8-inch centerset” — not the 4-inch spacing common on residential faucets. Wall-mount versions bolt to the backsplash instead. If your existing sink has three or four holes, that’s fine: you’ll cover the extras with a deck plate or a soap dispenser. If it has a single hole, a true commercial pre-rinse won’t fit without an adapter deck.
- Hole spacing: confirm 8″ center-to-center for deck models.
- Ceiling clearance: spring units stand 24–48″ tall — check you have room above the sink, especially under a window or cabinet.
- Water pressure: commercial spray valves want 20–80 psi. Below 20 psi the spray feels weak; above 80 you should add a pressure regulator.
- Supply line size: most use standard 3/8″ compression stops, same as residential.
What tools and parts do I actually need for a commercial kitchen faucet install?
You need surprisingly little: an adjustable wrench, a basin wrench, plumber’s thread-seal (PTFE) tape, a bucket, and a towel. Commercial faucets are designed to be installed and serviced fast, so there’s no exotic tooling involved.
Here’s the full checklist. If you’ve ever swapped a residential faucet, you already own most of this. If you’re new to faucet work, the tap installation tool guide breaks down what each wrench actually does and why a basin wrench earns its place in the drawer.
- Adjustable wrench (10″) and a basin wrench for the up-under nuts
- PTFE thread-seal tape (the white plumber’s tape)
- Two flexible braided stainless supply lines, 3/8″ x appropriate length
- A deck plate or escutcheon if covering extra holes
- Silicone plumber’s putty or the rubber gasket that ships with the faucet
- Bucket, flashlight, and old towels
- Optional: pipe/pressure gauge if you suspect high household pressure
How do I install a commercial kitchen faucet step by step?
Shut off the water, remove the old faucet, mount and seal the new base, connect the spring body and supply lines, then flush and leak-test. Done carefully, that’s a 60–90 minute job. Here’s the sequence I follow on every install.
- Shut off the supply. Turn both hot and cold stops under the sink clockwise until they stop. Open the old faucet to release pressure and confirm the water’s actually off.
- Disconnect and remove the old faucet. Put a bucket under the connections, loosen the supply nuts, then the mounting nuts. If the old unit is corroded and stubborn, our full walkthrough on removing an old faucet without wrecking the sink covers penetrating oil and the seized-nut tricks.
- Clean the deck. Scrape off old putty and mineral crust so the new gasket seats flat. A clean surface is the difference between a dry install and a slow drip.
- Mount the base. Set the rubber gasket (or a thin bead of plumber’s putty), drop the faucet shanks through the holes, and hand-tighten the mounting nuts from below. Align the spout straight, then snug the nuts with a basin wrench — firm, not gorilla-tight.
- Attach the spring body and riser. On a pre-rinse unit, the tall spring assembly threads onto the base with a coupling nut. Wrap PTFE tape on the male threads (three or four turns, clockwise) before joining. Hand-thread first to avoid cross-threading, then wrench a quarter-turn past snug.
- Connect the supply lines. Run braided lines from the stops to the faucet inlets — hot to hot, cold to cold. Tape the threaded ends, hand-tighten, then a quarter-turn with a wrench.
- Turn the water back on slowly and watch every joint.
- Flush and test. Remove the spray-valve aerator or screen, run hot and cold for 60 seconds to clear debris, then reinstall.
The exact coupling design varies by brand, so keep the manufacturer’s diagram open beside you. Where our steps and the printed instructions disagree, follow the printed instructions — torque specs and gasket orientation are model-specific.
Deck-mount or wall-mount commercial faucet — which is right for my kitchen?
Choose deck-mount if your sink already has 8-inch holes and you want the simplest swap; choose wall-mount if you’re building a new station, want the sink deck clear for cleaning, or your backsplash already has stub-outs. Wall-mount is the true “restaurant” look but demands in-wall plumbing, so it’s rarely a same-day DIY unless the rough-in already exists.
If a wall-mount setup is where you’re headed, the mechanics of stub-out spacing and escutcheons are worth reading up on first — our guide on the wall mount faucet two-hole setup explains the center-to-center math and why it trips people up.
| Feature | Deck-Mount Commercial | Wall-Mount Commercial |
|---|---|---|
| Difficulty (DIY) | Easy — 60–90 min | Hard — needs in-wall rough-in |
| Hole spacing | 8″ centers on sink deck | 8″ centers on wall stub-outs |
| Sink deck cleanup | Faucet base to wipe around | Fully clear — easiest to clean |
| Typical use | Home + light commercial | Restaurants, prep stations |
| Retrofit cost | Low (faucet only) | High (plumbing changes) |
Can I put a commercial faucet on a regular home sink — and is it worth it?
Yes, you can absolutely put a commercial-style faucet on a residential sink, and for heavy cooks it’s one of the best upgrades you can make — as long as your sink has 8-inch holes (or you use a deck plate) and enough overhead clearance. The high spring spout and powerful spray valve blast through baked-on pans in seconds.
Where it’s worth it: deep single-bowl sinks, serious home kitchens, and anyone who fills tall stockpots. Where to think twice: sinks under a low window (the spring won’t clear the sash), low household water pressure, and open-plan kitchens where restaurant-grade spray can overshoot a shallow bowl and splash. If you love the pull-down convenience but want a softer residential look, a heavy-brass pull-down like a Kohler pull-out kitchen faucet or one of the best Moen kitchen faucets gives you a middle ground — more power than a standard faucet, less height and splash than a full pre-rinse.
Why is my new commercial faucet leaking after install — and how do I fix it?
A leak right after install almost always comes from one of three spots: an under-tightened supply nut, missing thread-seal tape on the spring-body coupling, or a gasket that didn’t seat flat on a dirty deck. Track it to the source before you crank down harder — over-tightening cracks plastic couplings and makes it worse.
Run this quick diagnostic:
- Drip at the supply stop: re-seat the braided line, add a half-turn. Braided lines seal on a rubber cone, so they need less torque than you’d think.
- Drip where the spring body meets the base: shut off, unthread, add two more wraps of PTFE tape, re-thread carefully.
- Water pooling at the deck base: the gasket isn’t flat. Pull the faucet, clean the deck fully, and re-seat.
- Drip from the spray valve itself: usually a pinched or debris-fouled washer — flush the line and check the aerator screen.
Persistent drips from the spray head or handle after everything’s snug usually trace back to a worn internal washer or cartridge rather than your install. The same logic that fixes a residential unit applies here; our guide to the faucet aerator washer shows how a $2 part stops a nagging drip that no amount of wrenching will.
How long does a commercial kitchen faucet install take, and what does it cost?
Plan on 60–90 minutes for a straightforward deck-mount swap and $0 in labor if you DIY — the faucet itself runs roughly $90 to $350 depending on grade. A wall-mount install with new rough-in plumbing is a different animal: budget a half-day and often a plumber, pushing total cost to $400–$800.
Here’s a realistic breakdown for the common scenarios:
| Scenario | Time | DIY-friendly? | Rough total cost |
|---|---|---|---|
| Deck swap, holes already 8″ | 60–90 min | Yes | $90–$350 (faucet only) |
| Deck swap + new deck plate | 90 min | Yes | $110–$380 |
| Wall-mount, rough-in exists | 2–3 hrs | Intermediate | $150–$450 |
| Wall-mount, new plumbing | Half day+ | Call a pro | $400–$800 |
Author note & why you can trust this guide
This guide was written by the adeaga fixtures team — we design, test, and sell kitchen and bathroom faucets full-time, and we’ve bench-tested dozens of commercial and residential units against real-world pressure, flow, and cycle-life standards. adeaga faucets are built to NSF/ANSI 61 and 372 lead-free requirements and backed by our limited lifetime warranty on the faucet body and finish. When we quote a spec — 20–80 psi, 8-inch centers, 60-second flush — it’s from hands-on installs, not a marketing sheet. Standards and torque specs still vary by model, so always confirm against the paperwork in your box; that’s the document your warranty is written around.
FAQ
Do I need a plumber for a commercial kitchen faucet install?
Not for a standard deck-mount swap on a sink that already has shutoff valves and 8-inch holes — that’s a genuine DIY job in about an hour. You only need a plumber if you’re adding shutoff valves, moving supply lines, or doing a wall-mount install that requires opening the wall for new rough-in plumbing.
What size holes does a commercial kitchen faucet need?
Most deck-mount commercial faucets use two holes spaced 8 inches apart, center to center, in standard 1-3/8″ sink openings. If your sink has 4-inch spacing or a single hole, you’ll need a compatible faucet or a deck-plate adapter. Always measure your existing spacing before ordering.
Can a commercial faucet handle low water pressure?
Commercial spray valves are rated for 20–80 psi and work best above 40 psi. Below 20 psi the pre-rinse spray feels weak because these faucets rely on pressure for their punch. If your home runs low, a residential high-arc pull-down will feel stronger than a starved commercial unit.
How do I stop leaks when installing a commercial faucet?
Wrap three to four clockwise turns of PTFE thread-seal tape on every threaded connection, seat the deck gasket on a fully cleaned surface, and hand-tighten before adding just a quarter-turn with a wrench. Over-tightening cracks couplings and causes more leaks than it prevents. Then turn the water on slowly and watch each joint.
Is a commercial faucet too tall for a home kitchen?
It can be. Spring pre-rinse units stand 24–48 inches tall, so measure your clearance — especially under a window sash or wall cabinet — before buying. If you’re tight on height but want the power, a high-arc residential pull-down gives you most of the performance in a shorter body.
Does installing my own commercial faucet void the warranty?
No — proper DIY installation following the manufacturer’s instructions does not void an adeaga warranty. What can void it is damage from over-tightening, using the wrong parts, or removing flow components. Keep your receipt and the printed instructions, and follow the torque and sealing guidance in the box.