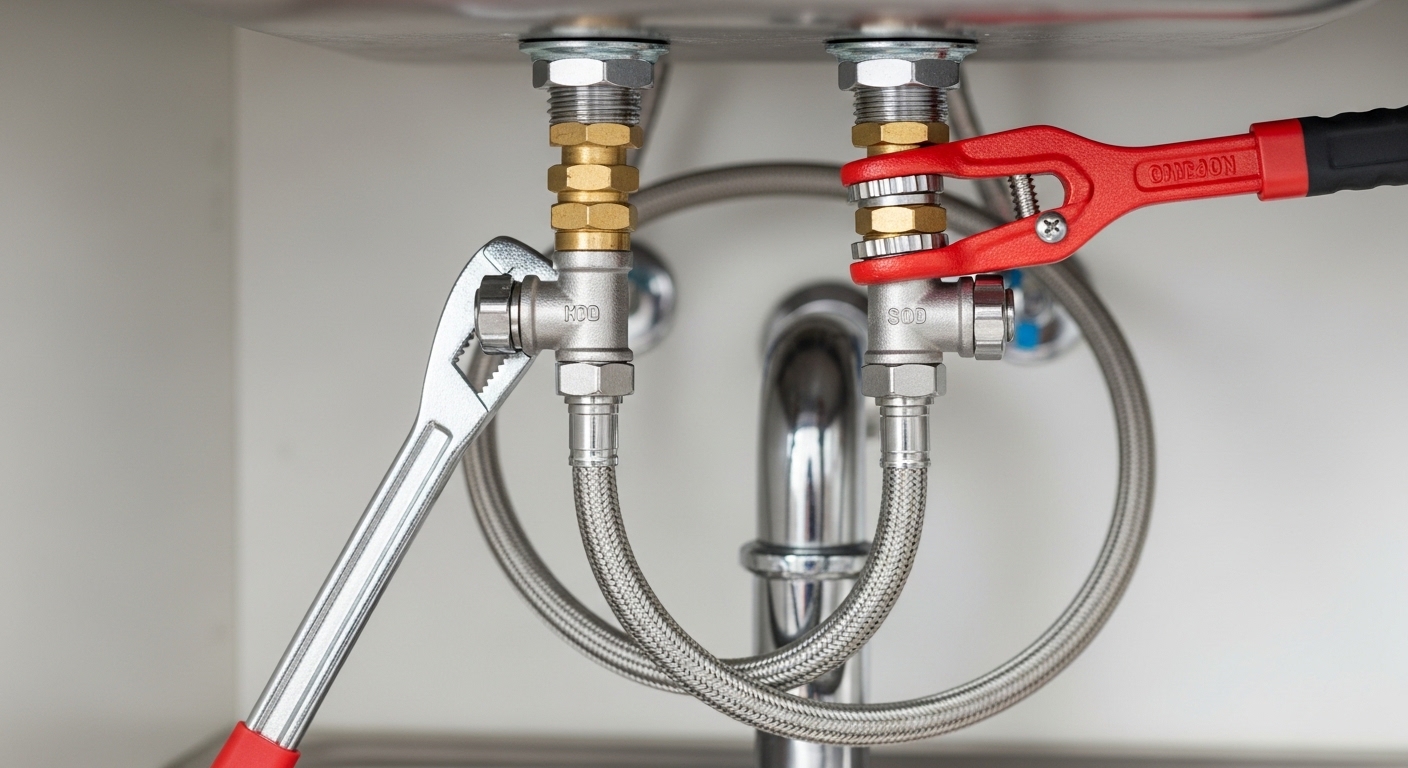
Learning how to remove old faucet from kitchen sink hardware is one of the most satisfying DIY plumbing wins you can score in an afternoon — no plumber, no $150 service call, and no special training. The catch is that 90% of the difficulty lives in one tight, dark, awkward spot: the underside of the sink deck where the mounting nuts hide. Get the right tool and the right sequence, and the whole thing is genuinely easy. This guide walks you through it step by step, including what to do when a nut is rusted solid.
At adeaga, we test and photograph faucet installs and removals across dozens of sink configurations every year, so the steps below reflect what actually happens under a real sink — not a spotless showroom demo.
What Tools Do I Need to Remove a Kitchen Faucet?
You need a basin wrench, an adjustable wrench (or channel-lock pliers), a bucket, a towel, and penetrating oil for stuck nuts. That’s the core kit, and it costs under $40 if you’re buying it fresh. Everything else is optional but nice to have.
Here’s the full list, in order of how much they matter:
- Basin wrench — the single most important tool. Its long shaft and pivoting jaw reach up behind the sink bowl to grab mounting nuts your hand and a normal wrench can’t touch. Do not skip this.
- Adjustable wrench or channel-lock pliers — for the supply-line coupling nuts, which are usually easy to reach.
- Bucket and old towels — the supply lines and faucet body hold trapped water. It will drip on you. Plan for it.
- Penetrating oil (PB Blaster, Liquid Wrench, or WD-40) — for corroded or seized nuts. Apply it early so it has time to work.
- Headlamp or flashlight — the cabinet is dark. A headlamp keeps both hands free.
- Putty knife and rag — to scrape off old plumber’s putty or silicone once the faucet lifts out.
- Safety glasses — you’re working face-up under a sink; debris and oil fall straight down toward your eyes.
If your faucet is genuinely rusted in place and the nuts won’t budge even with penetrating oil, you may also want a mini hacksaw or an oscillating multi-tool to cut through the mounting studs. That’s the nuclear option, and we cover it below.
How Do I Shut Off the Water Before Removing the Faucet?
Turn the two shutoff valves (called angle stops) under the sink clockwise until they stop — one feeds hot, one feeds cold. Then open the faucet to release pressure and confirm no water flows. This is the step people skip and regret, so never skip it.
The shutoff valves sit on the wall or floor of the cabinet, where the supply lines connect. Righty-tighty: turn each handle clockwise all the way. Once both are off, turn your old faucet handle to the “on” position — if water still runs, a valve isn’t fully closed or is failing. In that case, shut off the main water supply to the whole house (usually near your water meter or where the main line enters).
After the water’s off and the faucet is open to relieve pressure, leave the faucet lever up. This drains the lines and prevents a surprise spray when you loosen the couplings.
What if my under-sink valves are old, stuck, or leaking?
If your shutoff valves are frozen, corroded, or start weeping when you turn them, stop and shut off the house main instead. Old multi-turn gate valves sometimes fail the moment you disturb them. If yours are the culprit, this is a good time to plan replacing them with quarter-turn ball valves — but do that as a separate job, with the main off. Forcing a crumbling valve is how a 30-minute faucet swap becomes a flooded cabinet.
How Do I Disconnect the Supply Lines and Sprayer Hose?
Place a bucket underneath, then use an adjustable wrench to loosen the coupling nut where each supply line meets the faucet tailpiece, turning counterclockwise. Water trapped in the lines will drain out — that’s normal. If your faucet has a pull-down or side sprayer, disconnect its hose too.
Work through it in this order:
- Loosen the hot and cold supply-line coupling nuts at the faucet’s tailpieces (the threaded shanks poking down through the sink). Support the tailpiece so you don’t twist it.
- Let the lines drain into your bucket, then set them aside. If the supply lines are old braided stainless or crusty rubber, replace them with the new faucet rather than reusing them.
- If you have a separate side sprayer, unscrew its hose from the faucet body or the diverter tee under the deck.
- On a pull-down faucet, the spray hose often connects with a quick-connect clip or a weighted counterbalance — unclip the weight and release the connector.
- Disconnect any soap dispenser or air gap hoses if they thread through the same mounting holes.
Once nothing but the mounting nuts holds the faucet to the sink, you’re ready for the part that trips most people up.
Why Won’t the Faucet Mounting Nuts Budge — and How Do I Loosen Them?
The mounting nuts won’t budge because they’re buried in a cramped space and often corroded or mineral-crusted after years under the sink. Reach them with a basin wrench, apply penetrating oil, wait 10–15 minutes, then turn counterclockwise (as viewed from below). Patience beats brute force here.
The mounting nuts thread onto the faucet’s tailpieces and clamp the faucet down against the sink deck. On a modern faucet these are often big plastic wing nuts you can loosen by hand. On an older metal faucet, they’re hex or knurled brass nuts that a basin wrench is built to grab. Hook the basin wrench jaw onto the nut, position the T-handle at the bottom for leverage, and turn. Remember that “loosen” from underneath looks like clockwise when you’re lying on your back looking up — orient yourself before you crank.
If a nut is seized, soak it in penetrating oil and give it real time — 15 minutes minimum, longer for heavy corrosion. Tap the nut lightly with the wrench handle to help the oil wick into the threads. For badly corroded fixtures where the studs are rusted through, our full walkthrough on corroded faucet removal without snapping the pipe covers cutting techniques and how to protect the sink deck. Don’t overpower a rusted stud with a cheater bar — you can crack the sink or shear the tailpiece off inside the mount, which turns an easy job into a nightmare.
When should I just cut the mounting studs?
Cut the studs when penetrating oil, heat, and a basin wrench have all failed and the nut simply will not turn. Since you’re replacing the faucet anyway, the old studs are disposable — a mini hacksaw or oscillating multi-tool with a metal blade slices through them in a couple of minutes. Cut between the sink deck and the nut, protecting the sink surface with tape or a putty knife, and the faucet lifts right out.
How Do I Lift Out the Old Faucet and Clean the Sink Deck?
Once all mounting nuts are off, push the tailpieces up from below and lift the faucet out through the top of the sink. Then scrape off the old putty, silicone, or gasket residue and clean the deck down to bare metal so your new faucet seats flat.
The faucet may resist at first if it’s been sealed with plumber’s putty or silicone caulk that’s hardened into glue. Work a putty knife under the base and wiggle. Once it releases, lift straight up so the tailpieces clear the mounting holes. Then clean thoroughly — any old gunk left on the deck will keep your new faucet from sealing, and you’ll get a slow leak that seeps into the cabinet.
Use a plastic scraper and a mild bathroom cleaner or vinegar to cut through mineral deposits and old caulk. Dry the deck completely. While you’re down there, look at the condition of the sink holes and the deck itself — this is the perfect moment to check whether your new faucet’s hole configuration matches (single-hole vs. three-hole vs. four-hole with a sprayer).
Should I Reuse or Replace Parts When Swapping the Faucet?
Replace the supply lines, and replace the plumber’s putty or gasket — reuse nothing that seals or bends. Reusing old braided supply lines is the number-one cause of leaks after a faucet swap, and they cost about $8 a pair. New faucets almost always include fresh gaskets and mounting hardware.
Here’s a quick decision table for the common parts you’ll encounter:
| Part | Reuse or Replace? | Why |
|---|---|---|
| Braided supply lines | Replace | Old lines crack and fail; cheap insurance against a cabinet flood |
| Shutoff / angle stop valves | Replace if old or stiff | Quarter-turn ball valves are far more reliable than old gate valves |
| Mounting nuts & gasket | Use the new ones included | New faucet ships with matched hardware sized to its tailpieces |
| Plumber’s putty / silicone | Replace | Old sealant won’t re-seal; must be fresh to prevent deck leaks |
| Basin wrench | Reuse | A tool, not a consumable — keep it for next time |
If your new faucet is a pull-down model, take a minute to understand the hose and counterweight system before you install it — our guide on the pull down kitchen faucet extension explains reach and hose length so you buy the right one. And if you’re only removing the old faucet because it’s leaking or weak, it’s worth reading whether a repair makes more sense first — our breakdown of whether kitchen faucet repair is actually worth it can save you a full replacement.
How Long Does Removing a Kitchen Faucet Take, and What Does It Cost?
Removing an old kitchen faucet takes 30–60 minutes for a typical DIYer and costs almost nothing if you own a basin wrench. A plumber charges $100–$250 for a full remove-and-replace, so doing the removal yourself is where most of the savings live.
Time and cost break down roughly like this:
- Clean, modern faucet with plastic wing nuts: 20–30 minutes, tools you likely already have.
- Older metal faucet, nuts loosen normally: 45 minutes, basin wrench required.
- Corroded or seized fixture: 1–2 hours, plus penetrating oil and possibly a cutting tool.
- Tool investment if starting from scratch: about $30–$40 for a basin wrench, adjustable wrench, and penetrating oil.
Even in the worst case, you’re spending a couple hours and $40 versus a couple hundred dollars for a pro. And once you own the tools and know the sequence, the next faucet swap is a genuine 30-minute job.
FAQ
Do I need a basin wrench to remove a kitchen faucet?
For almost all older faucets, yes. The mounting nuts sit in a space too tight and too far back for a hand or standard wrench to reach, and a basin wrench’s pivoting jaw on a long shaft is the tool designed for exactly that spot. Some newer faucets use hand-tightened plastic nuts you can remove without one, but if you’re not sure what you have, buy the basin wrench — it’s about $15.
How do I turn off the water if there are no shutoff valves under my sink?
Shut off your home’s main water supply, usually located where the main line enters the house, near the water meter, or by the water heater. After turning it off, open a faucet on a lower floor to drain pressure. While the water’s off, seriously consider having angle-stop shutoff valves added under the sink — they make every future faucet or repair job dramatically easier.
What do I do if the mounting nut is completely rusted and won’t turn?
Soak it in penetrating oil for at least 15 minutes, tap it to help the oil penetrate, and try again with the basin wrench. If it still won’t move, cut the mounting stud with a mini hacksaw or oscillating multi-tool — since you’re replacing the faucet, the old studs are disposable. Protect the sink deck while cutting, and see our corroded-removal guide for the full technique.
Will water spray everywhere when I disconnect the lines?
No, not if you shut off the valves and open the faucet first to relieve pressure. Some water is still trapped inside the supply lines and faucet body, so keep a bucket and towel underneath to catch the drips when you loosen the coupling nuts. It’s a trickle, not a spray, as long as the supply is truly off.
Can I reuse my old supply lines with the new faucet?
You can, but you shouldn’t. Old braided or rubber supply lines are the most common failure point after a faucet swap — they crack, corrode at the crimps, and can burst inside a closed cabinet. New braided stainless lines cost only a few dollars a pair, so replace them while everything’s already apart.
My old faucet is stuck to the sink even after removing the nuts. What now?
It’s glued down by hardened plumber’s putty or silicone. Slide a putty knife under the faucet base and gently rock it back and forth to break the seal, then lift straight up so the tailpieces clear the holes. Scrape off all the old sealant afterward so your new faucet seats flat and seals properly.
A Note on Expertise and Standards
This guide was written and reviewed by the adeaga fixtures team, drawing on hands-on removal and installation testing across single-hole, three-hole, and deck-mounted kitchen sink setups. We recommend that any replacement faucet you install carry standard certifications — look for cUPC/NSF compliance for lead-safe drinking water and a solid manufacturer warranty (many quality kitchen faucets now carry limited lifetime warranties on the finish and mechanical parts). adeaga curates and stress-tests faucets and fixtures so the guidance you read here reflects real-world durability, not marketing spec sheets. When in doubt about your home’s plumbing or valves, consult a licensed plumber — some situations, especially failing shutoffs or damaged pipes, genuinely call for a pro.