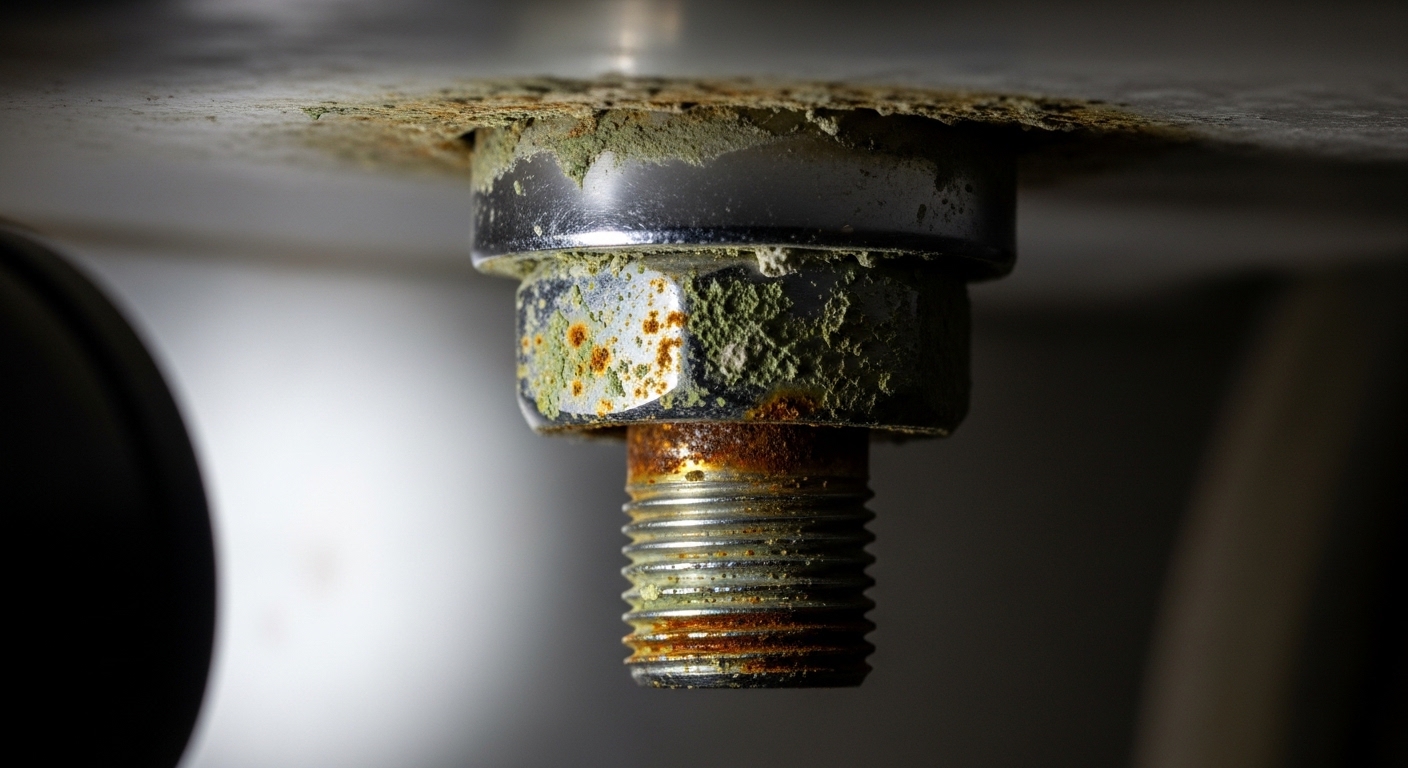
Corroded faucet removal is one of those jobs that looks like a five-minute swap and turns into a two-hour fight the moment a rusted, mineral-welded nut refuses to move. The good news: almost every stuck faucet comes off with the right sequence of penetrating oil, patience, leverage, and — when needed — a cutting tool. You rarely need a plumber, and you almost never need to replace the pipe, as long as you don’t over-torque a fastener that’s fused to the threads. Below is exactly how to do it safely, in the order a working plumber would.
Why is my faucet nut so corroded and stuck in the first place?
It’s stuck because water, minerals, and dissimilar metals have basically welded the nut to the threads over years. Two things drive it: mineral scale from hard water (calcium and magnesium building a chalky crust) and galvanic corrosion, where a brass nut sits against a steel or zinc-coated shank and slowly eats itself in the presence of moisture. Add a slow supply-line drip that nobody noticed, and you get a fastener that’s cemented in place.
Knowing the cause matters because it tells you which attack works. Pure mineral scale responds well to a little heat and an acidic soak. Galvanic corrosion and rust respond better to penetrating oil that wicks into the threads. Most old faucets have both, which is why the reliable approach is oil first, heat second, cut third. If you’ve seen a finish flaking on your fixtures too, that same moisture problem is often behind it — we cover that failure mode in our guide on why a brushed nickel faucet peels and how to stop it.
What tools do I actually need for corroded faucet removal?
You need a basin wrench, penetrating oil, a bucket and rags, and a cutting tool as backup — that’s the core kit. Everything else is a nice-to-have. Here’s the honest short list before you crawl under the sink:
- Basin wrench — the long-handled, spring-jaw tool made specifically to reach mounting nuts in the tight cavity behind a sink. Nothing else fits well.
- Penetrating oil (PB B’laster, Kroil, or Liquid Wrench). WD-40 works in a pinch but is a weaker penetrant.
- Channel-lock pliers and an adjustable wrench for supply-line nuts and compression fittings.
- Mini hacksaw or oscillating multi-tool / rotary tool with a metal-cutting blade — your plan B when a nut won’t turn.
- White vinegar or CLR for dissolving mineral scale on threads and around the base.
- Bucket, towels, headlamp, and safety glasses. Rust flakes fall straight into your eyes when you work overhead under a sink.
A telescoping magnet and a pair of nitrile gloves save real frustration, too. Old faucet cavities are full of grit and dropped nuts.
How do I remove a corroded faucet step by step?
Shut off the water, disconnect and drain the supply lines, soak the corroded nuts, then break them loose from below with a basin wrench — cutting them off only if they refuse to turn. Work in this order and you’ll avoid the two mistakes that create real damage: forcing a seized nut and twisting the pipe.
- Shut off both supply valves under the sink and open the faucet to release pressure. If the shutoffs are also corroded or won’t fully close, turn off the main and note that those valves are your next replacement job.
- Disconnect the supply lines at the faucet shanks with an adjustable wrench. Keep a bucket and rag ready — there’s always trapped water.
- Soak everything. Spray penetrating oil on the mounting nuts and exposed threads. Wrap a vinegar-soaked rag around scaled areas. Walk away for 15–30 minutes. This single step does more than any amount of muscle.
- Break the nut loose with the basin wrench, turning counterclockwise (viewed from below). Steady the faucet body or pipe with your other hand so you’re twisting the nut, not the plumbing.
- Re-soak and repeat if it moves a hair then stops. Tiny back-and-forth movements let oil creep deeper. Don’t crank harder — you’ll shear the shank.
- Cut it off if it still won’t turn (see the next section). This is normal, not a failure.
- Lift the faucet out, then scrape the old plumber’s putty, gasket, and mineral ring off the sink deck before the new install.
If your project is a tub faucet rather than a sink, the sequence is similar but the access and spout connection differ — our walkthrough on replacing an old bathtub faucet without calling a plumber covers those specifics.
The nut won’t budge — should I cut it, heat it, or keep soaking?
If 30 minutes of soaking and steady wrench pressure haven’t moved it, stop twisting and cut it — cutting a $2 nut is far safer than snapping a supply stub you’d have to re-plumb. Here’s how to decide between the three options:
| Method | Best for | Risk | When to use it |
|---|---|---|---|
| Keep soaking (oil + vinegar) | Light rust, mineral scale | Very low | Always try first; give it 15–30 min, repeat once |
| Heat (heat gun, not open flame) | Mineral-welded brass nuts | Medium — nearby seals, plastic, finishes | Metal-on-metal only; never near PEX, plastic nuts, or the sink finish |
| Cut the nut (hacksaw / rotary tool) | Fully seized, rounded-off nuts | Low if careful; you’ll destroy the old nut on purpose | When it simply won’t turn — the safest end-game |
How to cut it safely: use a mini hacksaw blade or a rotary tool with a metal cutoff wheel to slice through one side of the nut, angling slightly away from the pipe. Cut until you’re almost through the nut wall, then crack it open with a screwdriver or pliers and it falls off the threads. Keep the blade off the underlying shank so you preserve the pipe. For a compression-fitting supply line that’s corroded, cut the tubing cleanly and plan on a new compression sleeve and nut.
On heat: a heat gun expands the nut and breaks the mineral bond, but only use it on all-metal joints well away from any plastic, rubber gasket, or the visible faucet/sink finish. Skip an open-flame torch for a DIY sink job — the fire risk near cabinets and the damage to nearby fittings aren’t worth it.
How do I remove a corroded faucet without damaging the sink or pipes?
Protect the pipe by always counter-holding it, and protect the sink by cutting nuts instead of prying against the basin. The single most damaging move is applying big torque to a stuck mounting nut while the copper or PEX stub twists behind the wall — that’s how a small job becomes a soldering or repipe job. A few concrete safeguards:
- Counter-hold every time. Grip the shank or valve body with one wrench while you turn the nut with the other, so torque never travels down the pipe.
- Never pry against a porcelain or fireclay sink as a lever point — you’ll chip or crack it. Support tools against the cabinet or a wood block instead.
- Cut, don’t crank, on seized nuts. A destroyed nut costs cents; a cracked shutoff valve costs a repair.
- Inspect the shutoff valves and supply lines while you’re in there. If they’re corroded too, replace them now rather than fighting them again in six months.
Corroded compression fittings deserve special care because the ferrule (the little ring that bites the pipe) is often fused on. If a supply valve or stub is involved, it can be cleaner to replace that section — the same principles apply as in our guide to a copper faucet stub out installation. And if you find the handle itself is loose or spinning as you work, our quick fix on a loose Kohler faucet handle covers the set-screw and cartridge side of things.
Should I replace the faucet entirely, or can I reuse it after removal?
Once a faucet is corroded enough to fight you on removal, replace it — reusing it rarely pays off. If the mounting hardware is that far gone, the internal cartridge, seals, and finish are usually near the end too, and you’ve already done the hard part by getting it off. A new mid-range faucet costs less than a plumber’s callout, and modern cartridges are far more reliable than a 15-year-old fixture you cleaned up.
The exception is a high-end faucet where only the external nut corroded and the valve body is solid brass in good shape. In that narrow case, clean the threads with a wire brush and vinegar, chase them with a thread file if needed, and reuse it with new gaskets and hardware. When you do install the replacement, use fresh plumber’s putty or the supplied gasket, hand-tighten plus a quarter turn, and don’t over-torque the new nuts — that’s how the next person ends up in this same situation. If your removal was driven by leaks rather than looks, it’s worth reading our take on when kitchen faucet repair is actually worth it before you decide.
FAQ
What’s the best penetrating oil for a corroded faucet nut?
Dedicated penetrants like PB B’laster, Kroil, or Liquid Wrench outperform WD-40 for seized threads because they’re formulated to wick into rusted joints and break the corrosion bond. Apply it, wait at least 15 minutes, and reapply once before you wrench. For heavy mineral scale, pair the oil with a vinegar-soaked rag wrapped around the nut.
Can I remove a corroded faucet without a basin wrench?
You can sometimes reach the nuts with channel-lock pliers or a socket on an extension, but a basin wrench is worth the roughly $15 it costs because the mounting nuts sit in a cavity nothing else reaches. If the nut is fully seized anyway, you’ll end up cutting it — and a mini hacksaw or rotary tool becomes your real “wrench.”
Is it safe to use a torch to loosen a stuck faucet?
For a DIY sink job, skip the open-flame torch — a heat gun is the safer choice and only on all-metal joints away from plastic, rubber, and the finish. Open flame near a cabinet, supply lines, and dried oil is a real fire and damage risk. Heat expands the nut and cracks mineral bonds, but cutting the nut is usually the safer end-game.
How long should I let penetrating oil soak on a corroded faucet?
Give it at least 15–30 minutes, and re-apply if the nut only moves slightly before stopping. Corrosion doesn’t release instantly; the oil needs time to creep down the threads. On badly seized hardware, some plumbers soak overnight. Patience here prevents the shearing that forces a bigger repair.
What if the shutoff valve is corroded and won’t turn off the water?
Turn off your home’s main water supply, then plan to replace the seized shutoff valve as part of the job. A shutoff that won’t close is a failure waiting to happen, and you’re already under the sink. Corroded compression or valve fittings often need to be cut and replaced rather than freed — see our related guidance on tub faucet repair parts and fittings for how those connections come apart.
Will removing a corroded faucet damage my pipes?
Not if you counter-hold the pipe and cut seized nuts instead of forcing them. Damage happens when torque from a stuck mounting nut twists the copper or PEX stub behind the wall. Steady the shank or valve body with a second wrench, and destroy a stubborn nut with a cutting tool rather than muscling it — that keeps the plumbing intact.
A note on doing this right
Author note: This guide was written by the adeaga fixtures team, drawing on hands-on faucet installation and removal across kitchen, bath, and tub applications. We’ve pulled apart hundreds of corroded fixtures, so the sequence above reflects what actually works under a real sink — not a lab bench. About adeaga: adeaga (adeaga.net) specializes in faucets, shower heads, and bathroom fixtures, and we test replacement hardware against the mounting and durability expectations set by standards like ASME A112.18.1/CSA B125.1. When you choose a replacement, look for a solid-brass body and a warranty that covers the finish and cartridge — a lifetime finish-and-function warranty is a strong signal you won’t be fighting corroded hardware again in a few short years.