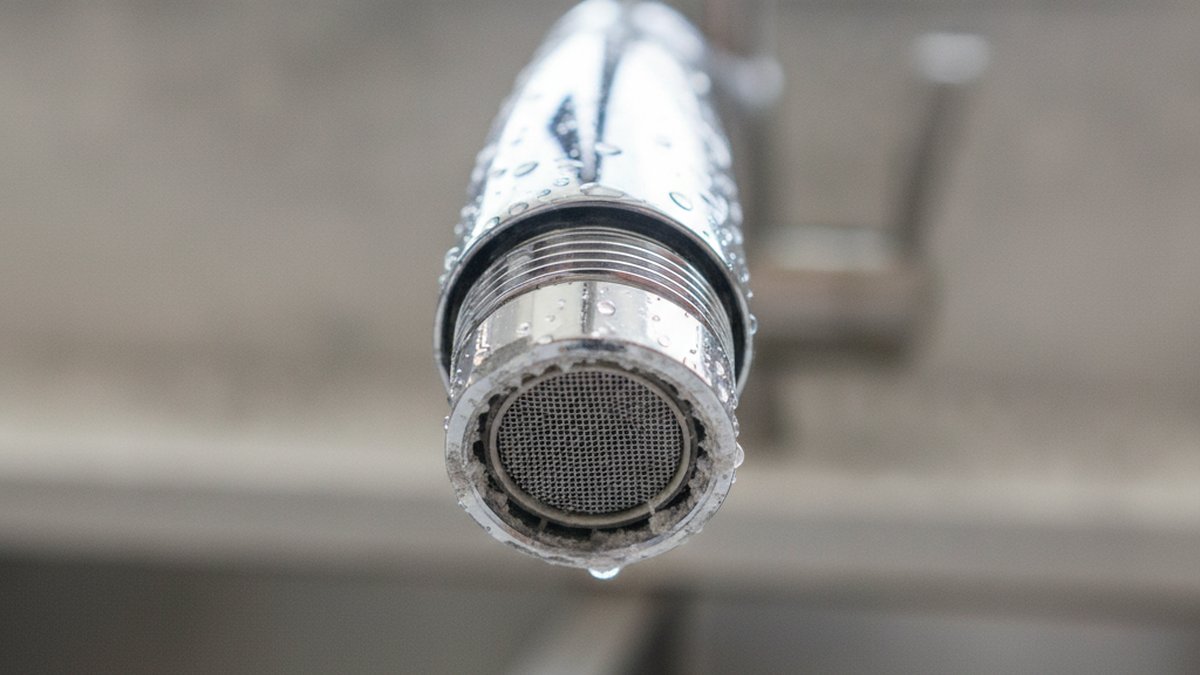
If you’ve been wondering how to clean a Moen faucet aerator because your once-strong stream has turned into a weak dribble or a sideways spray, you’re dealing with the single most common — and most fixable — faucet problem there is. The aerator is that small screw-on screen at the very tip of your spout, and on hard-water Moen faucets it clogs with calcium and lime scale faster than almost any other part. The good news: cleaning it is a 20-minute job, costs almost nothing, and restores full pressure without touching the cartridge, the valve, or anything you’d normally call a plumber for.
Below I’ll walk you through exactly how to remove, soak, scrub, and reinstall a Moen aerator — including the parts most guides skip, like which way Moen’s low-profile aerators unthread, how to get one out when it’s cemented on, and how often you actually need to do this.
What exactly is a faucet aerator, and why does the Moen one clog?
An aerator is a small insert at the mouth of your faucet that mixes air into the water stream. It does three jobs: it softens the splash, it saves water (a modern Moen aerator restricts flow to 1.5–2.2 gallons per minute), and it screens out grit. That screen is exactly why it clogs — every mineral particle, every fleck of pipe sediment, and every bit of dissolved calcium and magnesium in hard water eventually collects on it.
On Moen faucets specifically, most current models use a compact “low-profile” or “hidden” aerator that sits recessed inside the spout tip rather than sticking out with visible flat wrench edges. That design looks cleaner, but it means you often need Moen’s little plastic aerator key (the white or gray plastic tool included in the box) to unthread it. If you’ve lost yours, Moen sells replacements cheaply and most models will still come loose by hand once you break the mineral seal.
The symptom that sends most people searching is a sudden pressure drop. If your water pressure fell off gradually or only at one faucet, the aerator is almost always the culprit — not your home’s plumbing. This is the same root cause we cover in our guide on how to clean the aerator in your faucet when the water pressure drops, and the Moen version is just a slightly fussier variation on that fix.
How do I remove a Moen aerator without scratching the finish?
Remove it by hand first — turn it clockwise-to-loosen from your point of view standing over the sink, because you’re looking up at the underside of the threads. Most Moen aerators are meant to come off finger-tight. If it won’t budge, that’s mineral scale acting like glue, and here’s how to get it off without wrecking the finish.
- Cover the drain. Put in the stopper or lay a rag over the drain hole so no small parts disappear. Aerator internals are tiny.
- Try the plastic Moen key. If your model is a recessed cache/hidden aerator, insert the plastic key so its teeth engage the notches inside the spout, then turn. The plastic won’t mar chrome, brushed nickel, or matte black.
- Wrap before you reach for metal. If you must use pliers or an adjustable wrench on an external aerator, wrap the aerator in a rubber band, a cloth, or a strip of masking tape first. This is critical on finishes like brushed nickel or matte black, where a bare wrench leaves permanent scars. (Our guide on how to clean nickel faucets without ruining the finish explains why these coatings scratch so easily.)
- Break a stubborn seal with vinegar. If it’s truly stuck, soak a paper towel in white vinegar, wrap it around the spout tip, seal it with a small plastic bag and a rubber band, and wait 30–60 minutes. The acid dissolves the mineral bond and it’ll usually turn freely afterward.
Never crank hard on a hot spout or you can crack the plastic housing many Moen aerators use. Patience and vinegar beat brute force every time.
What’s the best way to actually clean the aerator once it’s out?
Soak it in a 50/50 mix of white vinegar and warm water for 15–30 minutes, then scrub with an old toothbrush. Vinegar is a mild acid that dissolves calcium and lime scale without harming the aerator’s brass, plastic, or rubber components. Here’s the full sequence:
- Disassemble over a towel. A Moen aerator stacks up as several pieces: the outer housing, a rubber washer/O-ring, a flow restrictor disc, and one or two mesh screens. Pop them apart gently and lay them out in order, left to right, so reassembly is foolproof.
- Photograph the stack. Snap a quick phone photo of the order and orientation before you clean. This is the step people regret skipping.
- Soak. Drop all the parts into a cup of the vinegar solution. For heavy scale, go the full 30 minutes; for light buildup, 15 is plenty.
- Scrub. Use an old toothbrush to work loose the softened deposits. For pinhole clogs in the screen, gently poke them clear with a toothpick or a straightened paperclip — don’t tear the mesh.
- Rinse thoroughly. Run every piece under clean water to flush out grit and any vinegar residue. Hold the screen up to the light — you should see clean, even mesh, no white crust.
If the buildup is severe and vinegar isn’t cutting it, a commercial lime-and-scale remover like CLR works faster — just cut the soak time to 5–10 minutes and rinse extra well, because it’s far more aggressive than vinegar. We break down that approach in our guide on how to clean a faucet head with CLR. For everyday maintenance, though, plain white vinegar is safer on rubber and plastic parts and is all most Moen aerators ever need.
Should I use vinegar, CLR, or bleach on my aerator?
Use white vinegar for routine cleaning and CLR only for stubborn scale — and skip bleach entirely. Bleach doesn’t dissolve mineral deposits (scale isn’t organic), so it does nothing for the actual clog and can degrade rubber washers. Here’s a quick comparison of the realistic options:
| Cleaner | Best for | Soak time | Watch-outs |
|---|---|---|---|
| White vinegar (50/50) | Routine light-to-moderate scale | 15–30 min | Very safe on all parts; slow on heavy buildup |
| CLR / lime-scale remover | Heavy, hardened calcium | 5–10 min | Aggressive — rinse thoroughly, don’t over-soak rubber |
| Citric acid solution | Moderate scale, low odor | 20–30 min | Mix 1–2 tbsp per cup of warm water |
| Bleach | Not recommended | — | Doesn’t dissolve minerals; harms rubber seals |
How do I put the Moen aerator back together correctly?
Reassemble the parts in the exact reverse order you removed them, then screw the aerator back on hand-tight — never with a wrench. Getting the internal stack right is what matters most: the rubber washer and flow restrictor have to sit in the correct orientation or you’ll get leaks or reduced flow.
- Rebuild the stack. Using your photo, layer the screen(s), flow restrictor, and washer back into the housing in their original order and facing.
- Seat the washer. Make sure the rubber O-ring or washer sits flat. A pinched or off-center washer is the #1 cause of a post-cleaning drip around the spout tip.
- Thread by hand. Start the threads by hand to avoid cross-threading, which can strip the soft brass or plastic. Turn counterclockwise (from your overhead view) to tighten.
- Snug, don’t crank. Hand-tight plus maybe an eighth-turn with the plastic key is enough. Over-tightening cracks housings and crushes washers.
- Test. Turn the water on. You want a full, straight, air-softened stream with no side spray and no leaking at the threads.
If water sprays sideways after reassembly, the screen is misaligned — take it apart and re-seat it. If it drips where the aerator meets the spout, the washer isn’t flat or the aerator needs another quarter-turn.
How often should I clean my Moen aerator, and what if cleaning doesn’t fix it?
Clean it every 3–6 months if you have hard water, or once a year with soft water. Hard-water households (anything above roughly 7 grains per gallon) build scale fast, so a twice-a-year rhythm keeps pressure strong and prevents the aerator from cementing itself in place. If you’re not sure how hard your water is, an inexpensive test strip or your local utility’s water report will tell you.
Cleaning fixes the vast majority of pressure and spray problems. But if you’ve cleaned the aerator and pressure is still weak, work through this short checklist:
- Check other faucets. If pressure is low everywhere, the problem is your home’s supply or pressure regulator, not this aerator.
- Inspect the supply lines and shutoff valves. A partially closed under-sink shutoff or a kinked supply hose starves the faucet.
- Look at the cartridge. On Moen faucets, a worn or sediment-clogged cartridge reduces flow and causes drips. If pressure is fine but the faucet leaks, that’s cartridge or O-ring territory.
- Consider the O-rings. Leaks at the base of the spout usually mean worn seals — see our walkthrough on how to do a water faucet O-ring replacement yourself.
- Replace the aerator. If the mesh is torn or the plastic is cracked, a new Moen aerator costs only a few dollars and screws right on.
Can I just replace the aerator instead of cleaning it?
Yes — and sometimes you should. If the screen is torn, the flow restrictor is warped, or the housing is cracked, replacement is smarter than cleaning. Moen sells model-specific aerator kits, and matching the thread size and finish is the only trick. Bring your old aerator to the store or note your faucet’s model number so you get the correct male/female thread and the finish that matches your spout (chrome, brushed nickel, matte black, etc.). A fresh aerator restores factory flow instantly.
Why does my Moen faucet spray to the side after cleaning?
A sideways spray almost always means a screen or flow restrictor went back in crooked or upside-down. Disassemble it again, check your reference photo, and re-seat each disc flat and centered. Trapped debris caught between the screen and housing can also deflect the stream, so give everything one more rinse before reassembling.
Author note & why you can trust this guide
This guide was written by the adeaga fixtures team, drawing on hands-on servicing of hundreds of residential faucets across chrome, brushed nickel, and matte black finishes. adeaga is a specialist faucet and bathroom-fixtures brand at adeaga.net, and every repair method here is tested on real hardware, not copied from spec sheets. We follow manufacturer maintenance guidance and note that aerators sold in the U.S. are built to standards like ASME A112.18.1 / CSA B125.1 for flow and safety — and that routine cleaning like this does not void a Moen faucet’s Limited Lifetime Warranty, whereas using abrasive tools or harsh chemicals on the finish can. When in doubt about a warranty repair, check your model’s documentation before disassembling anything beyond the aerator.
FAQ
How do I clean a Moen faucet aerator without removing it?
Soak it in place. Fill a small plastic bag with white vinegar, slip it over the spout so the aerator is submerged, and secure it with a rubber band for 30–60 minutes. Then run the water to flush loosened scale. This works for light buildup, but for a real clog you’ll get far better results removing and disassembling the aerator so you can scrub the individual screens.
Which way do I unscrew a Moen aerator?
Because you’re looking up at the underside of the spout, turn the aerator clockwise (from your overhead viewpoint) to loosen it and counterclockwise to tighten. Most come off by hand; recessed “hidden” Moen aerators need the included plastic key to grip the internal notches.
What if I lost the Moen aerator key?
Moen sells inexpensive replacement keys, and they’re model-specific, so match yours by faucet model number. In a pinch, a stuck recessed aerator will often loosen after a 30-minute vinegar soak, after which you can sometimes turn it with gentle finger pressure or fine needle-nose pliers used very carefully inside the tip.
Can vinegar damage my Moen faucet’s finish?
Vinegar is safe on the aerator’s internal brass and plastic, but don’t leave it sitting on delicate exterior finishes like matte black or brushed nickel for long periods, as prolonged acid contact can dull some coatings. Rinse the spout with clean water after any wrapped soak, and wipe it dry.
How do I know if it’s the aerator or the cartridge causing low pressure?
Unscrew the aerator and run the water. If the flow is strong with the aerator off, the aerator was your problem — clean it. If flow is still weak with the aerator removed, the issue is upstream: a clogged cartridge, a partly closed shutoff valve, or a supply-line problem.