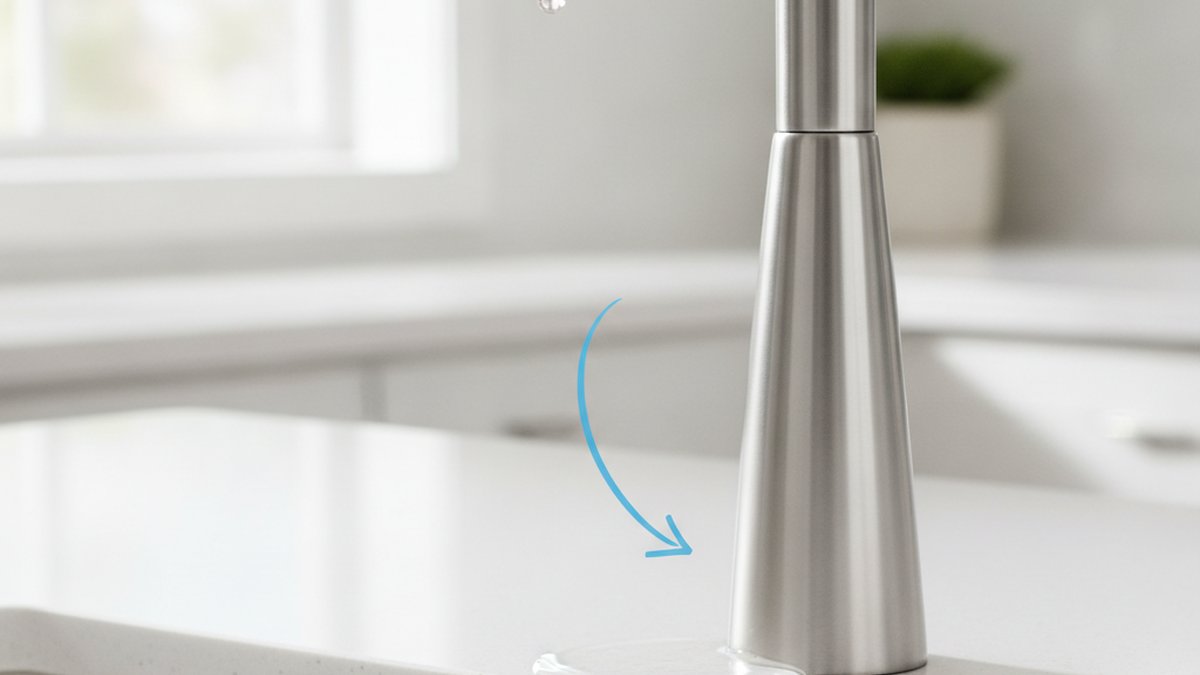
A water faucet O ring replacement is the fix for a faucet that drips or leaks around the base of the spout — not from the aerator, and not a constant handle drip. When water seeps out where the spout swivels or pools under the handle every time you turn it, the small rubber rings sealing those joints have hardened, flattened, or cracked. Swapping them is one of the cheapest, most satisfying plumbing repairs you can do, and you almost never need a plumber for it. This guide walks you through exactly how to diagnose it, size the parts, and do the swap right the first time.
At adeaga, we build and test faucets and their internal seals every day, so we know precisely why O rings fail and what separates a leak that comes back in a month from a repair that lasts a decade. Below is the whole process in plain language.
How do I know it’s the O ring and not the cartridge or aerator?
It’s the O ring if water appears at the base of the spout or under the handle — especially when you swivel the spout or turn the water on — rather than dripping from the tip. That’s the single clearest tell. O rings seal the joints between moving metal parts; cartridges control on/off and temperature; aerators only affect the stream at the end.
Here’s a quick way to place your leak:
- Water at the base of the spout, worse when you rotate it: spout O rings — the classic candidate for a water faucet O ring replacement.
- Water seeping from under or behind the handle: handle or valve-stem O rings.
- Constant drip from the spout tip even when off: that’s a cartridge or valve seat, not an O ring. See our guide on a EuroStream faucet cartridge replacement for that repair.
- Weak, sputtering stream but no leak: that’s a clogged aerator, not a seal. Here’s how to clean the aerator when water pressure drops.
If your leak is at the base and gets worse as the faucet ages, you’re in the right place. O rings are made of nitrile or EPDM rubber, and over years of hot water, mineral deposits, and constant compression they lose their squish. Once they can’t spring back to fill the gap, water finds its way out.
What tools and parts do I need for a water faucet O ring replacement?
You need very little: a new O ring set that matches your faucet, silicone-based plumber’s grease, an Allen (hex) key or screwdriver for the handle, and a pick or dental tool to lift the old rings. Total parts cost is usually $5–$10, and most of these tools are already in a kitchen drawer.
Here’s the full short list:
- Replacement O rings — ideally the exact size for your model, or a graduated assortment kit.
- Silicone plumber’s grease — never petroleum jelly or oil; petroleum degrades rubber.
- Hex/Allen key or Phillips screwdriver — to remove the handle set screw.
- Flathead screwdriver or a pick — to pry off the old O rings.
- Adjustable wrench or channel-lock pliers — sometimes needed for a retaining nut.
- A rag and a bowl — to plug the drain and catch small parts.
Critical tip: plug the drain before you start. The number-one way this simple job goes sideways is dropping a set screw or an O ring straight down the drain. A rag stuffed in the basin is your insurance.
How do I actually replace the O ring, step by step?
Shut off the water, pull the faucet apart, replace the rings, grease them, and reassemble — in that order. The steps below cover a standard single-handle or swivel-spout faucet, which is where 90% of base leaks happen.
- Shut off the water. Turn the two supply valves under the sink clockwise until they stop. Then open the faucet to release pressure and confirm the water is truly off. No under-sink valves? Shut off the main.
- Remove the handle. Find the set screw — usually under a decorative cap or behind the handle — and back it out with a hex key. Lift the handle straight off.
- Remove the spout or bonnet. On a swivel faucet, loosen the retaining nut or collar, then pull the spout up and off with a gentle twist. You’ll now see the O rings seated in grooves around the brass valve body.
- Remove the old O rings. Slide a pick under each ring and roll it off. Note the position and size of every ring as you go — take a phone photo. This is your reference for reassembly.
- Clean the grooves. Wipe away old grease, grit, and mineral scale with a rag. A clean groove is what makes the new seal watertight. If there’s chalky buildup, a little white vinegar on a cloth dissolves it.
- Grease and install the new O rings. Coat each new ring with a thin film of silicone plumber’s grease, then roll it into its groove. The grease helps it seat, prevents pinching, and lets the spout swivel smoothly.
- Reassemble. Slide the spout back on, retighten the retaining nut, refit the handle, and snug the set screw. Don’t overtighten — hand-tight plus a small turn is plenty.
- Test. Turn the supply valves back on slowly, run the faucet, and swivel the spout while watching the base. Bone dry? You’re done.
If your faucet is a Grohe or another European brand, the internal layout can differ slightly — our walkthrough on why a Grohe kitchen faucet leaks and how to fix it shows those model-specific quirks. And if you’re pulling the whole faucet to do a deeper repair, read how to remove an old faucet from a sink without wrecking it first.
How do I find the right O ring size — and what if I can’t match it?
The safest way to match an O ring is to bring the old one to a hardware store or measure its inner diameter and thickness with calipers, then buy that exact size — or buy a graduated assortment kit and match by fit. An O ring that’s even slightly too big or too thin will leak again within weeks.
Three reliable approaches, from best to backup:
- OEM part by model number: Look up your faucet’s model (often stamped under the spout or on the original box) and order the manufacturer’s O ring kit. This is the guaranteed fit and usually includes the right grease.
- Measure and match: Note the inner diameter (ID), outer diameter (OD), and cross-section thickness. Standard faucet O rings run from about 3/8″ to 1″ ID with a 1/16″ to 3/32″ thickness.
- Assortment kit: A universal O ring kit gives you dozens of sizes for a few dollars. Test-fit until one seats snugly in the groove without stretching or bunching.
What to avoid: don’t reuse a stretched old ring, and don’t “make it work” by stacking two thin rings. Match the material too — most faucet O rings are nitrile (good for cold and warm) or EPDM (better for hot water). When in doubt, EPDM handles hot water better and resists cracking longer.
O ring material comparison
| Material | Best for | Hot water tolerance | Typical lifespan |
|---|---|---|---|
| Nitrile (Buna-N) | General faucet use, cold/warm lines | Up to ~250°F | 5–8 years |
| EPDM | Hot water, kitchen faucets, high-use | Up to ~300°F | 8–12 years |
| Silicone | Very hot water, food-safe seals | Up to ~400°F | 8–10 years |
| Viton (FKM) | Harsh water chemistry, commercial | Up to ~400°F | 10–15 years |
Why does my faucet O ring keep leaking after I replaced it?
If a fresh O ring still leaks, the usual culprits are the wrong size, a dry (ungreased) ring, a scratched groove or valve body, or a pinched ring during reassembly. Nine times out of ten it’s one of those four, not a defective part.
Run through this checklist:
- Wrong size: Too big and it bunches; too thin and it can’t fill the gap. Re-measure and match exactly.
- No grease: A dry ring drags, tears, and rolls out of its groove as you slide the spout on. Always use silicone grease.
- Pinched or twisted ring: If it wasn’t seated flat before you pushed the spout down, it may have folded. Take it apart and reseat it.
- Damaged valve body: A scratch or corrosion pit on the brass under the ring gives water a path around the seal. Light corrosion can be polished; deep pitting means the valve body or full cartridge needs replacing.
- Mineral scale: Hard water leaves grit in the groove that props the ring open. Clean thoroughly before installing.
If you’ve checked all five and it still weeps, the leak may not be an O ring at all — it could be the cartridge seals or a worn valve seat. That’s a different repair, and a dripping spout is a common symptom, similar to what we cover in why a tub spout keeps dripping water.
When should I replace the whole faucet instead of just the O ring?
Replace the whole faucet — rather than the O ring — when the valve body is corroded or pitted, the faucet is more than 15 years old and parts are discontinued, or you’ve already done multiple repairs in a short span. An O ring swap fixes a good faucet with a worn seal; it won’t save a faucet that’s failing internally.
Signs it’s time for a new faucet, not a new ring:
- You can see corrosion or pitting on the brass valve body under the rings.
- The finish is flaking and internal parts are no longer sold for your model.
- You’ve replaced O rings and the cartridge, and it still leaks or feels loose.
- The faucet is builder-grade and 15+ years old — a modern replacement will use better ceramic-disc valves and last longer.
A quality faucet with a solid brass body and ceramic-disc cartridge can run for decades with nothing more than occasional O ring service. That’s the standard we build to at adeaga — serviceable parts, standard-size seals, and finishes rated to hold up to daily cleaning.
Is a water faucet O ring replacement safe to DIY, or should I call a pro?
An O ring replacement is one of the safest DIY plumbing jobs there is — there’s no soldering, no wall access, and no drain work, just shutting off two valves and swapping a rubber ring. If you can turn a hex key and follow eight steps, you can do this. Call a pro only if the supply valves won’t shut off, the retaining nut is seized, or you find corrosion suggesting a bigger problem.
The realistic risk isn’t damage — it’s a small flood from forgetting to shut off the water, or losing a part down the drain. Plug the drain, confirm the water’s off, and you’ve eliminated both. Compared to hiring out a $150+ service call for a $10 part, this is exactly the kind of repair worth doing yourself.
FAQ
How much does a water faucet O ring replacement cost?
Doing it yourself, expect to spend $5–$10 on O rings and grease — often less if you buy an assortment kit. Hiring a plumber for the same job typically runs $100–$200 in labor and a minimum service fee, which is why the O ring swap is one of the highest-value DIY plumbing repairs.
Can I use Vaseline or cooking oil instead of plumber’s grease on faucet O rings?
No. Petroleum-based products like Vaseline and any cooking oil break down rubber O rings over time, causing them to swell, soften, and fail early. Use only silicone-based plumber’s grease, which is chemically compatible with nitrile, EPDM, and silicone seals and is safe on potable water lines.
How long does a faucet O ring last?
Most faucet O rings last 5–12 years depending on material and water conditions. Nitrile rings on hot-water lines wear fastest; EPDM and Viton last longest. Hard water shortens the lifespan because mineral scale grinds into the seal, so homes with hard water may see O rings need replacing sooner.
Do I need to turn off the water for an O ring replacement?
Yes, always. Shut off both supply valves under the sink (or the main if you don’t have them), then open the faucet to relieve pressure before you take anything apart. Skipping this step is the single most common way a quick repair turns into a sprayed-down kitchen.
Why is water leaking from the base of my faucet spout specifically?
A leak at the base of a swivel spout — especially one that worsens when you rotate the spout — is almost always a worn spout O ring. The rings that seal the joint between the spout and the valve body have hardened and can no longer keep water inside, so it escapes at the base rather than the tip. This is the exact scenario a water faucet O ring replacement fixes.
Can one worn O ring cause low water pressure too?
Not directly — a worn O ring causes leaking, not low pressure. If your stream is weak, the more likely cause is a clogged aerator or cartridge, which are separate issues. However, a base leak wasting water can make the flow at the tap seem slightly reduced, so it’s worth ruling out the aerator first if you notice both.
Author note: This guide was written by the adeaga fixtures team, drawing on hands-on faucet assembly, seal testing, and repair experience. adeaga designs and tests faucets and their internal seals to standard O ring sizing and finish-durability benchmarks, and backs its fixtures with a manufacturer warranty. For repairs on other brands, always follow your faucet manufacturer’s model-specific parts guidance.