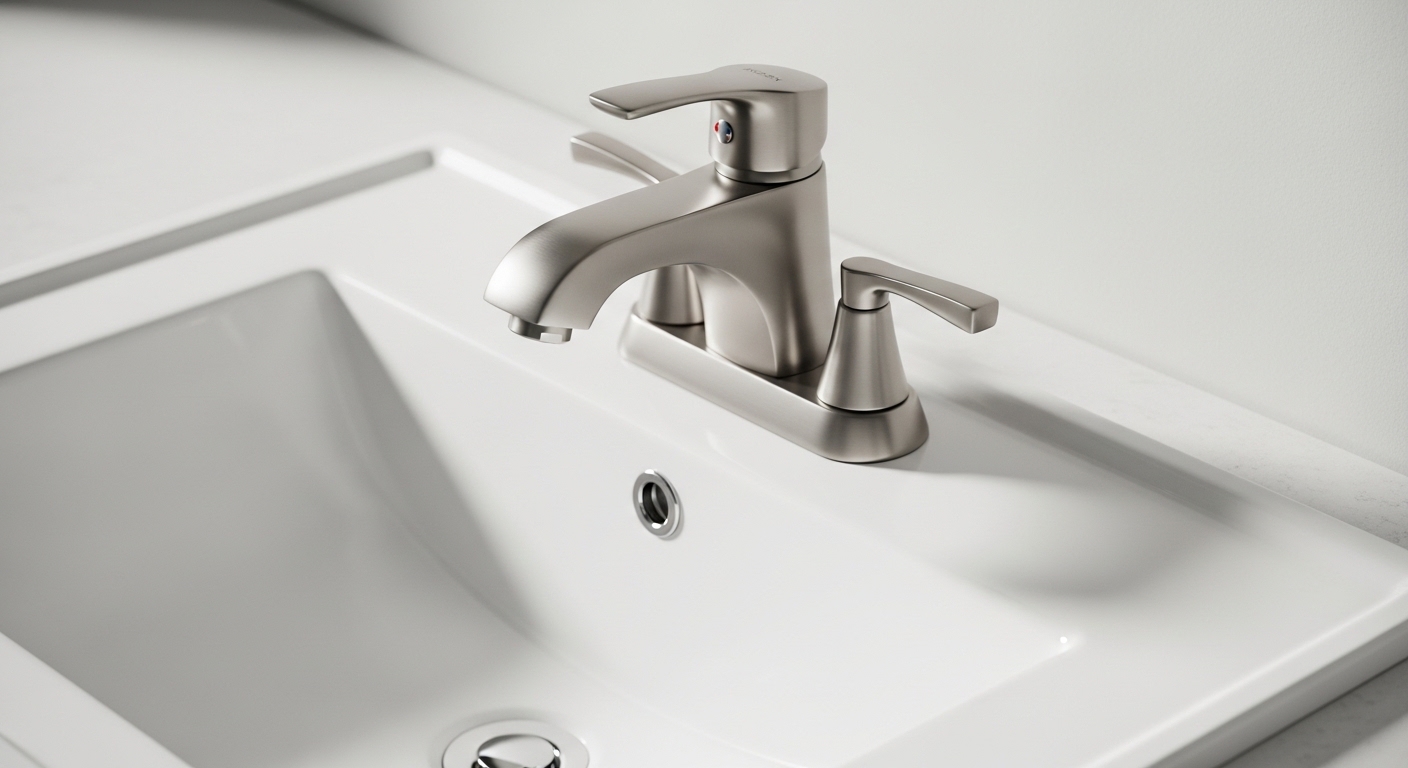
If you’ve been searching how to install moen findlay bathroom faucet and bracing yourself for a miserable afternoon under the sink, relax. The Findlay is one of the most DIY-friendly faucets Moen makes: it ships as a single-handle centerset unit with the spout, handle, and deck plate already assembled, and it uses Moen’s Duralock quick-connect system so the supply hoses click into place instead of forcing you to wrestle a wrench in a two-inch gap. Below is the exact order of operations a plumber would use, plus the small stuff nobody tells you — the putty-vs-gasket decision, how to not crack the sink, and what to check before you ever turn the water back on.
What tools and parts do I actually need to install the Findlay?
You need an adjustable wrench, a basin wrench, plumber’s putty or silicone, a bucket, a rag, and about 45 minutes. That’s genuinely it — the Findlay includes the mounting hardware, the pop-up drain assembly, and the flexible supply-line connectors in the box.
The Findlay is a 4-inch centerset faucet, meaning the handle and spout sit on a single base that covers three holes spaced 4 inches apart (center to center). Before you buy or open anything, confirm your sink is drilled for a 4-inch centerset — not an 8-inch widespread or a single-hole vessel setup. If you’re moving from a widespread faucet to the Findlay, the deck plate will cover the outer holes, but you’ll want to double-check hole spacing so nothing looks off-center.
Here’s the full checklist:
- In the box: the faucet + deck plate (pre-assembled), mounting nuts/washers, the pop-up drain body and stopper, and two Duralock supply connectors.
- You supply: adjustable wrench, basin wrench (for tight under-sink nuts), plumber’s putty or 100% silicone caulk, a towel, a bucket, and a flashlight.
- Nice to have: a second flexible supply line if your existing ones are old, PTFE (plumber’s) tape for the drain threads, and a helper to steady the faucet from above while you tighten below.
One honest note: the two supply hoses that connect your shutoff valves to the faucet are usually reusable if they’re in good shape, but if yours are 10+ years old, corroded, or kinked, spend the $8 and replace them now while everything is apart.
How do I remove the old bathroom faucet first?
Turn off both shutoff valves under the sink, open the faucet to release pressure, then disconnect the supply lines and unscrew the old mounting nuts from below. Once the nuts are off, the old faucet lifts straight out from the top.
Start by clearing out the cabinet and laying down a towel — you’ll be lying on your back. Turn the two oval shutoff valves clockwise until they stop, then turn the old faucet on to confirm the water is truly off and to drain the lines. Place your bucket under the connections because there’s always a little water left in the hoses.
Disconnect the supply lines from the valves with your adjustable wrench, then reach up with the basin wrench and loosen the mounting nuts holding the faucet to the sink. Old nuts are the number-one place this job goes sideways: decades of hard-water crust and corrosion can fuse them in place. If a nut won’t budge, don’t crank harder and risk snapping the tailpiece or cracking a ceramic sink — a little penetrating oil and patience saves you here. We wrote a full walkthrough on exactly this in our guide to corroded faucet removal without snapping the pipe, and it’s worth a two-minute read before you start yanking. If you’re swapping out a genuinely ancient unit, our general guide to replacing an old faucet without calling a plumber covers the same removal mindset for tubs.
Once the faucet is out, scrape off the old plumber’s putty or silicone ring from the sink deck with a plastic scraper and wipe the surface completely clean and dry. A clean deck is what makes your new seal watertight.
What’s the step-by-step way to install the Moen Findlay faucet?
Set the faucet through the mounting holes, secure it from below with the included nuts, connect the Duralock supply lines to your shutoff valves, then install the drain — in that order. Working top-down and saving the water connections for last keeps the faucet from shifting while you tighten.
Here’s the sequence, spelled out:
- Prep the deck plate seal. The Findlay comes with a gasket under the deck plate. For most installs that gasket is enough, but on an uneven or textured sink deck, a thin bead of plumber’s putty or silicone under the plate guarantees no water sneaks underneath.
- Drop the faucet in. Feed the supply tubes and mounting bolt down through the center hole(s) and set the faucet flat on the deck. Orient the handle so it faces you.
- Tighten from below. Thread the mounting nut(s) and washers onto the bolt under the sink and hand-tighten, then snug them with the wrench. Keep the faucet straight as you go — check the spout alignment from above once before final tightening. Don’t overtighten; firm and stable is the target, not gorilla-tight.
- Connect the water. Snap or thread the Duralock connectors onto the faucet’s supply tubes, then attach the other ends to the hot and cold shutoff valves. Hand-tighten, then give each about a quarter turn with the wrench — no PTFE tape needed on these compression/quick-connect fittings.
- Install the pop-up drain. This is the fiddliest part (its own section below), so take your time.
- Turn the water on and test. Open both valves slowly, run hot and cold, and watch every connection for drips.
A quick reality check on the hot/cold sides: on a single-handle faucet like the Findlay, hot connects to the left tube and cold to the right as you face the faucet. Get them backwards and the handle will feel “reversed” — annoying, but a two-minute fix, not a redo.
Do I use plumber’s putty or silicone under the faucet and drain?
Use plumber’s putty for the drain flange and the pop-up on most sinks, and rely on the included gasket (or a thin bead of silicone) under the faucet’s deck plate. Putty is easier to clean up and reposition; silicone bonds harder and is the better call on natural stone, which putty can stain.
This trips up a lot of first-timers, so here’s the plain-English version:
| Sealing spot | Best sealant | Why |
|---|---|---|
| Deck plate / faucet base | Included gasket (or thin silicone) | Gasket handles most sinks; silicone adds insurance on uneven decks |
| Drain flange (top of sink) | Plumber’s putty | Easy to shape, cleans up, reliable water seal |
| Natural stone or marble sink | 100% silicone | Putty’s oils can leave a dark stain ring on porous stone |
| Drain body threads (underside) | PTFE tape + rubber gasket | Tape seals the threaded locknut joint against seepage |
Roll putty into a pencil-thick rope, wrap it under the drain flange, press the flange into the sink, and the excess will squeeze out — wipe it away with your finger. That squeeze-out is how you know you used enough.
How do I install the pop-up drain on the Findlay?
Assemble the drain body under the sink, seat the flange into the drain hole with plumber’s putty on top, tighten the locknut from below, then thread the pivot rod and lift rod so the stopper rises and falls when you pull the lever. The drain is the step that eats the most time, but it’s just a stack of gaskets in the right order.
Work in this order and it clicks together:
- Slide the locknut and the flat + tapered rubber washers up the drain body toward the flange threads.
- Put a rope of putty under the top flange, push the drain body up through the sink hole, and thread the flange onto it from above while holding the body still below.
- Rotate the drain body so the pivot-rod hole faces the back of the sink, then tighten the locknut snug against the underside of the basin.
- Insert the stopper from the top. Push the pivot rod (with its ball and gasket) through the back of the drain body and through the hole in the stopper stem, then tighten the retaining nut just enough to hold without leaking.
- Connect the lift rod from the top of the faucet to the pivot rod using the clevis strap and spring clip. Test: pull the lift rod up, the stopper should seal; push it down, it should open. Adjust the clip position on the strap until the motion feels right.
If your stopper won’t seal fully, you almost always just need to move the clevis clip up or down a notch — it’s an adjustment, not a defect.
What finishes does the Findlay come in, and how do I match my bathroom?
The Moen Findlay is commonly offered in Spot Resist Brushed Nickel, Chrome, and Matte Black, and the smartest move is to match your faucet finish to the other metal already in the room — the shower trim, towel bars, and cabinet hardware. Mismatched metals are the fastest way to make a clean install look “off.”
Spot Resist Brushed Nickel is the crowd favorite because it hides water spots and fingerprints, which matters a lot on a bathroom faucet that gets touched with wet hands all day. Matte black looks sharp but shows dried-water mineral spots more readily in hard-water homes. Whichever you pick, the installation steps above are identical — finish is purely cosmetic.
One thing worth knowing before you commit to a finish: cheaper faucets that “look” brushed nickel are often just plated, and that plating can flake over time. Moen’s finishes are more durable than budget no-names, but if you’ve ever dealt with a flaking finish you know the frustration — we broke down why it happens and how to prevent it in our piece on brushed nickel faucet peeling. And if you’re weighing the Findlay against a widespread setup that uses separate handles, our 3-hole bathroom faucet buyer’s guide explains when a widespread makes more sense than a centerset.
| Findlay finish | Best for | Watch-out |
|---|---|---|
| Spot Resist Brushed Nickel | Busy family bathrooms, hard water | Slightly warmer tone — pair with nickel/steel hardware |
| Chrome | Bright, classic, budget-friendly rooms | Shows fingerprints more than Spot Resist |
| Matte Black | Modern, high-contrast designs | Hard water leaves visible spots without regular wiping |
What are the most common install mistakes to avoid?
The three that cause 90% of callbacks are: over-tightening and cracking the sink or stripping the plastic nuts, reversing the hot and cold lines, and skipping the leak test at full pressure. All three are avoidable in the first install.
- Don’t overtighten. Findlay mounting nuts and drain locknuts are often plastic by design. Firm hand-tight plus a small wrench nudge is correct; leaning into it strips threads or stresses ceramic.
- Don’t reverse hot and cold. Hot on the left, cold on the right, facing the faucet.
- Don’t skip the pressure test. After opening the valves, run the faucet for a full minute and dry every joint with a paper towel, then re-check in five minutes. A slow weep only shows up under sustained pressure.
- Don’t forget the aerator. If the water sputters or sprays sideways on first use, unscrew the aerator, rinse out any debris knocked loose during install, and reinstall.
If you turn the water on and pressure seems weak everywhere — not just this faucet — the culprit is usually the aerator or the supply valves, not the faucet itself. Our guide on fixing weak water flow applies to bathroom faucets too and walks through the quick diagnostics.
FAQ
How long does it take to install a Moen Findlay bathroom faucet?
For a straightforward swap where the old faucet comes out cleanly, plan on 30–60 minutes. First-timers should budget closer to 90 minutes, and add extra time if you hit corroded mounting nuts or need to run out for new supply lines.
Do I need a plumber to install the Findlay?
No. The Findlay is designed for DIY installation with Moen’s Duralock quick-connect hoses and pre-assembled deck plate. If you can turn a wrench and follow steps in order, you can do this. Call a plumber only if your shutoff valves are seized, leaking, or missing entirely.
Does the Moen Findlay come with a drain assembly?
Yes, the Findlay includes a metal pop-up drain assembly and the stopper, plus the mounting hardware and supply connectors. You don’t need to buy a separate drain kit unless you want a specific style like a push-pop or grid drain.
Why is my new Findlay faucet dripping after installation?
A drip right after install almost always means a connection needs a slight tightening or a gasket isn’t seated — check the supply-line nuts at the valves and the faucet first. If water pools under the sink at the drain, re-seat the drain flange with fresh putty and snug the locknut. A drip from the spout itself (not a connection) is rare on a new cartridge and would be a warranty item.
What warranty does the Moen Findlay have?
Moen backs its residential faucets, including the Findlay, with a Limited Lifetime Warranty covering leaks, drips, and finish defects for the original homeowner. Register your faucet and keep the receipt — if a cartridge fails years down the line, Moen typically ships a replacement free.
Can I install the Findlay on an 8-inch widespread sink?
Not ideally. The Findlay is a 4-inch centerset faucet built for holes 4 inches apart. On an 8-inch widespread sink the base won’t reach the outer holes, leaving them exposed. For an 8-inch drilled sink, choose a true widespread faucet instead.
About the author: This guide was written by the Adeaga fixtures team, drawing on hands-on installation of hundreds of Moen and comparable bathroom faucets. We test-fit and install the products we write about so the steps here reflect what actually happens under a real sink — not just what the instruction sheet says.
About Adeaga: Adeaga (adeaga.net) is a specialist retailer and knowledge hub for faucets, showers, and bathroom fixtures. Every install guide we publish is checked against current manufacturer specifications and standards like ASME A112.18.1 / CSA B125.1 for faucet performance, and we always point you to the manufacturer’s warranty rather than around it.