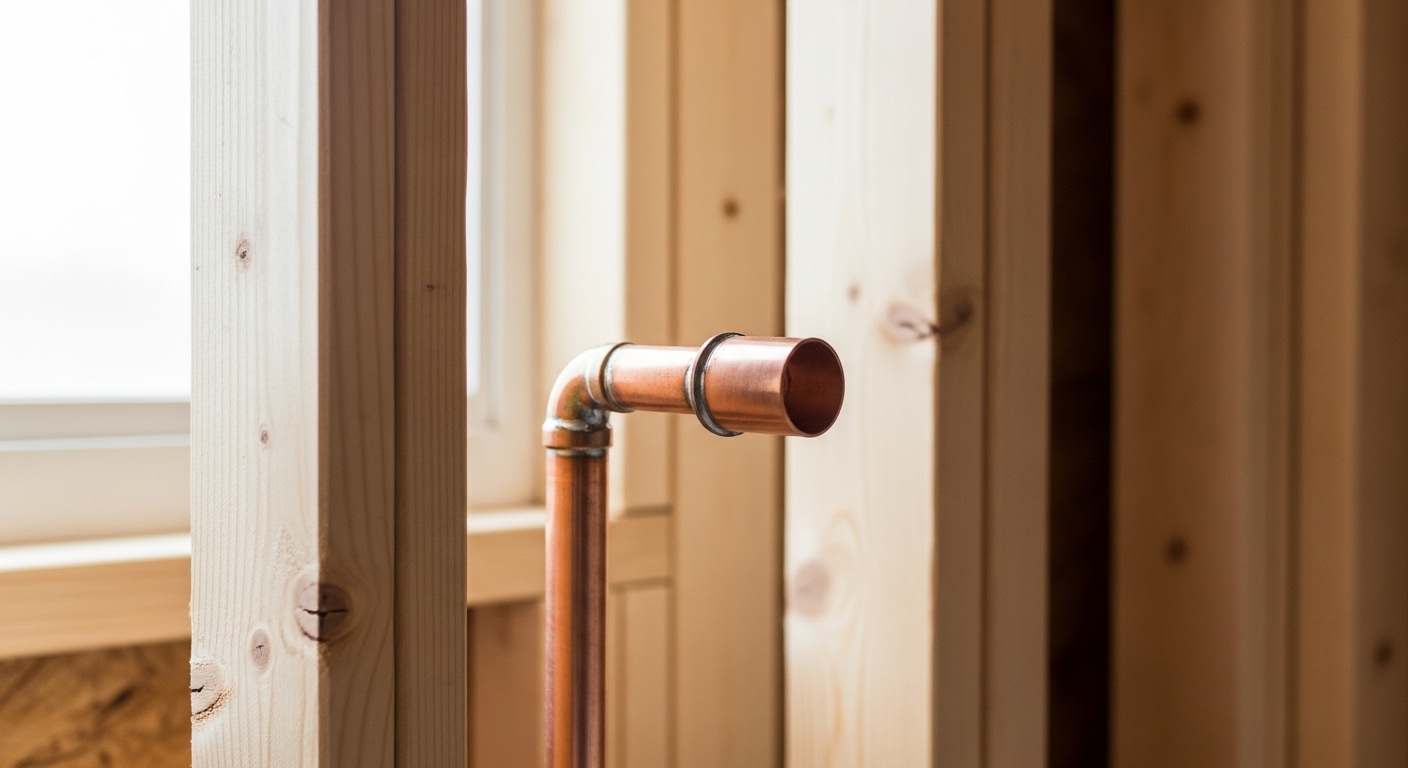
If you’re roughing in a bathroom or kitchen and someone hands you a fitting and says “leave a copper faucet stub out here,” they mean: bring the water line to this exact spot, stop it cleanly, cap it, and leave it protruding so a faucet, shower valve, or supply stop can connect to it later. It’s one of the most basic moves in any rough-in plumbing job — and also one of the most commonly botched, because people get the length wrong, forget to cap it, or sweat the joint badly and find a pinhole leak three days after the drywall goes up.
This guide walks through exactly what a stub out is, why copper is still the go-to material in 2026, how long it should stick out, how to install one without a leak, and when you should use a different material instead. At adeaga.net we sell and service faucets, supply stops, and rough-in valves every day, so this is the same advice we give customers who call us mid-project with a soldering iron in one hand and a panic in their voice.
What exactly is a copper faucet stub out — in plain English?
A stub out is the terminating end of a water supply line — the spot where the pipe “stubs out” of the wall or floor and waits for a fixture. For a faucet, you almost always have two of them side by side: one hot, one cold. Each is a short piece of copper that pokes through the rough opening, capped during construction so the system can be pressurized and tested.
Think of it as the handshake point between your home’s hidden plumbing and the visible fixture. Behind the wall, copper or PEX runs from your manifold or main lines. At the fixture, that run ends in a copper stub out. Later, a plumber cuts off the cap, slides on an escutcheon (the decorative wall plate), and connects an angle stop or supply valve. From there a braided supply line feeds the faucet.
The standard residential stub out is ½-inch nominal copper. That’s the diameter that matches the inlet on virtually every angle stop and compression valve sold in North America. You’ll occasionally see ¾-inch for a tub filler or high-flow application, but for a lavatory or kitchen faucet, ½-inch is the rule.
Where do stub outs show up in a typical bathroom?
- Bathroom sink (lavatory): two stub outs, hot and cold, usually 8 inches apart and roughly 19–21 inches off the finished floor.
- Kitchen sink: two stub outs under the cabinet, often closer to 22–24 inches off the floor so they clear the cabinet base.
- Toilet: a single cold-only stub out, around 6–7 inches off the floor and 6 inches to the left of center.
- Shower or tub valve: the supply runs to a mixing valve rather than a pair of exposed stops, but the rough-in still terminates in capped copper for testing.
If you’re replacing a fixture rather than roughing in new, you may never touch the stub out at all — you just connect to the existing angle stop. But the moment you move a sink, add a vanity, or open a wall, stub outs become your job.
Why use copper for a faucet stub out instead of PEX or CPVC?
Copper wins for stub outs because it’s rigid, dimensionally stable, and gives you a rock-solid surface for a compression angle stop to bite into. A stub out takes repeated stress — every time someone shuts the angle stop, wrenches a supply line on, or bumps it under the cabinet — and rigid copper simply doesn’t flex, kink, or pull out of square the way a soft line can.
That said, the honest answer in 2026 is “it depends on what’s behind the wall.” Here’s how the common materials actually compare for the stub-out termination specifically.
| Material | Best for stub outs? | Pros | Cons | Typical cost (½”) |
|---|---|---|---|---|
| Rigid copper (Type L) | Yes — gold standard | Rigid, durable, clean compression seal, fire-safe, 50+ yr life | Needs soldering or press tools; pricier | $3–$5 / ft |
| PEX with copper stub-out elbow | Yes — very common now | Flexible runs, freeze-tolerant, fast; copper “ear” elbow gives a rigid termination | Stub elbow must be secured to backing; crimp tools needed | $0.50–$1 / ft + fittings |
| CPVC | Sometimes | No torch, cheap, code-legal in many areas | Brittle when cold, less ideal compression surface | $0.40–$0.80 / ft |
| Galvanized steel | No (legacy only) | — | Corrodes, restricts flow, outdated | n/a |
Notice the second row: in modern construction, a huge share of homes run PEX through the walls but still terminate at a copper stub-out elbow (a drop-ear or “stub-out” elbow) mounted to a backing board. So even a PEX house ends in copper at the fixture. That’s why understanding the copper faucet stub out matters even if you never sweat a full copper system — the visible, connectable end is copper regardless.
How long should a copper stub out stick out of the wall?
A faucet stub out should extend about 2 to 4 inches past the finished wall surface — not past the rough framing or drywall, but past where the tile or final wall face will be. Too short and the angle stop won’t have room to seat with its escutcheon; too long and it looks sloppy and crowds the supply line. For most lavatories, plan on the copper poking out roughly 2–3 inches beyond finished tile.
The mistake people make is measuring from the studs. Remember to add for drywall (½ inch), backer board and tile (another ¼–½ inch), or thick stone. If you cut your stub flush to the rough wall thinking “I’ll have plenty,” you can end up with copper that barely clears the finished surface — leaving no room for the compression nut and ferrule. When in doubt, leave it long. You can always cut a stub out shorter with a tubing cutter; you can’t add length without re-soldering.
What height should faucet stub outs be set at?
Standard rough-in heights are well established, and following them keeps you compatible with off-the-shelf vanities, supply lines, and stops. Here are the numbers most plumbers use:
- Bathroom lavatory: stub outs 19–21 inches above finished floor, 8 inches apart (4 inches each side of the drain center).
- Kitchen sink: 22–24 inches above finished floor to clear the cabinet floor and garbage disposal.
- Toilet: 6–7 inches above finished floor, 6 inches left of the toilet centerline.
- Pedestal sink: often raised to 22–24 inches and tucked tight to centerline so the pedestal hides the lines.
If you’re matching a specific vanity or a wall-mount faucet, always confirm against that fixture’s rough-in template before you solder. A wall-mounted faucet in particular has tight tolerances, and the same care applies whether you’re roughing in supply or, say, dealing with the hidden connection hub like a widespread faucet tee on a three-hole sink.
How do I install a copper faucet stub out without a leak?
Install a leak-free copper stub out by cutting the pipe square, cleaning and fluxing both surfaces, soldering a clean joint (or using a press fitting), extending the stub 2–4 inches past finished wall, capping it, and pressure-testing before closing the wall. The order matters, and so does cleanliness — 90% of stub-out leaks come from a dirty or under-heated joint.
Here’s the workflow we walk customers through:
- Plan the termination. Decide hot/cold position (hot on the left as you face the fixture), height, and spacing. Mount a backing board between studs to anchor a drop-ear elbow so the stub can’t wiggle.
- Cut Type L copper. Use a tubing cutter, not a hacksaw, for a clean square end. Type L (thicker wall) is preferred over Type M for in-wall durability.
- Ream and clean. Ream the inside burr, then sand the pipe end and the inside of the fitting with emery cloth until bright. Oxidation kills solder bonds.
- Flux and assemble. Apply a thin, even coat of lead-free flux, seat the fitting fully.
- Solder. Heat the fitting (not the solder) until lead-free solder melts on contact and wicks into the joint. You want a clean silver ring, not a glob.
- Add the stub and cap. Solder a short length of pipe into the elbow so it extends past the finished wall, then solder a copper cap on the end.
- Pressure-test. Restore water (or air-test) and check every joint while the wall is still open. Watch for 15–30 minutes.
- Close up and finish. Only after a dry test do you insulate, drywall, and tile. Later, cut the cap off, install the angle stop, and connect your faucet.
If soldering makes you nervous, press fittings (ProPress-style) and push-to-connect fittings like SharkBite have made copper stub outs genuinely DIY-friendly — no torch, no open flame near framing. They cost more per fitting but eliminate the most error-prone step. For a single bathroom rough-in, the time and risk savings are often worth it.
Can I connect a faucet directly to the stub out, or do I need a valve?
You should almost always install an angle stop (shut-off valve) on the stub out rather than connecting the faucet directly — and most plumbing codes require it. The stop lets you shut off water to that one fixture for repairs without killing water to the whole house. Connecting a faucet straight to a capped stub is only done in rare situations and makes future maintenance miserable.
The connection chain looks like this: copper stub out → angle stop (compression or push-fit) → braided supply line → faucet inlet. The compression-style stop is what makes the rigid copper stub out so valuable: the brass ferrule needs a firm, round, undented pipe to seal against. A kinked PEX line or a dinged stub won’t seal reliably, which is exactly why the termination is copper even in PEX homes.
When you eventually hook up the faucet, that braided supply line and the angle stop are doing the real sealing work. If you’ve ever fought a fixture that wouldn’t stop dripping, the culprit is often downstream of the stub — worn supply lines, a bad cartridge, or a failing stop. Our guides on kitchen faucet repair and free standing tub faucet repair dig into those downstream problems once your stub out is solid.
What can go wrong with a copper faucet stub out?
The three big failures are leaks at the solder joint, stubs cut too short, and corrosion or pinholes over time. Each is preventable. Here’s what to watch for and how to handle it.
- Cold-solder joint: A grey, grainy, or incomplete solder ring means the joint never reached temperature. It will weep. Fix: drain, reheat, re-flux, and re-solder — or cut it out and use a press fitting.
- Stub too short: If the copper barely clears the finished wall, the angle stop ferrule has nothing to grab. Fix: solder on an extension or use a longer push-fit stop.
- Pinhole corrosion: Aggressive (low-pH) or high-velocity water can erode copper over decades, causing pinhole leaks. Type L’s thicker wall resists this better than Type M.
- Galvanic corrosion: Copper touching galvanized steel or certain fittings without a dielectric union can corrode. Use proper transition fittings.
- Frozen and split: A stub out in an exterior wall without insulation can freeze. This is the same failure mode you see on outdoor lines — our piece on the garden hose faucet stem covers freeze damage in detail.
For new work, the single best habit is the pressure test before close-up. Five extra minutes with the wall open saves you tearing out finished drywall later.
Copper vs. PEX stub-out elbow: which should I choose for a remodel?
For a remodel where you’re already opening walls, choose a PEX run with a copper drop-ear stub-out elbow if speed and freeze resistance matter, or full rigid copper if you want maximum rigidity and a traditional, repairable system. Both terminate in a copper, compression-ready face, so the faucet hookup is identical either way.
| Scenario | Recommended stub-out approach | Why |
|---|---|---|
| Single bathroom remodel, DIY | PEX + copper stub-out elbow, or push-fit copper | No torch, fast, forgiving |
| Whole-house repipe | PEX home runs, copper terminations | Cost and labor savings at scale |
| High-end / exposed copper look | Full Type L copper, soldered | Clean, traditional, premium feel |
| Cold climate, exterior wall | PEX run (freeze-tolerant) + insulated copper stub | Reduces split-pipe risk |
There’s no wrong answer here — both are code-compliant and durable. The deciding factors are your comfort with soldering, your climate, and whether any copper will be visible.
FAQ
What size copper pipe is used for a faucet stub out?
½-inch nominal copper is standard for bathroom and kitchen faucet stub outs because it matches the inlet on standard angle stops and compression valves. Tub fillers and some high-flow applications may use ¾-inch, but for any lavatory or kitchen sink faucet, ½-inch is correct.
How far should a copper stub out stick out past the wall?
Aim for 2 to 4 inches past the finished wall surface — measured beyond drywall and tile, not the studs. That gives the angle stop and escutcheon room to seat properly. If unsure, leave it long; you can trim a copper stub with a tubing cutter but can’t lengthen it without re-soldering.
Do I have to solder a copper stub out, or can I use push-fit fittings?
You can absolutely use push-to-connect (SharkBite-style) or press fittings instead of soldering. They cost more per fitting but eliminate the torch and the most common source of leaks — a poorly heated solder joint. For a single rough-in, many DIYers now skip soldering entirely.
Can I cap a copper stub out and leave it unused?
Yes. A soldered or push-fit copper cap safely seals an unused stub out indefinitely, which is exactly what’s done during construction so the system can be pressurized and tested before fixtures are installed. Just make sure the cap is rated for your water pressure and is fully seated.
Why is my copper stub out leaking at the joint?
The most common cause is a cold-solder joint — the fitting never got hot enough to fully wick the solder, leaving a grey, incomplete ring that weeps under pressure. Drain the line, reheat and re-flux the joint, or cut it out and replace it with a press fitting. Corrosion-related pinholes are the other cause and require cutting out the affected section.
Hot on the left or right at the stub out?
Hot goes on the left and cold on the right as you face the fixture. This is the universal convention, and matching it ensures the faucet handles operate the way users expect once everything is connected.
About the author: This guide was written by the adeaga.net fixtures team — plumbing-supply specialists who spec, sell, and troubleshoot faucets, supply stops, and rough-in valves daily. We field stub-out and rough-in questions from DIY remodelers and pro installers year-round, and our recommendations follow standard North American rough-in practice.
Brand credibility & standards: adeaga curates faucets and supply components that meet recognized plumbing standards (ASME A112.18.1 / NSF/ANSI 61 for wetted parts and lead-free compliance). We favor Type L copper for in-wall durability and recommend pressure-testing every rough-in before close-up. Most quality angle stops and faucets we carry are backed by manufacturer warranties — always confirm warranty terms, since improper soldering or over-tightened compression fittings can void coverage.