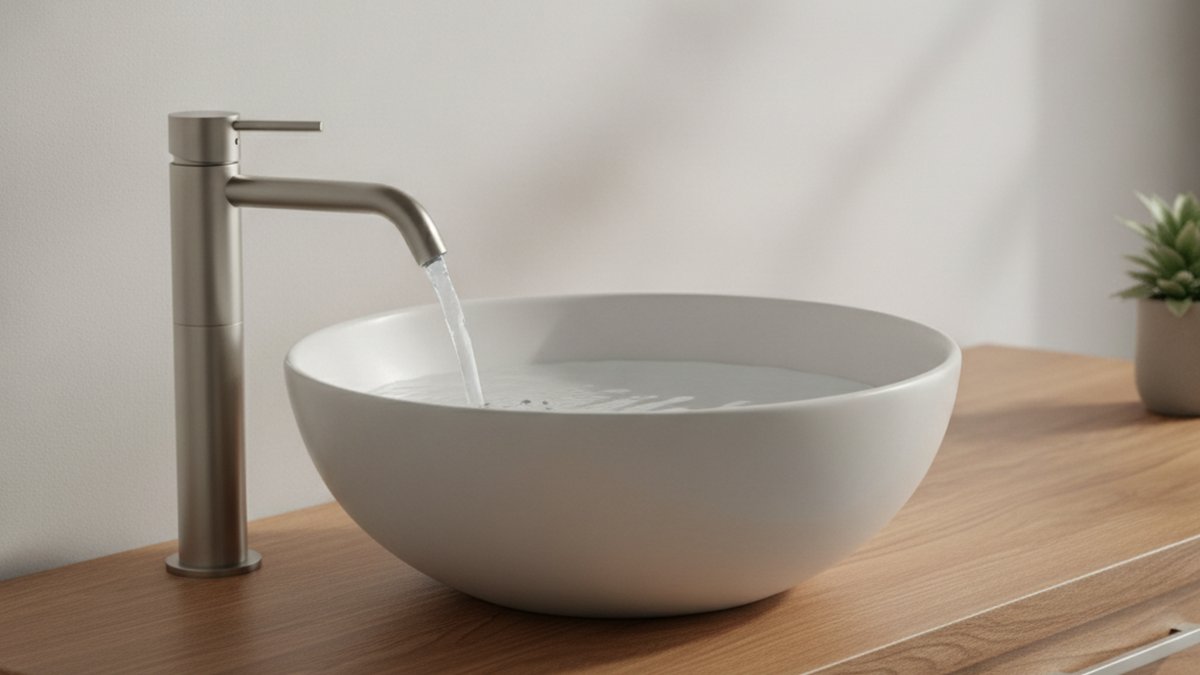
If you’ve dropped a beautiful above-counter bowl on your vanity and then realized your spout barely peeks over the rim, a vessel sink faucet riser is the part that saves the install. It’s a simple hollow column that sits between your deck and your faucet body, adding the height you need so the stream lands in the center of the basin instead of dribbling down the outside. In this guide we’ll cover exactly what a riser does, when you genuinely need one versus when you should just buy a taller faucet, how to size it, what finishes and materials hold up, and how to install it without leaks.
What exactly does a vessel sink faucet riser do?
A riser adds vertical height to a faucet so its spout clears the tall wall of a vessel bowl. Vessel sinks sit on top of the counter rather than dropping into it, so their rims typically stand 5–6 inches above the deck. A standard bathroom faucet is designed for an under-mount or drop-in sink where the basin is below the counter, so its spout height (often 4–5 inches) is too low for a vessel — the water hits the rim or splashes.
The riser is essentially a threaded tube. Your faucet’s shank passes through it, the riser sits on the deck, and the mounting hardware clamps the whole stack down through the single faucet hole. It doesn’t change how the faucet works — hot and cold supply lines still run straight down through the center — it just lifts the entire faucet body up by a fixed amount.
- Raises spout height so the stream reaches the basin center, not the rim.
- Improves reach so you can actually get your hands under the water comfortably.
- Reduces splashing caused by water falling too steeply from too low.
- Lets you keep a faucet you already own instead of buying a whole new tall model.
Do I really need a riser, or should I just buy a tall vessel faucet?
Buy a purpose-built tall vessel faucet if you’re starting from scratch; add a riser only if you already own a faucet you love or one that’s expensive to replace. A dedicated vessel faucet is engineered with the right spout height and reach in one clean piece, so there are fewer joints to leak and the proportions look intentional. A riser is the retrofit fix.
Here’s the honest math. A quality vessel faucet runs roughly $60–$250. A good metal riser runs $15–$45. So if your current faucet is a $40 builder-grade unit, a riser rarely makes sense — you’d spend half the cost of a new faucet to prop up a cheap one. But if you have a designer faucet, a matching widespread set, or a discontinued finish you can’t rematch, a riser is the smart, cheap save.
The finish decision matters more than people expect. If you’re already thinking hard about how a metal tone reads against your counter and bowl — the same way people weigh whether a Jacuzzi matte black faucet is worth it — then buy the faucet and finish you actually want as a set, rather than bolting a mismatched riser under it.
How tall should a vessel sink faucet riser be?
Match the riser so your finished spout height clears the bowl rim by at least 3–4 inches and the spout outlet sits over the drain, not the wall of the bowl. In plain numbers: measure your bowl’s height, subtract your faucet’s current spout height, and add about 3 inches of clearance — that’s the riser length you need.
Work through it like this:
- Measure bowl rim height from the counter to the top edge of the vessel (commonly 5–6 in).
- Measure your faucet’s spout height from its base to where water exits (commonly 4–5 in).
- Add 3–4 in of working clearance so hands and taller glasses fit under the stream.
- Subtract, then round to an available riser size (risers come in roughly 2, 4, 6, 8, 10, and 12 in).
Just as important is reach — the horizontal distance from the faucet base to the water outlet. If the spout is tall but short in reach, the water lands near the back wall of the bowl instead of the drain, and you’ll get splash-back. Aim for the outlet to sit over the center of the basin. Deep, narrow bowls are the least forgiving; wide, shallow bowls are the most.
Which riser material and finish should I choose?
Choose a solid-brass riser in a finish that exactly matches your faucet — brass resists corrosion, threads cleanly, and won’t crack under the clamping force. Avoid thin zinc or plastic risers; they can crush when you tighten the mounting nut and they corrode where they meet water and cleaning chemicals.
Finish-matching is the part people get wrong. A riser lives in plain sight directly under the faucet, so a slightly-off “brushed nickel” against a true “satin nickel” faucet reads as a mistake. If you can’t get an exact factory match, buy the riser from the same brand as the faucet, or accept an intentional contrast (a matte black riser under a matching black faucet, for instance). If you’re pairing warm and cool metals on purpose, the same taste rules apply as deciding whether an oil rubbed bronze faucet on a stainless sink works — contrast can look deliberate, or it can look like you ran out of options.
| Riser material | Typical price | Durability | Best for |
|---|---|---|---|
| Solid brass | $25–$45 | Excellent — won’t crush or corrode | Long-term installs, hard water, any finish |
| Stainless steel | $20–$40 | Very good — strong, rust-resistant | Brushed/satin metal finishes |
| Zinc alloy | $10–$20 | Fair — can pit and crack over time | Budget, low-use guest baths |
| Plastic/PVC | $6–$12 | Poor — flexes, discolors, may crush | Temporary or rental fixes only |
How do I install a vessel sink faucet riser myself?
You can install a riser in about 30–45 minutes with basin-wrench and adjustable-wrench basics — it’s a beginner-friendly job. The riser simply gets stacked onto the faucet shank before you drop the faucet through the counter hole, then everything clamps down together from underneath.
Here’s the sequence:
- Shut off the water at the under-sink stop valves and open the faucet to release pressure.
- Dry-fit first. Set the riser on the deck, pass the faucet shank down through it, and confirm your spout now clears the bowl and reaches the drain.
- Seal the base. Apply plumber’s putty or the supplied gasket under the riser’s base flange so water can’t seep into the counter hole.
- Feed the supply lines and shank down through the riser and the counter, then hand-thread the mounting nut from below.
- Tighten evenly with a basin wrench — snug, not gorilla-tight, so you don’t crush the riser or crack the counter.
- Connect the supply lines to the stop valves, turn the water back on, and check every joint for drips.
If you’re pulling out an existing faucet to add the riser, the removal step is where most DIYers get stuck — corroded nuts and tight cabinet space. Our walkthrough on how to remove an old faucet from a sink without wrecking it covers exactly that, and the same putty-and-torque discipline that keeps a bidet faucet replacement leak-free applies here too.
What problems does a riser cause — and how do I avoid them?
The two most common riser problems are splashing and leaks, and both come from getting the geometry or the seal wrong. Splashing happens when the spout is now tall enough but still doesn’t reach the drain, so water falls onto the sloped bowl wall and bounces out. Leaks happen when the extra joint the riser introduces isn’t sealed properly, or when the mounting nut is over- or under-tightened.
Watch for these specific issues:
- Too much splash: the outlet doesn’t sit over the drain — you need more reach, not just more height, or a lower flow-rate aerator.
- Wobble: the riser isn’t clamped firmly to the deck; retighten evenly and check the gasket seated flat.
- Base leak: putty gap under the flange — redo the seal.
- Reduced pressure: a longer supply path plus a clogged aerator can drop flow; clean the aerator.
If your stream turns weak or spits after the install, the culprit is almost always mineral buildup in the aerator rather than the riser itself — hard water is the usual villain, and a quick soak fixes it, as we explain in our guide to cleaning a faucet head with CLR.
Are risers universal, or do they only fit certain faucets?
Most risers fit single-hole, deck-mounted faucets with a standard shank, but they are not universal — thread size, shank length, and mounting style all have to match. A riser adds height to the shank path, so your faucet’s shank must be long enough (or use an extension) to still reach through the riser and the counter with room for the mounting hardware.
Before you buy, confirm three things:
- Mount type: single-hole faucets take risers easily; widespread and centerset sets usually don’t — they need a matched tall body instead.
- Shank length: add the riser height to your counter thickness; the shank plus any extension must exceed that total for the nut to catch.
- Thread compatibility: same-brand risers guarantee the thread pitch matches; universal risers list the thread spec — check it.
Thick countertops (a stacked 2-inch quartz slab plus a riser, say) are where shank length runs out fastest. If your faucet’s shank is short, look for a riser sold with a threaded shank extension, or reconsider a dedicated tall vessel faucet.
How much should I budget for a vessel sink faucet setup?
Plan on $20–$45 for a quality solid-brass or stainless riser, or $60–$250 for a dedicated tall vessel faucet if you’d rather do it in one piece. Add a few dollars for plumber’s putty and, if needed, new braided stainless supply lines. For most homeowners the all-in cost of retrofitting a riser onto an existing faucet lands under $50.
Spend the money where it counts: a solid-brass riser and a faucet with a ceramic-disc cartridge will outlast bargain parts by years and won’t develop the slow drips that plague cheap valves. A vessel setup is a high-visibility feature in your bathroom — this is not the place to save $10 on a plastic riser that yellows.
FAQ
Can I use a regular bathroom faucet with a vessel sink if I add a riser?
Yes, as long as it’s a single-hole, deck-mounted faucet with a long-enough shank. Add a riser that brings total spout height 3–4 inches above your bowl rim and confirm the spout still reaches over the drain. Widespread and centerset faucets generally can’t use a riser and need a purpose-built tall vessel model instead.
How tall should a faucet be for a vessel sink?
The spout outlet should sit at least 3–4 inches above the bowl rim, which usually means a total faucet height of 10–14 inches for a standard 5–6 inch vessel. Just as important, the spout should reach far enough that water lands over the drain, not on the bowl wall.
Will a riser reduce my water pressure?
No — a riser doesn’t restrict flow on its own; it just extends the vertical path. If pressure drops after installing one, the cause is almost always a clogged aerator or a partially closed stop valve, both of which are quick fixes. Clean the aerator and fully open the supply valves.
Do vessel sink faucet risers leak?
They shouldn’t if installed correctly. A riser adds one sealing point — the base flange — so use plumber’s putty or the supplied gasket there, and tighten the mounting nut evenly without over-torquing. Choose solid brass over plastic or zinc, since crushed cheap risers are a common leak source.
Is it better to get a taller faucet or add a riser?
For a new install, buy a dedicated tall vessel faucet — it has cleaner proportions and fewer joints. Add a riser only when you already own a faucet worth keeping, such as a premium or discontinued model, where a $30 riser saves you from replacing a $150+ faucet.
What size riser do I need for a 6-inch vessel bowl?
For a 6-inch bowl with a typical 4–5 inch faucet, a 4–6 inch riser usually gives you the 3–4 inches of clearance you want. Always measure your specific faucet’s spout height first, since faucet designs vary widely.
A quick word on trust
Author note: This guide was written by the adeaga fixtures team, drawing on hands-on vessel-sink installations across quartz, granite, and vanity-top decks of varying thickness. We test faucets and risers for real-world clearance, splash behavior, and leak resistance before we recommend them.
About adeaga: adeaga (adeaga.net) is a specialist retailer of faucets, shower systems, and bathroom fixtures. We stock risers and vessel faucets built to standard NSF/ANSI 61 and NSF/ANSI 372 (lead-free) requirements, and the solid-brass risers we carry are backed by manufacturer warranties — typically 1 to 5 years — so a properly installed riser is covered against defects, not just left to chance.