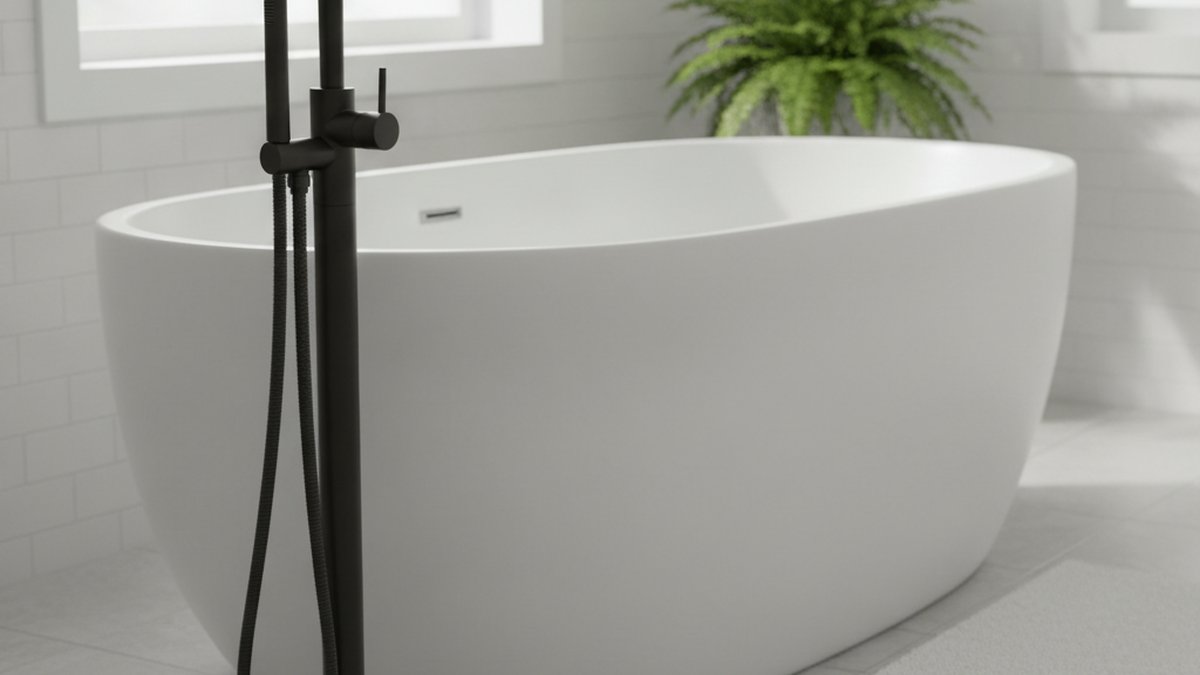
Choosing a freestanding tub faucet and drain is one of those bathroom decisions that looks simple in a showroom and gets complicated the moment you’re standing in front of a bare subfloor. A freestanding tub doesn’t sit against a wall, so it can’t borrow a wall-mounted spout or a hidden drain behind tile — everything has to be self-contained, correctly rated for flow, and physically matched to the tub’s drain hole and the plumbing coming up through your floor. Get the pairing right and you have a spa-grade soak that fills fast and drains clean. Get it wrong and you’re looking at a trickling filler, a wobbling faucet, or a leak under the floor. This guide breaks down exactly what to buy, how the pieces fit together, and what real people get tripped up on.
What exactly is a freestanding tub faucet and drain — and why can’t I just use a regular tub spout?
A freestanding tub faucet and drain is a matched set: a tall floor-mounted (or free-standing) faucet that rises from the floor next to the tub, plus a dedicated drain-and-overflow assembly that installs into the tub itself and connects down through the floor. You can’t use a regular wall tub spout because a freestanding tub has no wall behind it — there’s nothing to mount a spout to, and the water and waste lines run up through the floor instead of through the wall cavity.
Think of it as three connected systems. First, the filler — usually a floor-standing column 40–46 inches tall with a hand shower and a diverter. Second, the supply — hot and cold lines that come up through the floor to feed that column. Third, the drain and overflow — the assembly that seals into the tub’s drain hole, catches overflow water near the rim, and carries everything down to the P-trap below the floor. All three have to share the same rough-in dimensions and, ideally, the same finish.
Because it’s a self-contained system, the freestanding tub faucet and drain has to be chosen together with your specific tub. The drain hole diameter, the tub wall thickness, and the distance from the drain to the overflow are all tub-specific, and the drain kit must match them. This is why buying a random filler and a random drain separately is where most DIY headaches start.
Which type of freestanding tub filler is best for my setup?
For most homeowners a floor-mounted single-post filler with a handheld sprayer is the best all-around choice — it’s the most common, the easiest to source parts for, and it delivers the high flow a deep soaking tub needs. But the right pick depends on where your plumbing sits and how deep your tub is.
Here’s how the main types compare:
| Filler type | Best for | Typical flow | Rough-in needed | Price range |
|---|---|---|---|---|
| Floor-mounted single post | Most freestanding tubs, open bathrooms | 6–10 GPM | Floor supply lines + mounting bracket | $250–$600 |
| Floor-mounted with hand shower | Hair rinsing, cleaning the tub, kids & pets | 6–9 GPM | Floor supply + diverter | $300–$700 |
| Deck-mounted (tub-rim) | Tubs with a wide flat rim/deck | 5–7 GPM | Pre-drilled tub deck holes | $180–$450 |
| Wall-mounted filler | Tub placed close to a wall | 5–8 GPM | In-wall valve rough-in | $200–$500 |
Notice the flow rate column — this matters more than people expect. A freestanding soaking tub can hold 60–80 gallons. A standard bathroom faucet at 1.2 GPM would take 45 minutes to fill it. A dedicated tub filler at 7 GPM fills the same tub in roughly 9–11 minutes. If you’re choosing between two fillers, the higher GPM one will change your daily experience far more than a slightly nicer handle shape.
How do I know which drain kit fits my tub — and what’s the difference between the drain types?
Your drain kit has to match three tub measurements: the drain hole diameter (almost always 1.5 inches for a standard tub, but confirm), the tub floor thickness, and the drain-to-overflow distance. Buy the drain that’s specified for your exact tub model when possible; a universal freestanding drain works only if it lists a compatible thickness and overflow range.
The drain mechanism is a separate choice, and it’s about how you open and close the stopper. Here are the four you’ll actually see:
- Toe-tap (foot actuated): Push with your toe to open or close. Clean look, no moving parts to grab, very popular on modern tubs. Occasionally sticks if over-tightened.
- Lift-and-turn: Grab the stopper knob, lift and rotate to lock open or closed. Simple and reliable, but you have to bend down and touch it.
- Push-pull (tip-toe variant): Press down to seal, press again to release. Similar feel to toe-tap but with a center button.
- Pop-up with trip lever: A lever on the overflow plate raises and lowers the stopper. Traditional and hands-free at the drain, but has more internal linkage that can corrode.
For a freestanding tub, toe-tap and lift-and-turn are the two most common because they keep the visible hardware minimal and don’t require a trip-lever plate that some sleek tub designs don’t accommodate. Whatever you choose, get the drain in the same finish family as your faucet — a brushed gold filler with a chrome drain looks like a mistake, because it is one.
How much should I budget for the whole freestanding tub faucet and drain package in 2026?
Plan on $350 to $800 for the faucet and drain together at a mid-range quality level, with premium sets running $900–$1,500. That’s parts only — professional installation typically adds $300–$700 depending on whether your floor plumbing is already roughed in.
Here’s a realistic breakdown for a mid-range 2026 build:
| Component | Budget | Mid-range | Premium |
|---|---|---|---|
| Floor-mounted filler (with hand shower) | $220 | $400 | $1,100 |
| Freestanding drain & overflow kit | $55 | $110 | $220 |
| Floor mounting bracket / rough-in kit | Included | $40–$90 | Included |
| Professional install | $300 | $450 | $700 |
The single biggest hidden cost is the rough-in. If your bathroom was plumbed for a wall or alcove tub, moving the supply and waste lines to a floor-standing location can mean opening the floor — that’s where a $400 faucet turns into a $1,200 project. Before you fall in love with a specific filler, confirm where your supply lines and drain actually come up. If you’re still deciding on placement, our guide on where a freestanding tub faucet location should go and how far from the tub walks through the exact clearances and rough-in spacing you need before anything gets cut into the floor.
Can I install a freestanding tub faucet and drain myself, or do I need a plumber?
You can install the drain and connect a floor filler yourself if the rough-in plumbing is already in place and correctly positioned — that part is confident-DIYer territory. Moving or adding the floor supply and waste lines, however, is a job for a licensed plumber, both for code compliance and because a mistake under the floor is expensive to reach again.
Here’s the realistic sequence for a DIY-friendly install where the rough-in already exists:
- Dry-fit the tub in position and mark the exact drain and supply locations.
- Install the drain-and-overflow kit into the tub first, using the supplied gaskets and plumber’s putty per the manufacturer’s torque guidance — over-tightening cracks the seal.
- Set the tub, connect the drain tailpiece to the P-trap, and test for leaks with a bucket of water before finalizing.
- Mount the filler’s floor bracket, connect the braided supply lines to the hot and cold rough-in, and secure the column.
- Turn the water on slowly, check every joint, and run a full fill-and-drain cycle.
The most common DIY failures are drain leaks from an over-torqued or misaligned gasket, and a filler that wobbles because the floor bracket wasn’t anchored into solid backing. If your tub sits on a tiled floor over a subfloor, make sure there’s blocking beneath the bracket. And if you later notice water appearing during use, our walkthroughs on why a tub spout keeps dripping and how to fix it and why a tub faucet leaks when the shower is on cover the diverter and seal issues that show up most often after a fresh install.
What finish should I pick — and will it look dated in a few years?
Chrome and matte black are the safest long-term finishes for a freestanding tub faucet and drain, with brushed nickel close behind — all three have stayed in demand for over a decade and hide water spots reasonably well. Polished brass and brushed gold look stunning but are more trend-sensitive, so choose them because you personally love them, not because they’re momentarily popular.
A few practical finish notes specific to tub fillers:
- Matte black hides fingerprints beautifully but shows dried mineral/limescale spots more in hard-water areas — you’ll wipe it down more often.
- Chrome is the easiest to clean and match; nearly every drain kit is made in chrome, so pairing is effortless.
- Brushed nickel is the most forgiving overall in hard water and reads as “warm neutral.”
- Gold/brass tones vary a lot between brands — a “brushed gold” filler and a “champagne bronze” drain may clash, so buy the drain from the same line when you can.
If you’re leaning toward a bolder look, it’s worth reading how a statement finish holds up in a real bathroom over time — our take on whether a matte black tub faucet is worth it and which one to buy digs into durability, cleaning, and matching across a full fixture set.
What specs and standards actually matter when comparing two fillers?
Beyond flow rate and finish, check the valve type, the material, and the certification. A ceramic-disc cartridge, a solid-brass body, and a recognized North American plumbing certification are the three markers that separate a filler that lasts 15 years from one that leaks in two.
Specifically, look for:
- Ceramic-disc cartridge — resists wear and hard-water grit far better than rubber-washer valves; it’s what keeps the handle smooth and drip-free for years.
- Solid brass waterway — heavier and more corrosion-resistant than zinc-alloy fillers, which is worth the weight difference on a floor-standing column.
- ASME A112.18.1 / CSA B125.1 certification and low-lead (NSF/ANSI 372) compliance — these are the standards that govern faucet safety, flow, and lead content in North America. Reputable tub fillers are tested against them.
- Warranty length — a lifetime warranty on finish and function signals the manufacturer’s own confidence; a 1-year warranty tells you something too.
These specs are also what make a filler serviceable years later. A brass body with a standard cartridge means you can replace a worn cartridge for $20 instead of replacing the whole column.
A quick real-world scenario: 67-gallon soaker on a slab floor
Say you’ve bought a 67-gallon acrylic soaking tub going into a bathroom on a concrete slab, and you want a 10-minute fill. You’d want a floor-mounted filler rated around 7 GPM with a hand shower, a solid-brass body, and a lift-and-turn or toe-tap drain matched to the tub’s 1.5-inch drain and its listed overflow distance. On a slab, the supply and waste have to be roughed in before the slab is poured or cut, so this is a plan-ahead job — decide the filler and drain during rough-in, not after tiling. Skipping that step is the classic way a freestanding tub project blows its budget.
FAQ
Do freestanding tub fillers come with the drain, or do I buy them separately?
Usually separately. Most fillers are sold on their own, and the drain-and-overflow kit is a distinct purchase matched to your specific tub’s dimensions. Some tub manufacturers sell a bundled drain designed for that exact tub — that’s the easiest route. If you buy a universal drain, confirm it lists a compatible drain-hole diameter, tub thickness, and overflow distance, and get it in the same finish as your filler.
What flow rate do I need to fill a freestanding tub quickly?
Aim for 6–10 GPM. A dedicated tub filler in that range fills a 60–70 gallon soaker in roughly 8–12 minutes. Anything under about 5 GPM will feel frustratingly slow for a deep tub. Just make sure your home’s water pressure and supply line size can actually deliver that flow — a high-GPM filler on undersized ½-inch lines with weak pressure won’t hit its rated number.
Can a freestanding tub filler be installed against or near a wall?
Yes, but placement affects clearance and drain access. Manufacturers usually specify a minimum distance from the tub rim (often 2–4 inches) and enough clearance for the hand shower and handle to operate. If your tub sits close to a wall, a wall-mounted filler may actually be the cleaner option. Confirm the exact spacing before roughing in the supply lines, since the filler’s position is fixed once the floor connections are set.
What’s the difference between the drain and the overflow — do I need both?
The drain is the stopper assembly at the bottom of the tub; the overflow is the opening near the top rim that prevents the tub from spilling over if you overfill it. Nearly all soaking tubs require both, connected by a linkage tube, and they’re sold together as a single kit. A few very deep Japanese-style soaking tubs are designed with no overflow — check your tub’s spec sheet, but assume you need the combined drain-and-overflow.
How long does a good freestanding tub faucet and drain last?
A solid-brass filler with a ceramic-disc cartridge and a quality brass or stainless drain will typically last 12–20 years, with the cartridge being the main serviceable wear part. Cheaper zinc-alloy fillers and plastic-bodied drains often start leaking or corroding within 2–5 years. Buying to the certifications and warranty above is the single best predictor of longevity.
Will hard water damage my tub filler and drain?
Hard water won’t quickly damage the internal brass or a ceramic-disc cartridge, but it leaves visible scale on the finish and can slow the flow through the aerator over time. Wiping the filler dry after use and periodically clearing mineral buildup keeps it looking and performing like new. In very hard water areas, brushed nickel or chrome finishes disguise spotting better than matte black.
Author’s note: This guide was written by the adeaga fixtures team, drawing on hands-on installation of floor-mounted tub fillers and drain kits across acrylic, cast-iron, and stone-resin freestanding tubs. We test fillers for real fill times, cartridge feel, and seal integrity rather than relying on spec sheets alone.
About adeaga: adeaga (adeaga.net) is a specialist retailer of faucets, showers, and bathroom fixtures. Every tub filler and drain we recommend is selected for compliance with recognized North American plumbing standards (ASME A112.18.1 / CSA B125.1 and NSF/ANSI 372 low-lead requirements) and backed by manufacturer warranties, so you’re buying tested hardware, not marketing.