If you searched how to increase water flow in kitchen faucet, you’re almost certainly standing at a sink watching a sad trickle where a strong stream used to be. The good news: kitchen faucets rarely lose pressure because of your home’s plumbing. The flow problem is almost always inside the last 12 inches of pipe — the aerator, the cartridge, the supply hoses, or the angle stops. This guide walks through every realistic cause in the order a plumber would actually check them, so you can fix it in 20 minutes with a wrench, a toothbrush, and a cup of vinegar.
I’ve been writing about and testing faucet hardware for a decade, and the Adeaga engineering team services thousands of pull-down and bridge faucets every year. The fixes below come from real warranty calls, not theory. Where it matters, I’ll flag what NOT to do (looking at you, “just yank the flow restrictor out” advice) because federal flow standards and warranty terms are real and worth respecting.
Why is my kitchen faucet suddenly running so weakly?
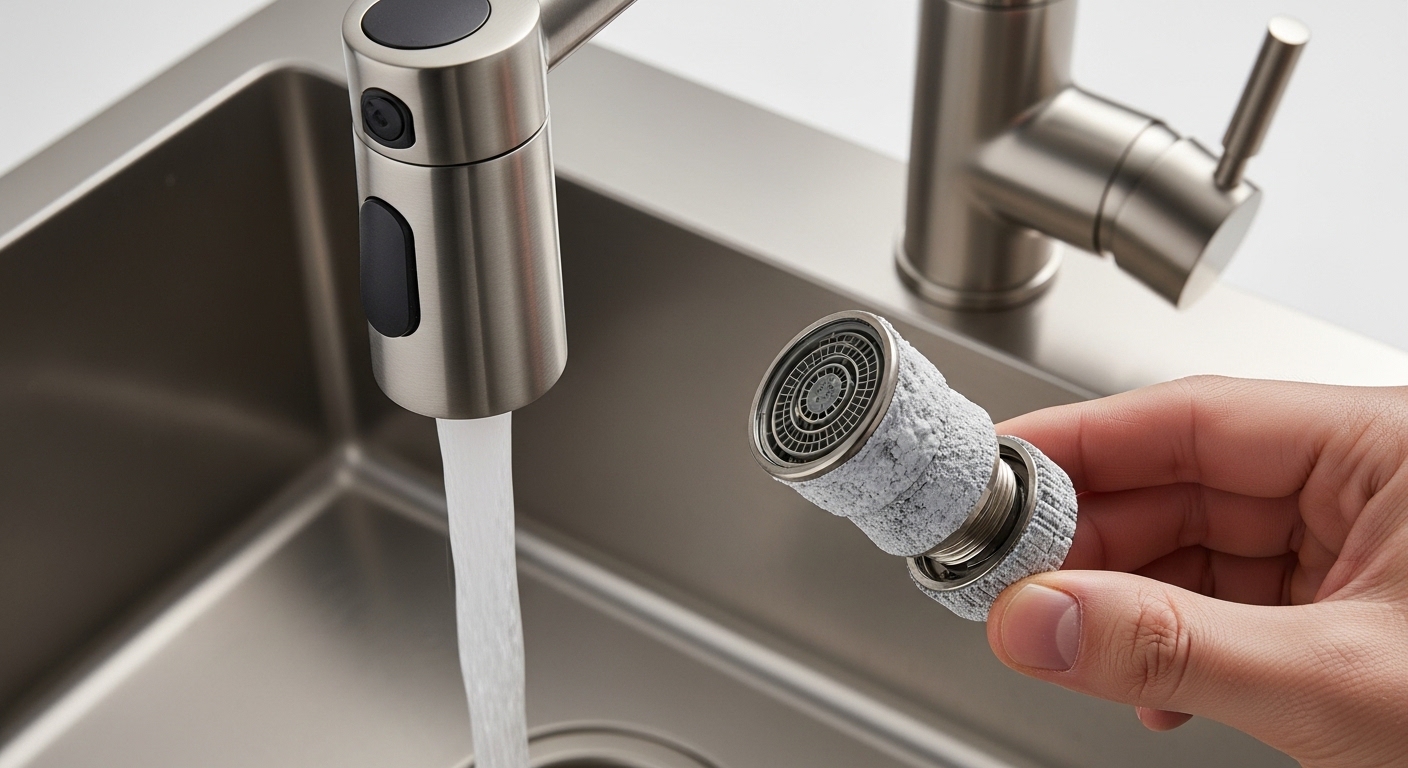
The single most common cause is a mineral-clogged aerator. The aerator is the small mesh-and-disc screen at the very tip of the spout, and it catches every fleck of sediment, rust, and calcium that comes through your pipes. In hard-water areas (anything over 7 grains per gallon), an aerator can go from full flow to a dribble in 6–12 months without you noticing the slow decline.
Sudden flow drops — pressure was fine yesterday, awful today — usually point to one of three things:
- A piece of sediment dislodged in your water heater or main line and lodged in the aerator or cartridge (very common after city water work, a water main break, or after you’ve shut the house water off for any reason).
- A shut-off valve under the sink was bumped partially closed — happens constantly when you store stuff in the cabinet.
- The cartridge inside the faucet shifted or cracked, especially on faucets older than 8 years.
Gradual flow drops — “it’s been getting weaker for months” — are almost always mineral buildup in the aerator, the pull-down spray head, or the cartridge ports. Same fix, just more scale to dissolve.
How do I clean a clogged kitchen faucet aerator step by step?
Unscrew the aerator counter-clockwise by hand or with a strap wrench, soak the parts in undiluted white vinegar for 30 minutes, scrub with an old toothbrush, rinse, and reassemble. That single procedure restores full flow on roughly 70% of “low pressure” kitchen faucets. Here’s the detail:
- Identify the aerator type. Most modern faucets use a “cache” or “tool-key” aerator hidden flush with the spout — you’ll need the little plastic key that came with the faucet (or a coin and patience). Older faucets have a knurled metal collar you can grip with your fingers or a rubberized strap wrench. Never use channel locks directly — they’ll scar the finish.
- Plug the drain so you don’t lose the rubber washer or the tiny flow disc.
- Unscrew counter-clockwise as you look up at the spout. Resistance is normal; mineral deposits cement the threads.
- Disassemble in order, laying the parts out left-to-right so you can put them back in the same orientation. Typical stack: housing → flow restrictor disc → mesh screen → rubber washer.
- Soak everything in white vinegar (room temp, undiluted) for 30 minutes. Stubborn scale: 2 hours. Do not use CLR or Lime-A-Way on PVD or living finishes — vinegar is safer and works.
- Scrub the mesh with a soft toothbrush, then hold it up to a bright light. You should see clear, even light through every hole. If half the screen is still cloudy, soak it again.
- Reassemble in the original orientation and hand-tighten plus a quarter turn with the strap wrench.
- Test before declaring victory — turn the faucet on with the aerator off first to flush loose grit out of the spout itself.
On pull-down faucets, the aerator is inside the sprayer head, and the spray-pattern button often hides a second screen. Pop the head off the hose (twist collar, usually quarter-turn) and clean both.
Are the shut-off valves under my sink fully open?
This is the 30-second check everyone skips. Reach under the sink and find the two angle stops (oval handles, one hot, one cold) on the wall side of the supply hoses. Turn each one fully counter-clockwise until it stops. If a valve was even half-closed — easy to do when you shove a trash bag into the cabinet — your faucet was running at half flow.
Two warnings: if a valve hasn’t been turned in years, it can seize or start dripping when you move it. Don’t force a stuck valve; that’s how a Saturday repair turns into a flooded kitchen. If it’s frozen, that’s actually a separate repair (replace the angle stop), and you can leave it where it is in the meantime.
While you’re under there, look at the supply hoses themselves. A braided stainless hose that’s been pinched against a garbage disposal or twisted during install can restrict flow dramatically. Straighten any kinks. If the hose is the original 3/8″ braided line and it’s more than 10 years old, replacing it with a fresh hose is cheap insurance.
How do I tell if it’s the faucet cartridge causing low flow?
If a cleaned aerator and fully open valves don’t restore pressure, the cartridge is the next suspect — especially on faucets 5+ years old or in homes with high sediment. The tell-tale signs of a failing cartridge are: weak flow on hot OR cold (but not both), flow that surges when you wiggle the handle, or a faucet that’s gotten progressively harder to swing through its temperature range.
Here’s the diagnostic trick: turn the handle to full hot, note the flow. Then turn to full cold, note the flow. If one side is noticeably weaker, the cartridge inlet port on that side is sediment-clogged or the cartridge itself is worn. If both sides are equally weak after the aerator is clean, the cartridge body may be partially blocked or there’s a downstream issue in the spout.
Replacing a cartridge is a 20-minute job on most modern faucets. Shut off the angle stops, pop the handle cap, remove the set screw, lift the handle, unscrew the retaining nut or clip, and pull the cartridge straight up with the manufacturer’s puller tool (or carefully with pliers). Bring the old cartridge to the store — there are dozens of variants and “looks similar” is not close enough. For brand-specific cartridge work and handle tightening tips that often correlate with cartridge wear, the guide on tightening a loose Kohler faucet handle walks through the same teardown sequence.
Should I just remove the flow restrictor in my kitchen faucet?
Short answer: not as your first move, and in many places not legally as a permanent fix. U.S. federal law caps kitchen faucet flow at 2.2 gallons per minute, and several states (California 1.8 GPM, Colorado, Washington, New York City) are stricter. The flow restrictor inside the aerator enforces that cap. Yanking it out doesn’t fix a clog — it just disables the limiter on a faucet that’s still partially blocked.
That said, the disc is a single point of failure: if calcium clogs the restrictor’s tiny ports, removing and thoroughly cleaning it (not discarding it) genuinely helps. Soak it in vinegar, scrub each port with a sewing needle, and put it back. You get full legal flow without violating code or your warranty.
If you live in an area with consistently low municipal pressure (below 40 psi at the meter), no faucet-side fix will help much. That’s a job for a whole-house pressure booster pump or a conversation with your water utility, not an aerator swap.
Comparison: What’s actually limiting my faucet’s flow?
Use this table to triage. Run through it top-to-bottom; the cheaper, easier fixes are at the top for a reason.
| Cause | How to Confirm | Fix Time | Cost | How Common |
|---|---|---|---|---|
| Clogged aerator | Unscrew aerator, run faucet — flow jumps dramatically | 15 min | $0 | ~60% of cases |
| Partially closed angle stop | Both valves under sink not fully counter-clockwise | 1 min | $0 | ~10% of cases |
| Kinked or pinched supply hose | Visual inspection under sink | 5 min | $0–$20 | ~5% of cases |
| Clogged pull-down spray head | Aerator clean but pull-down stream still weak | 15 min | $0 | ~8% of cases |
| Worn or sediment-clogged cartridge | One temperature noticeably weaker than the other | 30 min | $15–$60 | ~10% of cases |
| Sediment-clogged supply lines | All faucets in house affected after main work | 30 min | $0 | ~3% of cases |
| Failed pressure regulator (whole house) | Every fixture in the house is weak | 1–2 hr | $80–$300 | ~2% of cases |
| Municipal low pressure | Pressure gauge at hose bib reads below 40 psi | N/A | $$$ | ~1% of cases |
Why is the pull-down sprayer weak when the regular stream is fine?
If your main stream is strong but the pull-down spray pattern is weak, the issue is almost always inside the sprayer head, not the faucet body. Twist the spray head off the hose (most have a quarter-turn collar or a threaded coupling), and you’ll find a second aerator or a small disc with the spray-pattern holes. Soak it in vinegar exactly like the main aerator.
The other pull-down culprit is the hose itself. The braided hose retracts through a pulley and counterweight system under the sink. If the weight has slipped off the hose, the hose has wrapped around your drain pipe, or it’s caught on a basket of cleaning supplies, the hose gets pinched. Clear the cabinet, reseat the counterweight in the lowest position on the hose, and verify the hose can extend and retract freely. While you’re troubleshooting sprayer issues, our walkthrough on what to do when a faucet sprayer won’t turn off covers the diverter mechanism that lives between the spout and the sprayer — a related part that affects pressure when it fails.
How do I flush sediment out of my supply lines?
If aerator cleaning didn’t help and the angle stops are fully open, the next step is a supply-line flush. This is the standard plumber move after any city water work or after the home’s main valve has been turned off and back on (which kicks loose pipe scale).
- Shut off the angle stops under the sink.
- Disconnect the supply hoses from the angle stops (or from the faucet inlets — whichever is easier on your sink).
- Aim each hose into a bucket.
- One at a time, open each angle stop for 10 seconds. You should see a strong, fully-pressurized burst — and often a startling amount of brown or white grit in the first 2 seconds.
- Repeat until the water runs clear.
- Reconnect everything hand-tight plus a quarter turn with a wrench, and turn the valves back on slowly.
If the burst from the angle stop is weak even with the hose disconnected, the problem is upstream — the angle stop itself may be partially clogged (replace it, $8) or your house has a bigger pressure issue.
When should I just replace the whole kitchen faucet?
Replace rather than repair when: the faucet is more than 12 years old AND a new cartridge doesn’t restore flow, the body has visible mineral pitting or pinhole corrosion, the finish is flaking, or you’ve replaced the cartridge twice in three years. At that point you’re throwing parts at a faucet that’s already at the end of its service life.
A solid-brass pull-down faucet from a quality brand will last 15–20 years with normal use; cheap zinc-bodied units often start losing flow at 5–7 years because mineral deposits build up inside the body itself, where you can’t reach them. If you’re shopping a replacement, look for ceramic-disc cartridges, a lifetime drip-and-finish warranty, NSF/ANSI 61 and 372 certification (lead-free compliance), and a real metal body — not painted zinc. For a deep dive on a popular pull-down option many readers consider as an upgrade, see our review of the Kraus pull-down kitchen faucet with matching soap dispenser, which covers exactly what to look for in flow specs and cartridge design.
And while you’re under the sink, if you notice any drips at the supply connections during your flow troubleshooting, our companion guide on whether DIY kitchen faucet repair is worth it walks through when to fix and when to swap.
What about hard water — will this just happen again in six months?
Yes, if your water is hard. A clogged-aerator fix is a temporary win in any home above ~7 grains per gallon of hardness. The permanent solutions, in order of effectiveness:
- Whole-house water softener ($800–$2,500 installed). Eliminates the problem at the source. Best long-term answer if you also have hard-water issues with appliances, glassware, or skin.
- Under-sink point-of-use filter with a sediment + scale cartridge ($60–$200). Doesn’t soften but knocks out the particulates that clog aerators. Easier and cheaper than a softener.
- Schedule a vinegar soak quarterly. The 30-minute fix above, on the calendar. Free, but you’ll do it 4× a year.
- Switch to a faucet with a self-cleaning rubber-nub aerator (TouchClean, KleenFlo, etc.). Doesn’t stop scale buildup inside the faucet, but the spout aerator stays clear because rubbing the nubs dislodges deposits.
The honest take: if you’re cleaning the aerator more than twice a year, get a water softener or at least a sediment pre-filter. You’ll save yourself the hassle and extend the life of the faucet cartridge by years.
Quick diagnostic flow chart
If you only remember one thing from this guide, remember this order — it’s how a plumber would diagnose it in your kitchen:
- Run the faucet with the aerator unscrewed. Strong flow without the aerator? → Clean the aerator. Done.
- Still weak? Check both angle stops are fully open. Straighten the supply hoses.
- Still weak? Test hot-only vs. cold-only. If one side is weak, clean or replace the cartridge.
- Still weak? Disconnect supply hoses and flush each angle stop into a bucket.
- Still weak with the hoses disconnected? It’s upstream — pressure regulator, main shutoff, or municipal supply.
FAQ
Will removing the flow restrictor in my kitchen faucet void the warranty?
It depends on the manufacturer, but several major brands explicitly state that removing or modifying internal flow-regulating components voids the warranty. More importantly, it can violate state plumbing code in California, Colorado, Washington, and a handful of other jurisdictions. Clean the restrictor instead of removing it — you get the same real-world flow improvement without the legal or warranty risk.
Why does my new kitchen faucet have low pressure right out of the box?
The two usual causes: (1) you didn’t remove the protective filter screens in the supply hose inlets — most new faucets ship with paper-filter inserts that you’re supposed to remove after the first 24 hours, and (2) PEX or copper cuttings from the install lodged in the aerator. Disconnect the supply hoses, flush the lines into a bucket, remove any shipping screens, clean the aerator, and reassemble. Brand-new faucet pressure should match your home’s pressure within a few PSI.
How long does it take to clean a kitchen faucet aerator?
About 5 minutes of hands-on time, plus 30 minutes of soaking. Total elapsed time: under an hour. You can do other things during the soak — this isn’t a job that requires you to stand over a sink.
Is it normal for kitchen faucet flow to drop after the water company does work on the street?
Completely normal and very common. City water work stirs up sediment in the main, which then lodges in your aerators, cartridges, and washing-machine inlet screens. Clean the aerator first; if multiple fixtures are affected, flush the supply lines at each fixture and check the washing machine and dishwasher inlet screens too.
Can low water pressure damage my kitchen faucet over time?
Low pressure itself doesn’t damage the faucet, but the underlying cause — sediment, scale, or a partially open valve — does shorten cartridge life. Sediment grinds the ceramic discs every time you turn the handle, and a constantly half-open angle stop can deposit minerals on the valve seat. Fix the root cause and the faucet lasts longer.
My hot water flow is fine but cold is weak — what does that mean?
It means the cold-side restriction is downstream of the water heater split. Likely culprits, in order: (1) cold-side angle stop partially closed, (2) cold-side supply hose kinked or its inlet screen clogged, (3) cold side of the cartridge sediment-blocked. Reverse the symptom — hot weak, cold fine — and look at the same components on the hot side, plus check that the water heater shut-off is fully open.
Do touchless or smart kitchen faucets have more flow problems than manual ones?
Slightly more failure modes, but flow problems are usually the same aerator/cartridge issues. Touchless faucets have an additional solenoid valve that can stick partially closed and cause low flow — if cleaning the aerator and cartridge doesn’t help on a touchless model, the solenoid is the next suspect (most are user-replaceable in under 15 minutes).
About the author and Adeaga
This guide was written by the Adeaga editorial team and reviewed by our in-house plumbing service group, which handles warranty diagnosis and field service for the Adeaga faucet catalog. All Adeaga kitchen faucets are tested to NSF/ANSI 61 and 372 standards for drinking-water safety and lead-free compliance, and our pull-down and bridge faucets carry a limited lifetime warranty on the finish and cartridge. Visit adeaga.net for product specs, replacement parts, and warranty registration. If your troubleshooting points to a cartridge or hose replacement under warranty, our support team can ship parts directly — no plumber required.